 ZUKIWORLD Online – Everything Suzuki Your Complete Suzuki Automotive Resource for Editorial, Tech, Events, Adventure, Racing, and Forum

DIY Contest Winner – How To Flip Your Sidekick/Tracker Front Strut Mounts.
Editor: Eric Bewley Story/ Photo: Matt Oswald
ZW FORUM – This write-up was how I went about flipping my strut mounts, you may take a different approach than I did. I had browsed around the Zukiworld forums and didn’t see any kind of detailed write-up regarding flipping your front strut mounts, so I decided to make one up myself to help out those who may be new to working on cars or just not quite sure how to go about flipping their mounts. Any recommendations or other tips would be greatly appreciated, thanks! – Matt Oswald

Parts:
(6) 30mm M8x1.25 bolts, use a high grade bolt.
(6) M8 lock washers
*By using these parts, you can reuse the factory strut mount nuts.
Tools Used:
(2) Floor jacks
(1) Jack stand
(1) 1/2″ drive wrench + short extension
(1) 1/2″ drive 19mm socket
(1) 3/8″ drive wrench
(1) 3/8″ drive 12mm socket
(1) 12mm box wrench
(1) Big pipe wrench
(1) Reciprocating saw and a metal rated saw blade
(1) Flat punch and a hammer
(1) 5/16″ drill bit, drill press, and a clamp
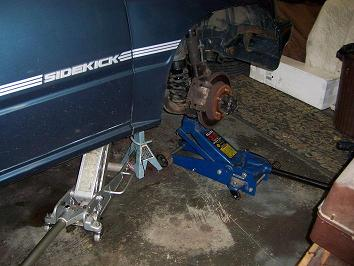
(1) Can of WD40 Notice how on a stock front suspension the strut mount sticks up a bit. On one with a suspension lift, the front struts tend to top out and be fully extended even when just sitting in your driveway. By flipping the strut mounts upside down, we can easily add some extra length to the strut before it tops out without having to plunk down a lot of money on some aftermarket off-road struts. 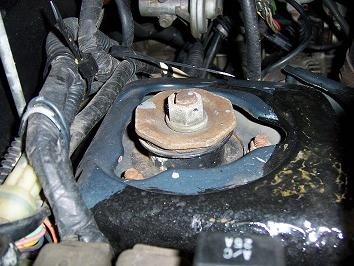 First step in this little project would be to jack up the front on the frame and remove your wheel. Be sure to support the car with a jack stand on the frame as well in case the jack would fail, last thing you want is a car to come down on top of you while you are working under it.
 Next step is to take another jack and place it under your control arm and jack it up a little bit to relieve the load from the strut and to keep the spring in place while you have the strut detached.
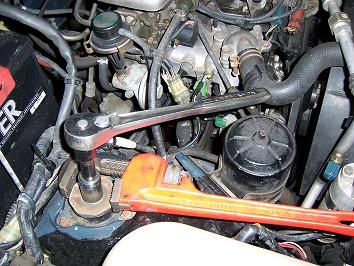
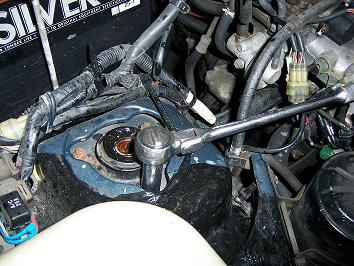
 Now that you have the control arm supported by the jack, you can go ahead and remove the strut top nut. I use a large pipe wrench to hold the hex disk while I use a 19mm socket to undo the nut on top of the strut.
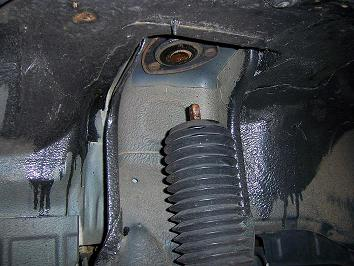
 Next, let the jack under the control arm down a couple inches so that the top of the strut shaft pops out of the mount, then push the strut down further by hand so that it is out of the way.
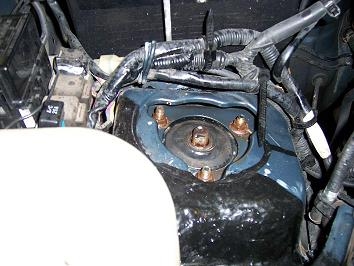
 Next step is to undo the 3 strut mount nuts using a 12mm socket while supporting the strut mount from underneath with your free hand. You may want to hose these down with a little WD40 before hand, mine were pretty crusty and the WD definitely helped. After you undo the 3 nuts, the strut mount can just be pulled out from underneath.
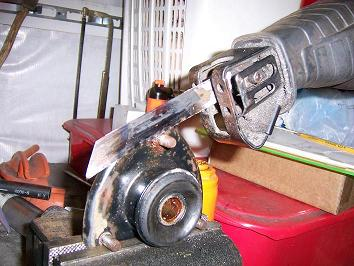
 Next step is to hack off the bolts so that they are flush with the mount. I used a reciprocating saw, but you can use pretty much any saw that works for cutting metal.
My bolts were fused to the mount with rust which is why I cut them off. If yours aren’t too rusty, I would definitely give this a try first and maybe save yourself a bit of time.
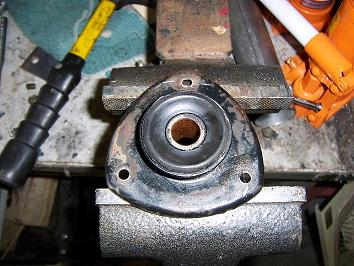
 After you hacked all the bolts off flush, use a flat punch and a hammer to knock out the rest of the bolt which is probably stuck to the mount.
 You can see the holes after the bolts are hacked off and knocked out. Next step is drilling them out a little bit.
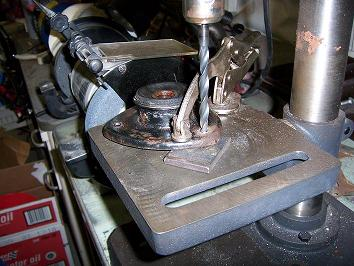
 I used a 5/16″ drill bit in my drill press, which allows just enough room for the new bolts to fit through. I put a piece of 1/4″ steel under the edge of the mount to keep it level while drilling. Make sure to clamp the mount to the drill press table so that the mount doesn’t take off spinning and take a chunk out of your finger (like you will see in the picture after this one).
 Next, insert the bolts in the mount upside down and reinsert into the fender well. The part that sticks out should be facing down now.
 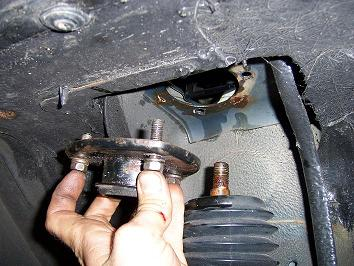 Tighten the bolts for the strut mount using your 12mm socket, get them nice and tight, but not so tight that you bend your mount or shock tower.
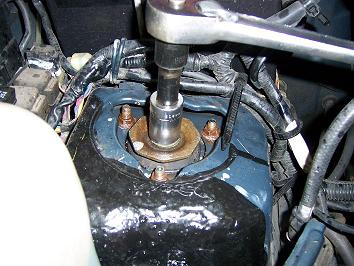
 Next step is to jack the control arm up again, and pull up on the strut shaft by hand and guide it into the hole in the center of the strut mount.
 After you have the strut top poking up through the mount, place the hex disk, lock washer, and nut back on and tighten them up using a 19mm socket.
After you have the top nut tightened up, you can lower and remove the jack from under the control arm. Then put your wheel back on, tighten and properly torque your lug nuts. You can now remove the jack stand and lower the jack and you are good to go
If you have a good DIY, Build Diary, or How-To, Please enter our contest here.