 ZUKIWORLD Online – Everything Suzuki Your Complete Suzuki Automotive Resource for Editorial, Tech, Events, Adventure, Racing, and Forum

WHEELER’S OFFROAD
Coil Spring Spacers For Your Sidekick
Editor: Eric Bewley Photo: Jason Hutchison
ALBANY, OR -Adding or building an aftermarket bumper, adding a winch, or putting in a larger motor in your Sidekick tends to compress the front springs giving the undesired effect of a raked vehicle. While cool for a hot rod, it is general considered poor form to have an unleveled vehicle. Not to mention the reduced available suspension travel resulting from this problem. Wheeler’s Offroad from Grants Pass Oregon has come up with a solution to level your Sidekick and get you back on the trail in style.

Simple yet effective coil spring spacers made from polyurethane material lift the front of the Sidekick without changing the spring rate characteristics or the handling of the vehicle. On our test car, the 3/4 inch spacer yielded a 1.5″ lift measured at the front bumper which leveled out the Sidekick perfectly. If you are suffering from a slumpy front end, we’d suggest giving Gary Wheeler at Wheeler’s Offroad a call for some Coil spring Spacers.
Installation Below:

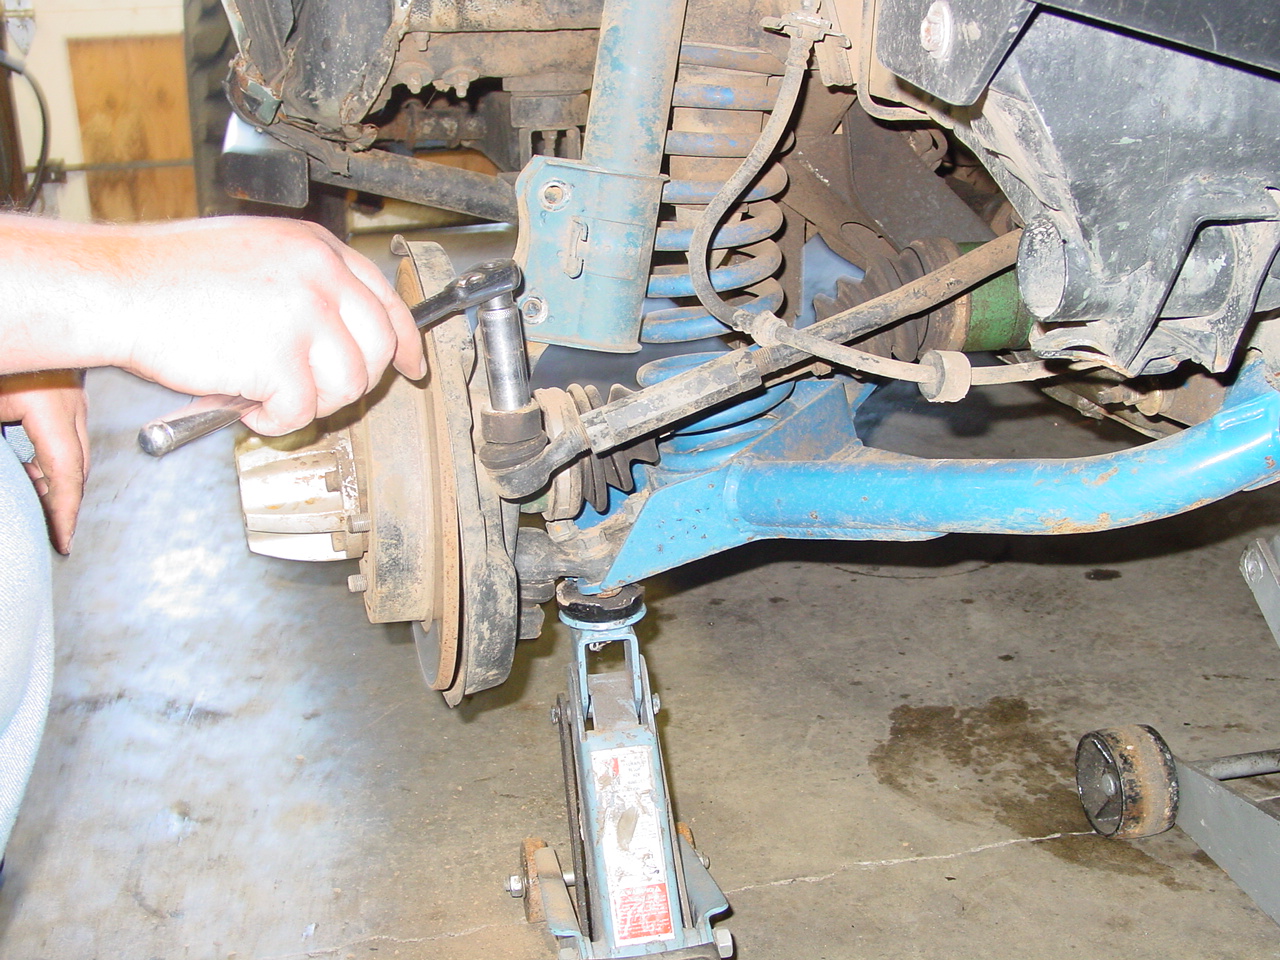
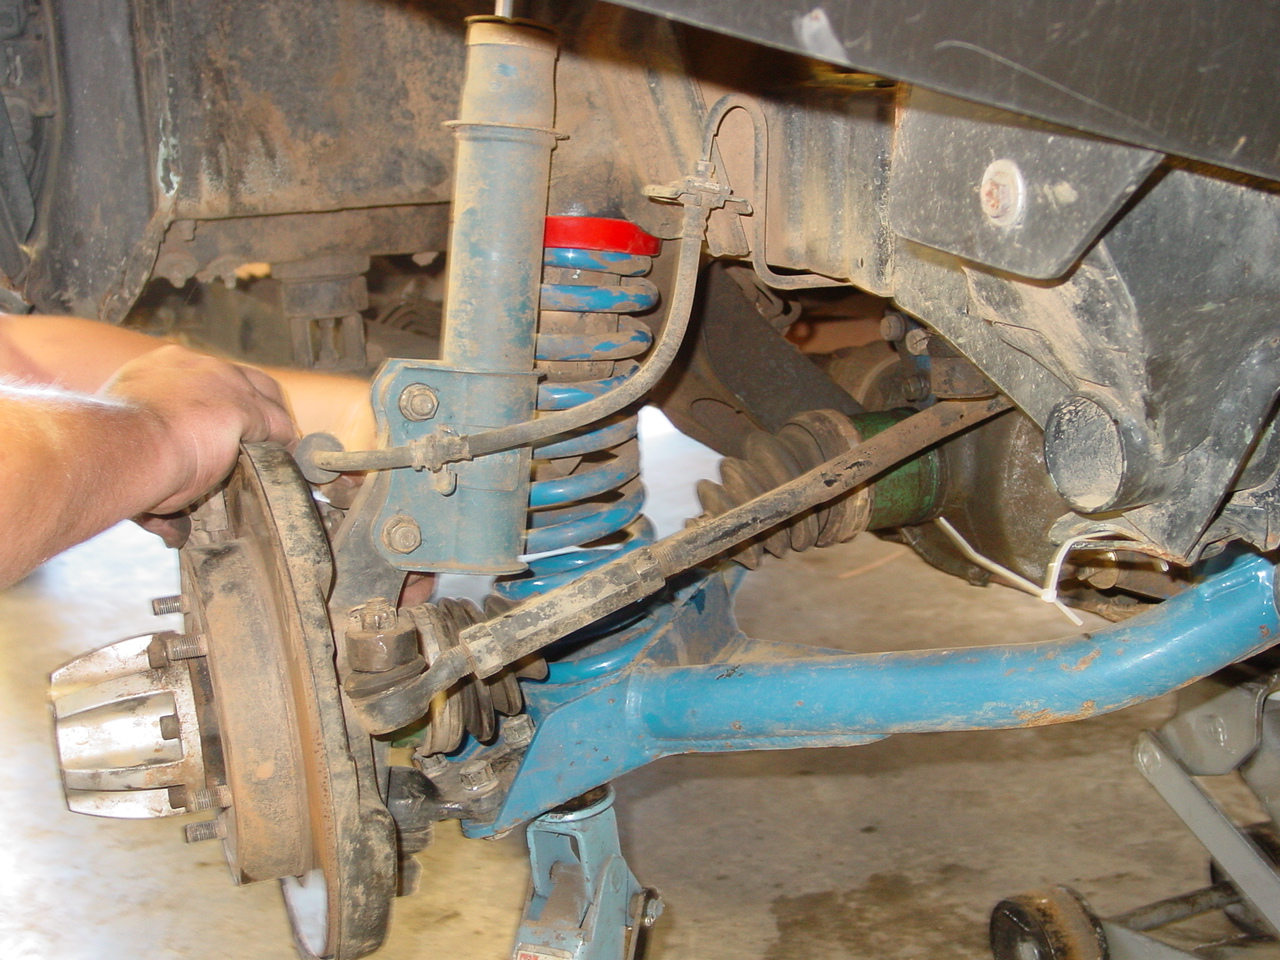
1. Remove the wheel and disc brake caliper. Secure Caliper away from working area.

2. Continue

3. Loosen the two Strut bolts.

4. With a jack under the vehicle and one under the A-arm, remove the two Strut bolts.
5. Loosen and remove the Castle nut on the tie rod.
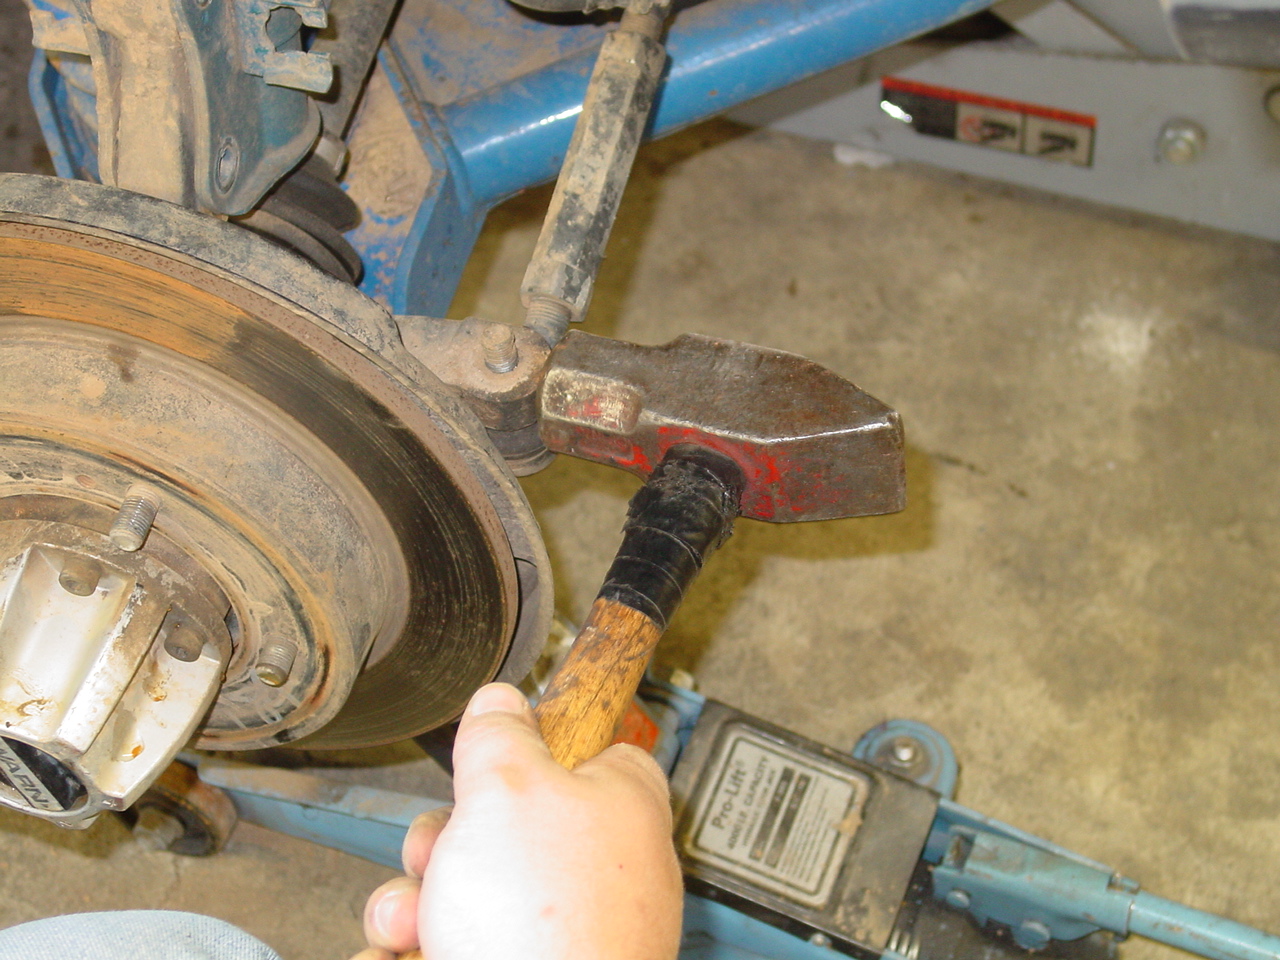
6. Using special ‘junk yard’ technique, tap the end of the steering arm and the tie rod will fall out.
7. Remove the clip that retains the CV shaft.

8. Remove CV Shaft and lower the A-arm to full extension, carefully remove the spring and old spring bushing. Re-install the spring using the new Wheeler’s Coil Spacer and jack the A-arm into position.
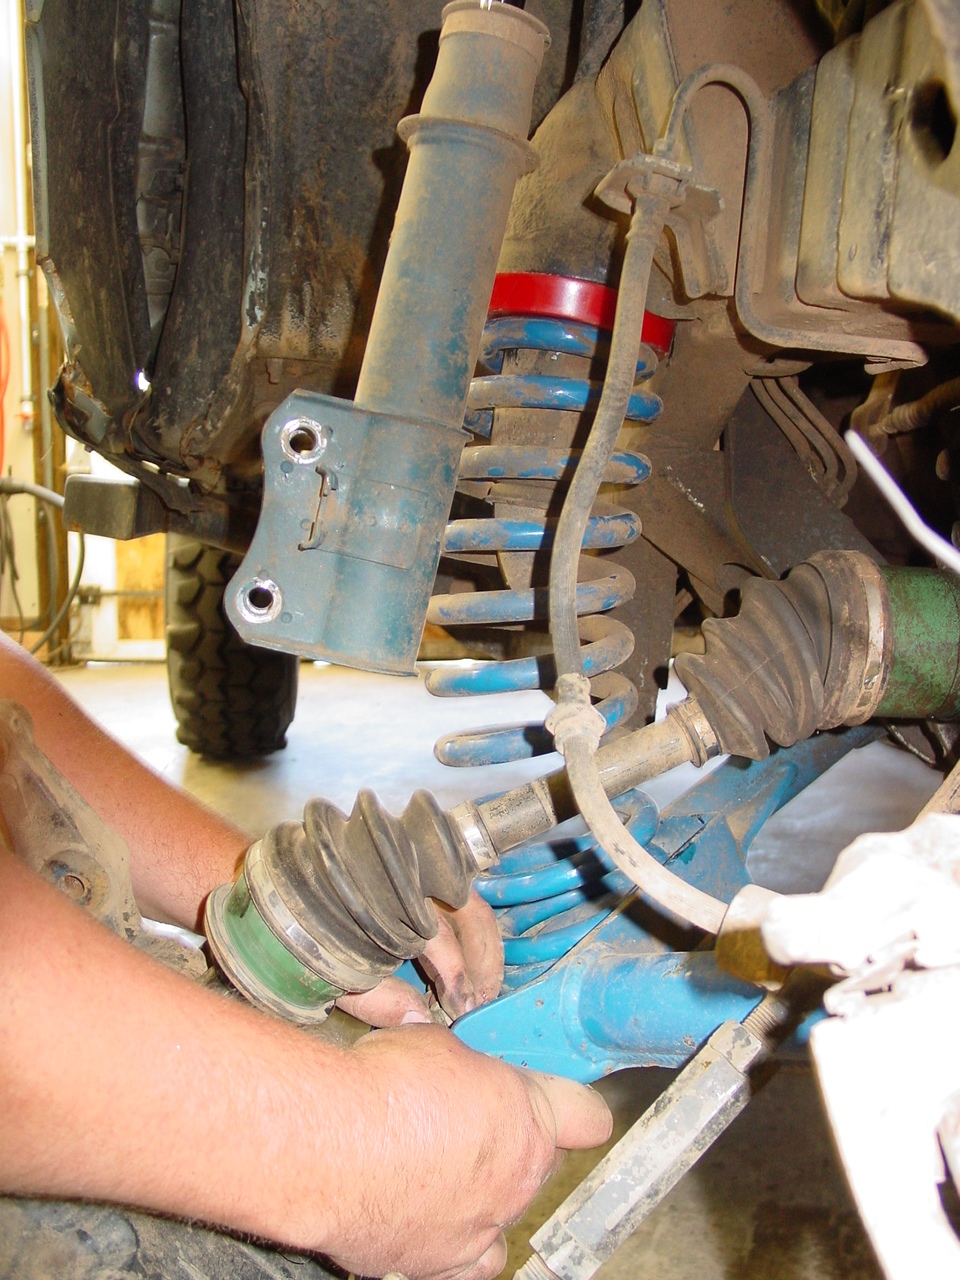
9. Begin re-assembly. First, slide CV shaft into place.

10. Re-attach Strut
11. Replace CV retaining clip. and tie-rod.
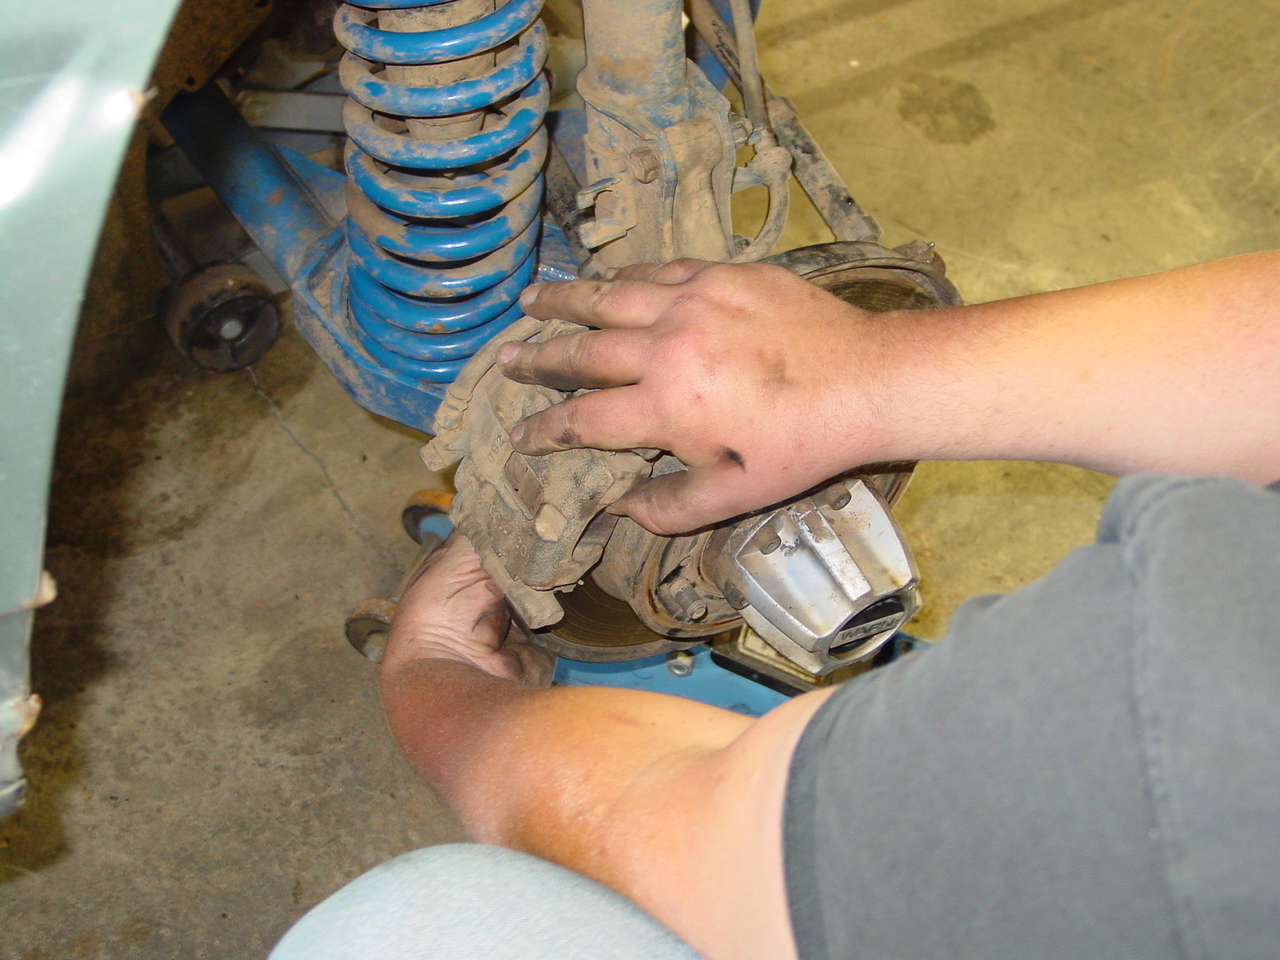
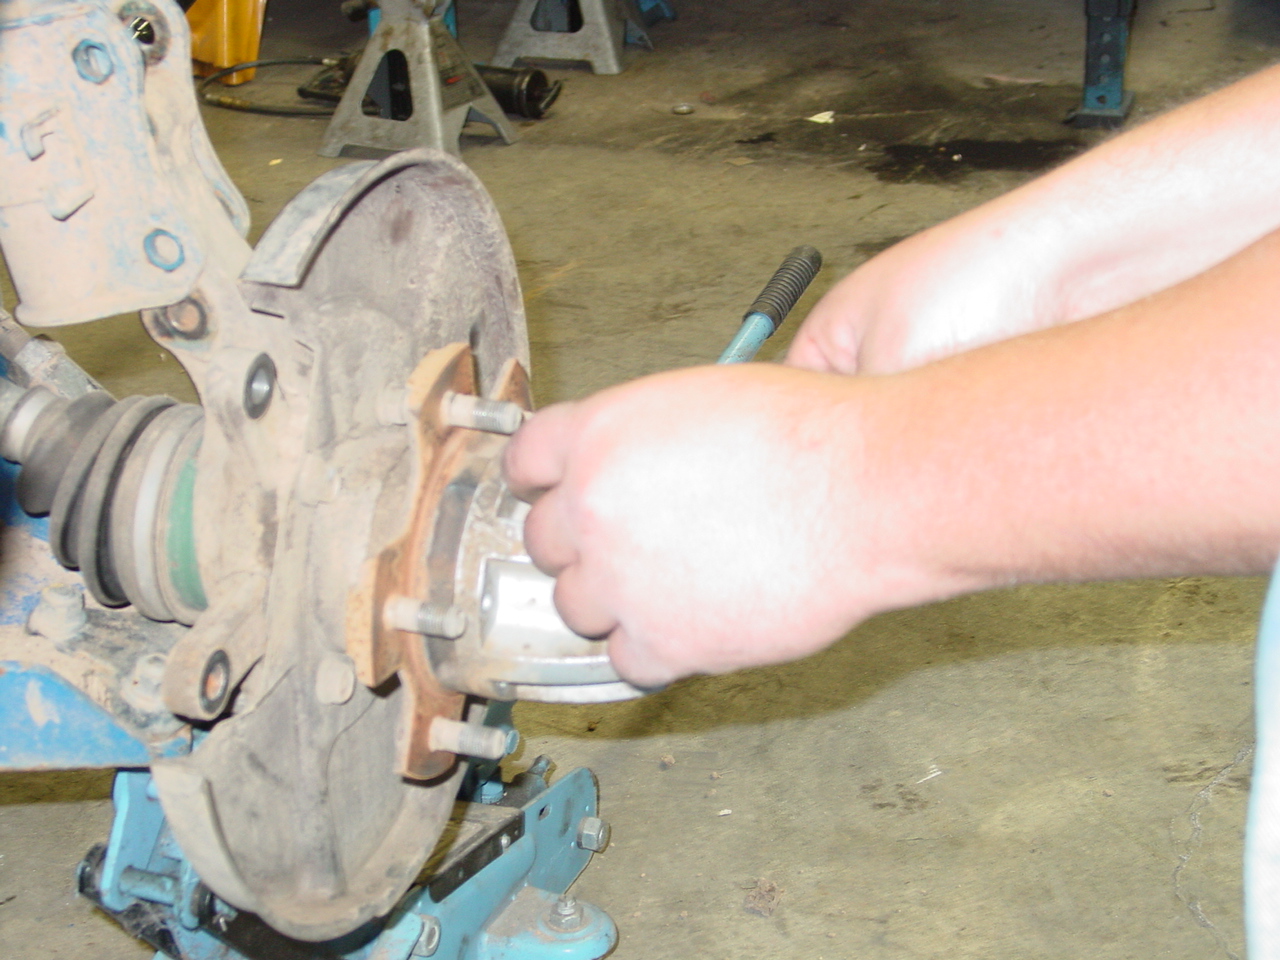
12. Install the disc brake calipers and re-install your wheel.
Installation take approximately 2 hours and can be done with the standard set of Suzuki tools. Extra caution should be taken when working with coil springs due to the high amount of energy that can be suddenly released when a spring becomes dislodged. Always remember to seat the spring into the spring pocket during re-assembly.