Installation of CALMINI’s Rockcrawler DL
Step by Step instructions
Editor: Eric Bewley Photo: Steve Kramer
Here are the CALMINI RockCrawler DL, a kit which contains 4 completely new gears machined from high quality SAE 8620 alloy billet material. The new ratio for this gear set is 5.8:1. in low and a true 18.2 percent reduction in high which is said to completely compensate for a 32 inch tire without the need for new differential gears instructions for installation. Make sure and click on any image you see to enlarge it for details. Contact CALMINI Mfg. for any direct question you may have on this install.
Suzuki Samurai/SJ413 Transfer Case Gear Reduction Kit
Manufactured to exceed factory tolerances from the highest quality material. Stronger, better fitting, and longer wear life are the advantages of our exclusive all new billet gear set. Complete kit includes new input shaft, high output gear, new counter gear, counter shaft & bearings, thrust washers and gaskets. Kit produces a 18.2% hi range reduction, 156% lo range. Fits all 86-95 SAMURAI. Note: CALMINI recommends a close inspection of and necessary replacement of all bearings not included in this kit.
1. Drain oil from bottom plug in transfer case. Then remove the transfer case from the vehicle. Disconnect the mounting brackets from the case. Save all hardware.
2. Remove rubber boot. Remove shifter stick. To remove stick, push down and turn to unlock it from the throat. Remove stick and spring assembly.
3. Remove the Rubber sheet ring from the large throat. This item is extremely important and cannot be overlooked. If the ring is cracked and degraded, it will need to be replaced. Using a worn out ring will cause major problems during shifting. OEM part # 29541-80051
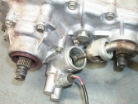
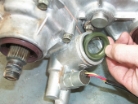
4. Next remove the electrical light switch wire with a wrench.
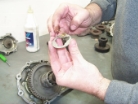
5. Dump out the check ball from the small opening.
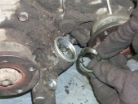
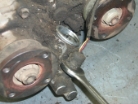
6. The Drive shaft flanges have crimped nuts. Uncrimp the nuts using a pointed punch and hammer. The best way to take off the nuts is using a air impact driver to spin the nuts off. The nuts can be re-crimped during the reassembly process.
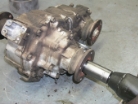
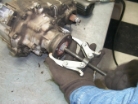
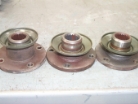
7. Remove the 3 flanges. Use a gear puller if necessary.
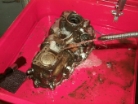
8. On the bottom of transfer case, loosen gear shift locating spring plug and take out spring and locating ball. It is helpful to use a small pointed object such as a center punch or ball point pen to remove these items. Spray carb cleaner or similar liquid into the hole to loosen these items.
9. Remove speedometer driven gear case bolt and remove speedometer driven gear from case using plyers.
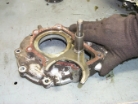
10. Remove bolts securing transfer front case, and take off case. Save bolts.
11. Remove counter shaft lock plate bolt and plate.
12. Remove bolts fastening center case and rear case together.
13. Using a hammer, lightly tap on the case lug to separate the case halfs approx 1/16″.
14. Next, use large slotted screwdriver or similar object to lightly pry case halfs apart. Check shift rods for any binding that may occur during this step. Pry the case apart by hand after checking shift rods.
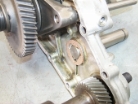
15. Place your thumb or finger over the opening before rotating the shift fork rod as shown. Remove the spring and check ball from the opening. Use caution as the spring and ball will come out rapidly when the fork is rotated.
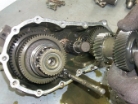
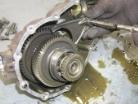
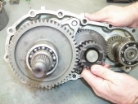
16. Remove counter gear from case by sliding gear off of large shaft. Remove needle bearings, spacer, large shaft and thrust washer from case. Remove thrust washer from opposite side case.
17. Remove input shaft from center case. Tap lightly with plastic hammer
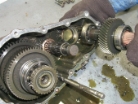
18. Remove shift shaft as shown.
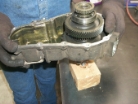
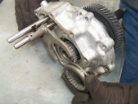
19. Next, hold case, use block of wood or similar surface and lightly bump the end of the shaft to dislodge output shaft from rear case. Remove stock shim from case before cleaning.
20. On the output shaft, remove circlip from hub as shown.
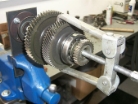
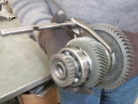
21. Use a gear puller to remove high output gear, thrust washer, bearing and hub. When using the gear puller, it is likely that the teeth on the gear will become chipped. This is not an issue as this gear will be replaced will a new high output gear included in the Rockcrawler DL kit.
22. Use a press to remove the low output gear from the main shaft. Also remove the thrust washer, bearing and hub.
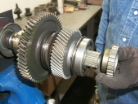
23. After the gears are removed from shaft, begin to install new high & low output gears. Install the new low output gear in the reverse order of disassembly
24. After low output gear is pressed into place, install new high output gear on main shaft
25.Install the assembly using an H-frame press, or use a socket or similar object that matches the diameter of the hub and tap on with a hammer gently. Re-install circlip.
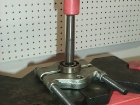
26. Remove bearing from the input shaft using H-frame press or bearing puller. Install same bearing onto new supplied input shaft
27. Clean your parts. Inspect all neoprene seals for condition and replace if necessary. After cleaning case, re-install shim removed in step 19 using a light coat of grease to hold in place.
28. In center case, install spring and ball. Use a blunt driver to hold the spring into the hole and press inward. Install the shift fork shaft into the hole and rotate.
29. After rotation, install center ball. Slide shaft out until ball drops in flush.
30. Apply shift fork to output shaft.
31. Install sleeve (coupler) ring onto the fork. Install shaft assembly into center case.
32. Install new input shaft assembly into case center.
33. Apply light film of grease to a thrust washer and apply to rear case.
34. Do the same to the opposite case and insert the large shaft flush with hole.
35. Install new ROCKCRAWLER DL COUNTER GEAR. Push shaft from opposite side of case thru the new gear.
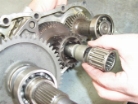
36. Install needle bearing, then the spacer, then another bearing.
37. Install new gasket to the back half of case.
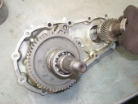
38. Assemble rear case to the center case as shown. Install case bolts as shown.
39. Install the counter shaft lock plate and bolt. Torque to 7.0- 12.0 ft lbs.
40. Line up shift rod gates as shown
41. Insert check ball and spring. Install bolt plug and tighten with allen wrench.
42. Apply gasket to case front cover and install cover using same bolts. Torque 9.5 to 16.5 lb/ft.
43. Using a torque wrench, torque case bolts 9.5 to 16.5 lb/ft.
44. Install speedometer driven gear and case bolt.
45. Install check ball and the electrical light switch wire with a wrench.
46. Install rubber sheet ring into shifter throat.
47. Re-install shift rod and spring.
48. Note: flanges are different. Two are the same and one is different. Install flanges correctly and tighten crimp nuts. Torque to 80.0 to 108.0 ft lbs. Be sure to re-crimp the flange nuts with hammer and punch.
49. Install the mounting brackets and hardware.
50. Install transfer case into vehicle and fill with gear oil before starting the vehicle.

 ZUKIWORLD Online – Everything Suzuki Your Complete Suzuki Automotive Resource for Editorial, Tech, Events, Adventure, Racing, and Forum
















me halp is jab jeep warkeing macenak and davre
warkeng jap