 ZUKIWORLD Online – Everything Suzuki Your Complete Suzuki Automotive Resource for Editorial, Tech, Events, Adventure, Racing, and Forum

SKY’S OFFROAD DESIGN
Sidekick Body Lift
Editor: Eric Bewley Story/Photo: R.H.S.C.
SAN DIEGO, CA -Off we go here at ZUKIWORLD Online with another great Sidekick build-up project. One of the easiest and most affordable ways of getting some additional clearance for large tires is a body lift. We decided to install a 2 inch body lift on our project vehicle from Sky Offroad Designs. The kit is simple and since we weren’t exactly sure what type of bumpers or modifications we would be doing next on this project vehicle the body lift kit fit the bill. The kit is straight forward and doesn’t require any special tools to install. We did ours in the driveway with a floor jack and a socket set and a Philips screw driver. Here is what we did. Remember to perform this on level ground. Make sure you chock the wheels and always disconnect the battery.

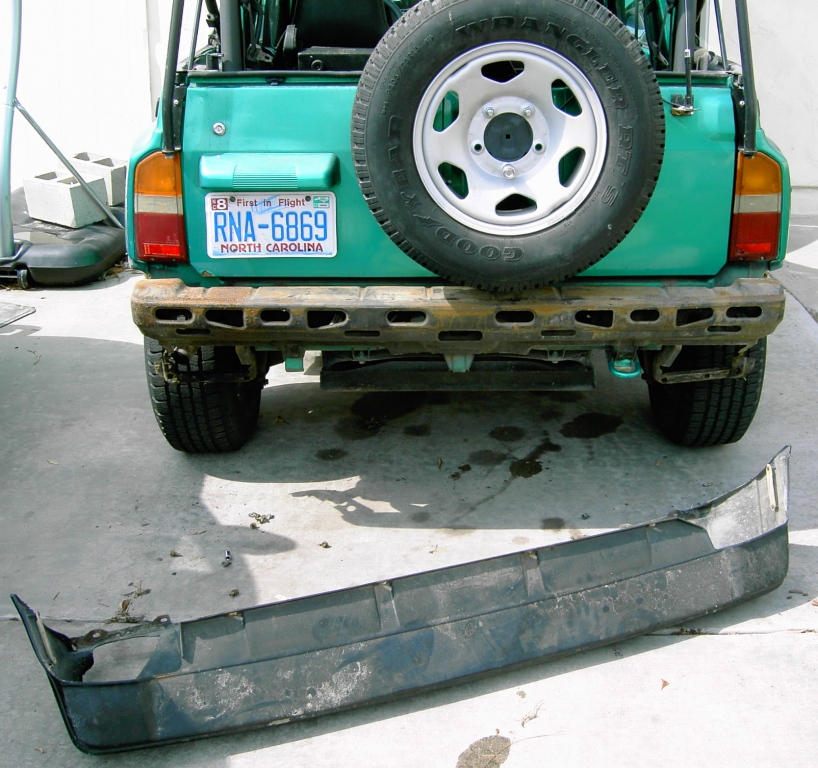
1. We removed the interior parts around the shifters, and unbolted all the retaining plates for the shifter boots. If you have carpet this can be a pain. We chucked the carpet out of our Geo as soon as we bought it. (We see Rhino Lining in the future!) 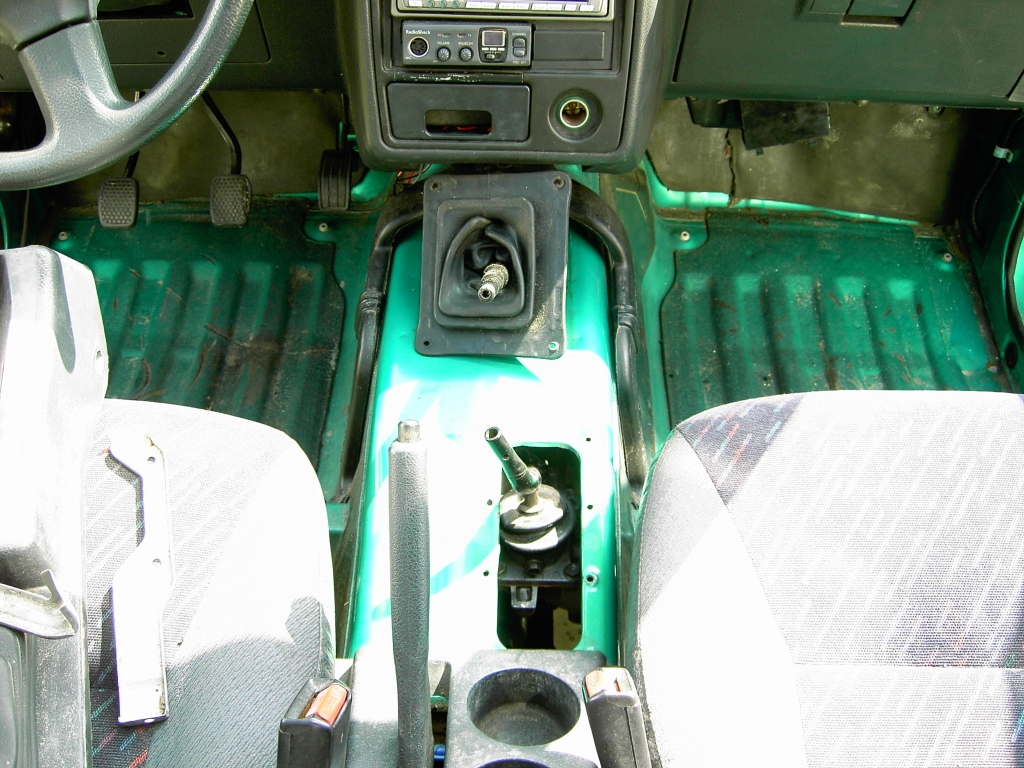 2. Next we removed the front and rear bumpers covers and the bumper sub frames.

3. The headlights must be removed to gain access the bolts for the front body mount. Remove the grill for easier access to the headlight bolts. Make sure you disconnect the headlights and twist out the turn signal lamp 

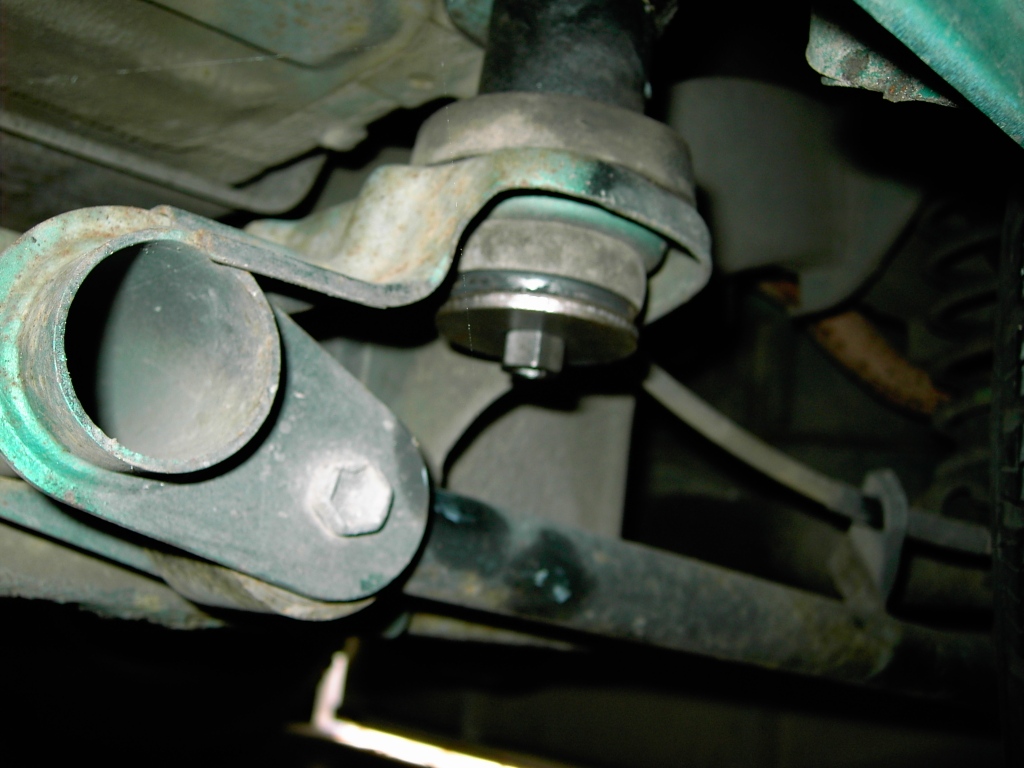
4. In the engine bay we loosened the bolts on both sides of the steering shaft, and release the front driver side break line from the strut by pulling the retaining clip. 

5. Last but not least we took the 4 screws out of the fuel filler hose  6. We then loosened all of the body bolts on the driver side but did not remove them all the way 7. We then took out all of the body bolts on the passenger side of the vehicle. There are 4 locations. One below the headlights, two along the side of the frame (one behind the front tire and one in front of the rear tire), and one below the taillights. 8. With a floor jack and a piece of wood we jacked the body off the frame positioning the jack at about the mid door location from front to back of the vehicle. If you are doing this on uneven ground you may have to position the jack in a different location. 9. We jacked the passenger side of the body up off of the frame just enough to slide in the spacers over the bolts extending out of the body. Keep a careful eye on the break lines. You can see the hoses behind the passenger side front tires. We did not have to take the retaining bolt out and where able to stretch the lines tight which gave us enough room to slide in the spacers.

10. Next we positioned a spacer underneath the support pad on the rear frame near the gas tank. This location does not have any mounting hardware so we glued these spacers in location with black RTV Silicon. The weight of the body will pinch the block between the rubber mount and the frame when the body bolts are torqued in place.
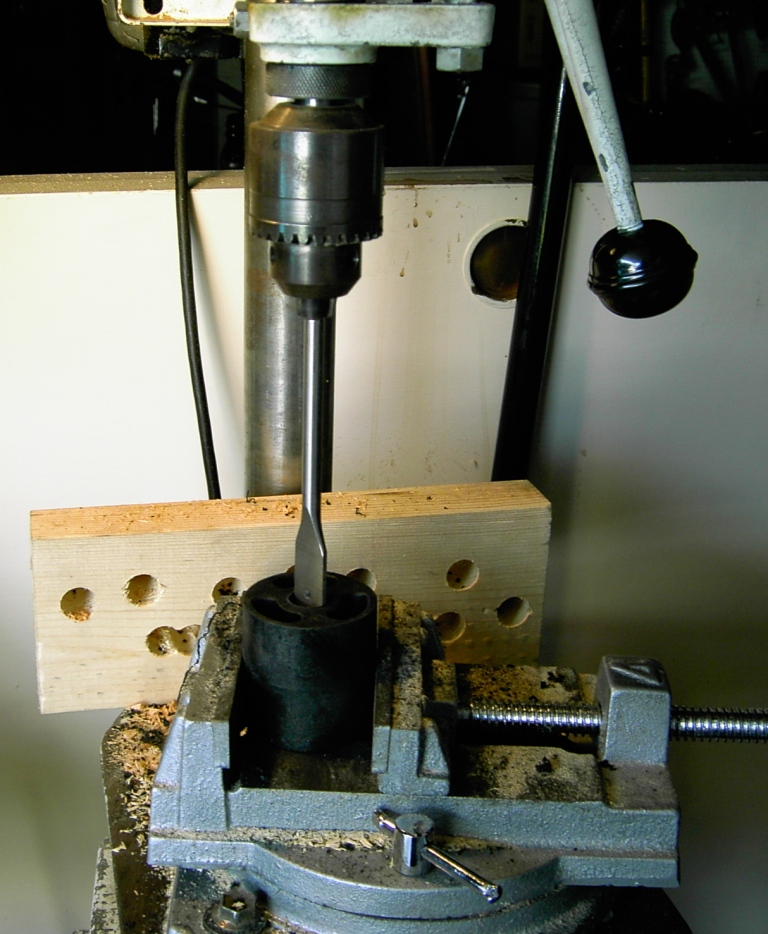
 11. When we got to the front body mount under the headlight we noticed that the stock rubber body mounts had a metal sleeve pressed into them. Unfortunately the holes in the center of the body mount blocks where not large enough to for these sleeves to press into. There are a couple options here in dealing with this. Press the sleeves out of the rubber mounts, cut the sleeves off, or drill out the body lift blocks. We chose to drill out the block with a drill press and a simple wood cutting spade bit. This can easily be done with a hand drill but since we had a drill press we took advantage of it.

12. We reinstalled the lower rubber bushings on underside of the frame mounts and then used the kit provided washers and these clever threaded sleeves/nut pieces. We only twisted the sleeve/nut pieces a couple turns to make sure we had a good engagement but left plenty of room for the body to twist when we lifted the driver side. 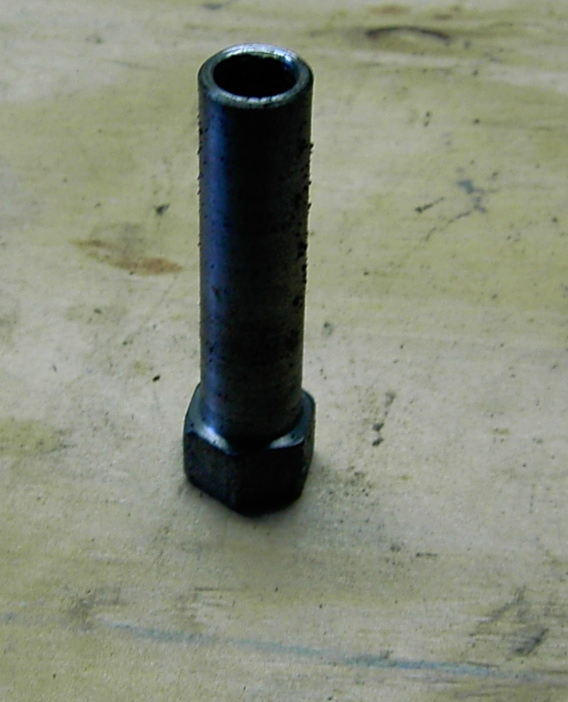

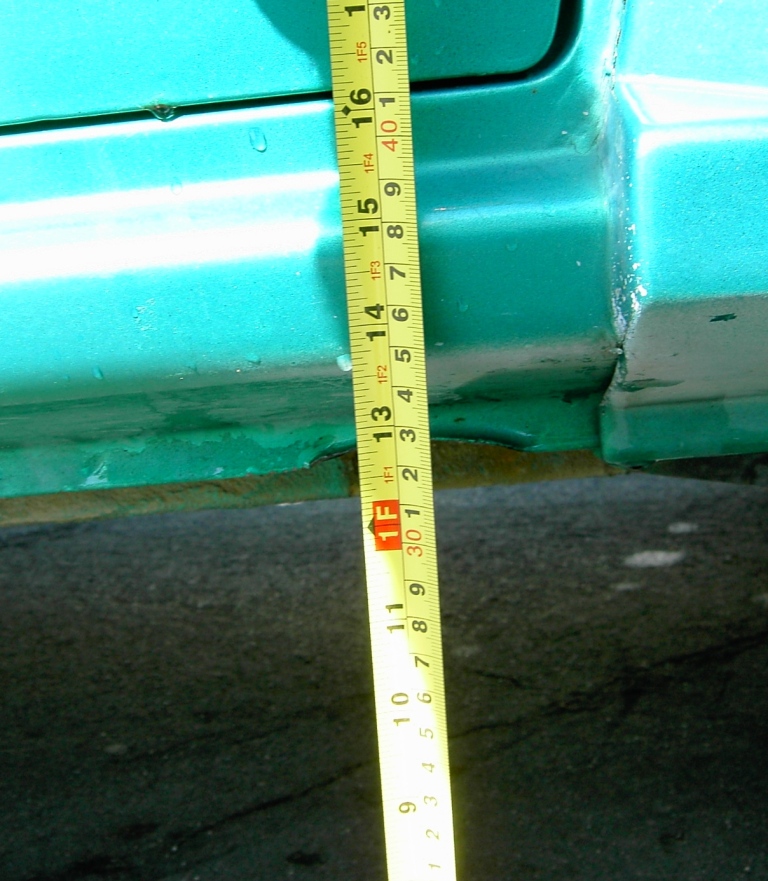
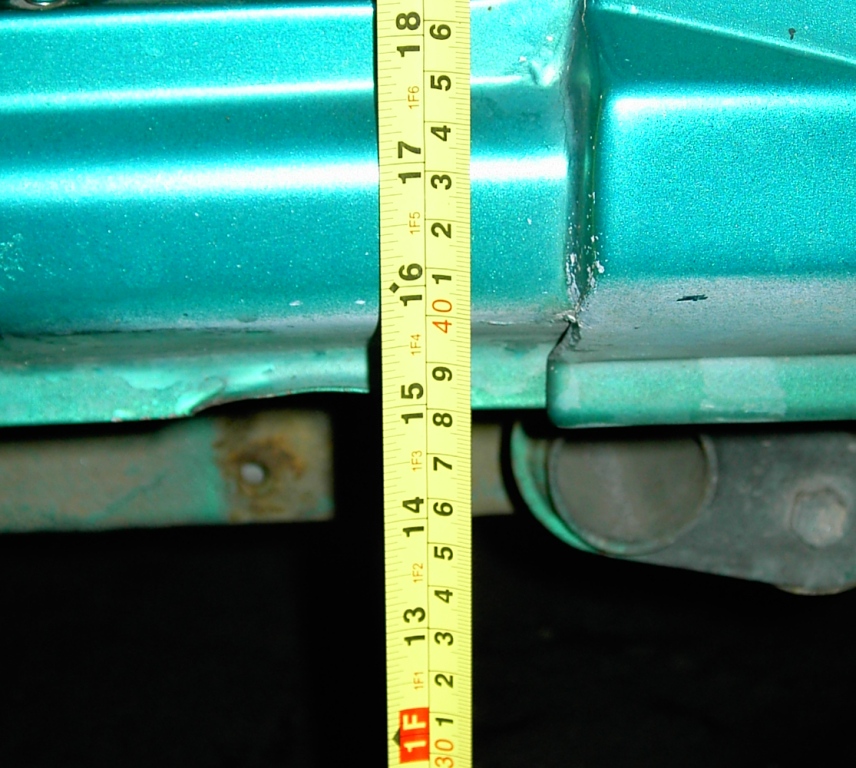
13. Repeat steps 7 through 11 for the driver side. 14. Once the body is set down on all the spacers we checked the body for squareness on the frame by taking some tape measurements from the frame rails to a body edge at each of the corners and in the center of the chassis. 15. We then went through and torques down the body bolts per the specified torque settings listed in the factory service manual. 16. Reinstall and tighten all the items listed in the first steps.
Comparison pictures before and after installation


We are planning on running either aftermarket or building homemade bumpers so we left our stock bumper components off. Some simple plate spacers can be constructed to reposition the bumpers to match the body lines if you are going to continue to run stock bumpers.
Overall this kit comes with all the pieces you need to do a pretty thorough body lift. Because we are not sure what a lot of the modifications are going to be on our vehicle this kit works perfect. Its affordable and the threaded sleeve/nut devices are way trick. We definitely like the fact that there is a steel rod running from the body to the frame. Directions are pretty minimal but then again a 2 body lift is pretty straight forward and can be installed in an afternoon with no problems. We especially liked this kit because we did not have to lengthen our steering shaft or the T-Case shifter. A major plus for those that dont have a welder handy.