Over Rotation of the Rear Sidekick Axle.
Editor: Eric Bewley Story/Photo: Mike Hagen
COTTAGE GROVE, MN. Every offroader dreams of having driveline angles that are straight but its not very realistic on most lifted vehicles. Thankfully, it is very possible and doable on a Sidekick. This article will give you some tips on how to accomplish this mod on the CALMINI 3 inch and Rocky Roads Rock Steady kit.
NOTE: This will require welding and grinding.
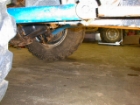
This is one of my favorite modifications to the Sidekick and here is why. First the rear driveline angle is strengthened and straightened. This reduces wear and vibration. Second, it moves the tire rearward in the wheel well, which not only looks better it performs better, by improving departure angle and the ability to run a larger tire. Third, this allows for 3 more inches of droop, CALMINI only, with new shocks. Fourth, the pinion will be higher, keeping U-joints out of the rocks and helping the rear bump over rocks, stumps, ect
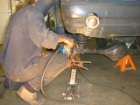
To get started, lift the vehicle high enough to have the tires a couple of inches off the ground while being supported by the frame. Remove the tires. Remove and discard the two 12mm bolts that hold the parking brake cables to the top of the frame. They will bind at full travel causing premature failure. Support the coils and shocks. Remove the four 14mm bolts holding the upper link to the diff.
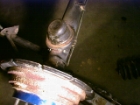
CALMINI 3 INCH: Remove the heim joint from the v link. Cut ½ inch off the threads and clean them up on a grinder. Remove the nut from the heim and reinstall into the v link. Screw it all the way in until it bottoms out. Tighten until it is turned to the install position. Reinstall the upper bracket backwards.
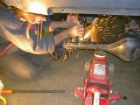
ROCKSTEADY KIT. This will require fabbing a piece to install between the upper ball joint and the diff. This will be installed one set of holes off. Notice there are 6 bolts now. Now that this has been done the coil cups need to be relocated on the axle. Do not skip this part or the coils will fatigue. First, grind off the welds on the cup.
Then, set the coils and cup into place and jack up the differential until the vehicle comes off the jack stands. Next, tap the cups until the coils are straight. After the coils are straight, tac weld the cup into place. Then, remove the coils and weld into place.
To utilize the most travel from the CALMINI kit buy shocks from the rear of 99 ford F 150 4×4. The Rock Steady kit will not benefit from longer shocks because the coils are not long enough. Both kits will need to fab a new lower shock mount to keep the shock tube from hitting the axle tube during uptravel. To find out where to mount the shock install the coils and jack up the rearend just until the coil just touches the upper and lower seat. Making the lower mount can be done many different ways. I used an upper shock stud from a suburban and pinched the original bracket together and welded it in.

 ZUKIWORLD Online – Everything Suzuki Your Complete Suzuki Automotive Resource for Editorial, Tech, Events, Adventure, Racing, and Forum

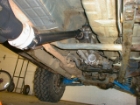
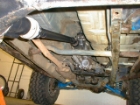
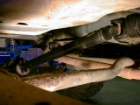

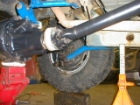
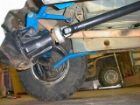

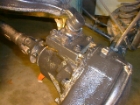


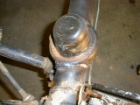


Rotating the diff like this means that the rear prop is now completely out of phase and will cause severe wear on the UJs. This mod will only work if you fit a double cardan type prop shaft.
Actually, it doesn’t because its ‘on the other side’ of the angle.
Is there any way you could expound on your explanation?
For most the picture above illustrates exactly what you are not supposed to do when setting up rear differential angles, I understand that it works for this scenario, What Most are not sure of (including myself) is why.
Question? I have suzuki samurai 91 can i put soft top from geo tracker somebody help me. Bows and soft top. Please…!!
Hi, I have a question, the people at Calmini insist that the dirve angles must be equal, meaning the angle that coms out of the trasfer case sholud be the same as the one going up from the rear trany….. the y say to leave 4 threads aprxo. from the jam nut….. did this midification turn out 100% efective for you??
Marcelo.
That’s right, the angles need to be the same if using a regular prop shaft like the type fitted to a Sidekick. This is a good mod for fixing the prop angles but to complete it the prop shaft needs to be changed for a double cardan type. Double cardan prop has two UJs at one end, and a single UJ at the other. And the bend should be at the end with two UJs.