OPERATION: ROCKSTAR
Building A Stadium Rock Sidekick On A Club Band Budget – Part 1.
Editor: Eric Bewley Story/Photo: Mike Hagen
COTTAGE GROVE, MN -How far can you go with a Trackick? We thought this would be a good place to start exploring this question. Here is a project that will hopefully open the minds of many and spawn, at the very least, health discussion. All to often, I hear people saying, “Building an IFS car is too hard, too time consuming, too expensive, and above all too weak.” Are these ideas true? If so, how far can you go with a Trackick? How capable and reliable can you make it without changing out too many parts? This is what my friend Dan Bour and myself are going to try and find out.

As with any project you should have goals with your build so you dont get lost along the way. These are our three goals.
First, to prove that a Trackick IFS is not hard to build and not time consuming to do we are going to try to build this whole rig in just 7 days. These are not consecutive days since we have jobs, but 7 days nonetheless.
Second, to keep this project as cheap and simple as possible without sacrificing performance. One way we plan to do this is to retain most of the suspensions stock components and drive train. The only mods to the drive train will be a front CV upgrade, lockers, and a 4 to 1 gear set.
Third, No frills like doors and heat! Function only. We want to remove as much as possible leaving only whats necessary to make the rig perform on the trail. We want to loose as much weight as possible to make room for the necessities for the trail. This should help the stock drive train hold up to the off road abuse we plan to inflict on this rig.
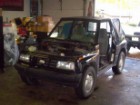
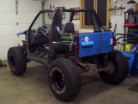
So here is our vehicle. It is a 91-2wd Geo Tracker. Dan got a little antsy before I showed up with the camera and had already swiped the doors hood and tailgate for his personal rig! Thats what I get for showing up late.
Next was getting rid of anything that doesnt make it go or stop.
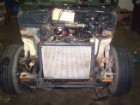
This included the entire front clip, which we will replace with a tube front end later. 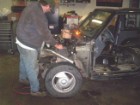
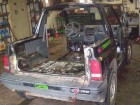
To lighten the vehicle even more and to prevent body damage we decided to bob 16 inches the rear and taper it 11 inches. 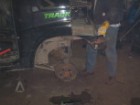 The reason for these dimensions were this was as short and narrow as we could go and still have room for the gas tank to fit in the back since the frame was also chopped 16 inches.
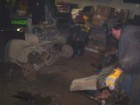
At the end of day one this was what we had thrown away. 
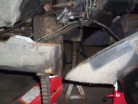
At the beginning of day 2 we started frame alterations. Our goal for the day was to be sitting on 35s by the end of the night. To help make room for 35-inch tires without beating the wheel wells back, we decided to cut and lengthen the frame 9 inches. Then we lowered the front 6 inches for a cheap 6-inch lift. The reason for going 9 inches forward was so we could use a stock 4wd 2-door rear drive shaft on the front without having a custom drive shaft made. 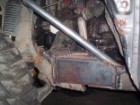 Then we capped and plated the frame. Just to be safe we added an additional support to the strut tower. Then we started to form some motor mount brackets.
 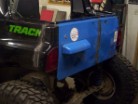 Next we cut 11 inches out of the tailgate and welded it back together. Instead of making it functional we opted to weld into place for better structural integrity. The taillights were cut just below the brake lights and mounted. We often wheel at night and were concerned about trail safety
At the end of day 2 this is what we had.
As you can see, Operation Rockstar is really shaping up. The body lines are flowing nicely and will only be accented by the upcoming tube work. Click here to join the Q&A Discussion on the ZUKIWORLD Forum.
TO BE CONTINUED…

 ZUKIWORLD Online – Everything Suzuki Your Complete Suzuki Automotive Resource for Editorial, Tech, Events, Adventure, Racing, and Forum

