Project SJ410
Restoring and improving on a great foundation.
Photo and story by: -Eric Bewley
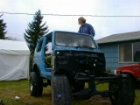
CORVALLIS, OR. -After two years collecting pieces and parts to make an awesome off-road exploration vehicle, we are now starting to build, fabricate, polish, and paint on this 1985 SJ410 Hard Top. Restoring one of Suzuki’s best creations and adding a few upgrades along the way such as a 1.8 liter engine out of a Sidekick Sport, a two-wheel drive Sidekick transmission, Hawk Strictly Suzuki’s Hybrid Sidekick/Samurai axles with 4.63:1 gears, Calmini’s 5 inch SJ410 lift kit and roof rack. Day one of this project started over 2 years ago when we purchased two hard top Samurai, or at least we were told they were Samurai, sight unseen. When we first looked at them, we knew immediately that we had scored a SJ410. It was complete and functioning with a blown head gasket. The down side was that the interior was roached by years of leaving the windows down and just letting the weather, animals, and vagrants in. We’ll touch on the gross-out factor later on but for now let’s relish in the euphoria of a great score.

The next two activities that took place, somewhat in parallel, was the acquiring of the desired parts and the dismantling of the stock and not-so-clean SJ. This was the first vehicle that we have ever taken down to the frame and now that it is done, we have one very important time saving tip, label and store properly everything you take off from the rig. Now that we’re putting parts back together we’re finding that we have to buy lot of bits that we should have had but lost. Ok, off of the soap box…
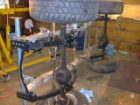
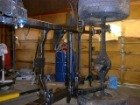
After stripping the frame down to the bare essentials, we bolted on the 5 inch CALMINI kit using the Hawk Strictly Suzuki hybrid axles that we welded new perches to for accommodating the narrower spring stance. We are excited to see how this vehicle will flex with having the springs under the frame, about 2 inches further in on each side. My only concern is body lean. Which if it’s there, we’ll have to fix with sway bars and disconnects.
Next, we tipped the frame up on it’s side to paint the underneath. The underside of the body received the same treatment. We are only going to be painting the frame, undercarriage, and underbody. The finish body and paint work will be left to the professionals.
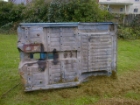
We finished up painting the underside of the body and gave the frame several good coats of paint. Next, the body was hoisted up using our engine hoist and the frame was rolled underneath. Then a good washing was in order to get rid of the left over interior glues, the mold, and the algae that grows on rigs here in the Northwest. All of this is in preparation for bolting items together and building of the basic body which will be taken to the Body shop for painting.
Join us next time where we will fit the 1.8 Sidekick Sport engine, transmission, and running gear. Now that the SJ is partially together, we are starting to get really jazzed to drive a ‘Samurai’ with a 125 HP engine. It’s going to be a blast…

 ZUKIWORLD Online – Everything Suzuki Your Complete Suzuki Automotive Resource for Editorial, Tech, Events, Adventure, Racing, and Forum


Hello Guys! This is great! I have a similar rig and I would like to do the same! What is your budget for this project?
Hello Tim – We did this on a ‘sort of’ budget and used a fair amount of left overs from other builds to make it happen. The largest expense was getting the body work and paint done professionally. Other than that, it was a simple lift, OK shocks, lockers, t-case gears, and a 1.6 swap. Today’s prices would probably be around $6k.