Making a Mighty Mouse
Reynold’s Machine creates a 1.3 monster! -Eric Bewley
CORVALLIS, OR. I have had several different iterations of engines in my samurai over the years. The first was just the plain old stock 1.3 that was so worn out, I could barely do 50 miles per hour. Rather than rebuilding this non-oil burning good-compression engine right away, I decided to add a few hop up goodies to see if I could get it to run better. In the course of about a year and a half, I had installed the Calmini cam, header, Weber DCOE sidedrafts, and a 2 1/4 inch exhaust. These modifications really helped the little trooper quite a bit but I wanted more. At this time, the samurai was equipped with 32 inch tires, stock ring and pinion gears, and a GRS2 transfer case. The next big mod that most people do is put a 1.6 liter 8-valve engine out of a Sidekick or a Tracker. This swap is nearly a bolt on proposition that requires only a transmission adapter plate and a modified motor mount. Well, if everybody else is doing it…
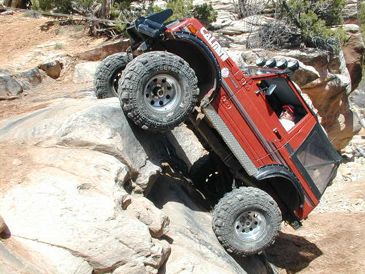
About two years ago I purchased a complete 1.6 8-valve engine along with 2wd sidekick transmission from a person that was upgrading to an even larger engine in their samurai. The installation of this engine and transmission was quick and easy due to the seller giving me every single thing I needed to put it in. The final configuration was a stock long block, Iskenderian torquer cam, Weber DCOE sidedrafts, Calmini Header, and a 2 1/4 inch exhaust. I immediately fell in love with my samurai all over again as I could easily do 80 miles per hour down the freeway with offroad performance being even better with higher torque numbers and the larger Sidekick flywheel.
Needless to say, I was a little hesitant when approached with the idea of going back to a 1.3 liter engine. The 1.6 seemed to be such a better choice, better built, and longer lasting engine. However, when a company with the background and reputation of Reynold’s Machine states they can improve our situation, we listen. The Owner of Reynold’s Machine, Hugh Reynolds has been in business since 1963. He began his career working for pioneer drag racing and engine builder, Ernie Hashim. He worked as a mechanic and machinist at Hashim’s Speed Shop until 1975 when he went on my own.
He opened his shop as a custom engine and machine shop; specializing in performance, street, and drag racing. Eventually this evolved into marine and off-road applications.
Later, he began expanding to high-torque engines for tow vehicles. Now, his shop builds a variety of engines including racing, street performance, off-road, and those used in industrial applications.
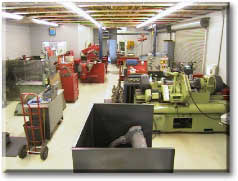
All Reynold’s engines are custom built with the highest standards.
The work that Reynold’s does is impeccable. When the engine arrived in the crate, it was immediately obvious the extra time that had been put into the intake and exhaust runners. Also noted was the incredible level of cleanliness inside of the crate and inside the engine.
Installation of the new engine was made easy with the help of Rick Hawkins of Hawk Strictly Suzuki who just happened to have an early bell housing from a rare 1989 1.3 liter Sidekick that made it possible to bolt the new engine to my Sidekick 2wd transmission.
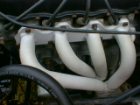
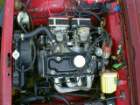
Once the engine was placed into the engine bay, I hooked up a new header from Calmini, brand-new 2 1/4 exhaust from a local shop with a high flow Dynomax muffler, placed my Weber 40 DCOE sidedrafts on, and hooked up all of the doo-dads and whatnots that are needed to complete the install.
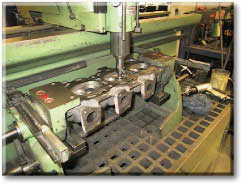
working on a cylinder head

precision balancing a crank
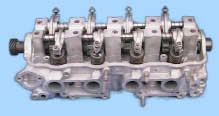
an assembled head
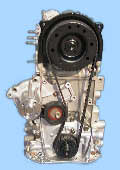
new oil pump, water pump, belt tensioner, and belt. Standard.
Hugh explained that there are some proprietary processes they employ in the manufacturing of these engines but one could rest assured that the following steps are taken with each engine that leaves their shop.
All engines are torn down, crack checked, and pressure tested before we start the machine process. They line hone the mains, surface the block parallel to the mains. Bore and hone the cylinders 90 degrees to the mains. They grind their cams to exact specifications and resize the rods to the same center to center line (total length) The engine is then balanced and cleared for assembly. After pressure testing the cylinder head, they install bronze valve guides and over sized exhaust seats for larger valves. They then do a full port and polish with a racing valve job on the head. The cambers are CC’d and corrected for the same size and the valves are all set at a given depth and surfaced to the desired size to obtain the proper compression ratio. The head is then checked and cleaned thoroughly and assembled.
Hugh also stated that his machine shop uses the following parts when building these high-horsepower Suzuki engines: Federal Mogul rod and main bearings, single moly rings, new oil pump, new water pump, belt and tensioner. High performance camshaft and valve springs, retainers and hard locks, stainless steel exhaust valves, and power forged high performance pistons and pins. All of the above parts are checked and rechecked for size upon assembly. Every rod and main bearing is torqued in and clearance checked. All rings are end gapped to exact clearance. All of this is done before the engine is completed. 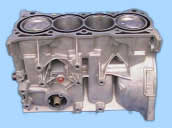
My First impressions of the engine could be simply stated with the expression ‘Wow!’ It was hard to believe that this smaller engine could have the performance of it’s larger cousin. Keep in mind now that my Samurai has change a little since the first time I had a 1.3 in it. The Samurai now sports 35 inch tall tires on Dana 44 axles, 5.89 ring and pinion gears, GRS2 transfer case, and the 2wd Sidekick transmission all of which makes the Samurai tip the scales at a prosperous 2925 lbs. with the trail gear loaded. Even with all this weight, the Reynold’s Machine 1.3 can easily motivate the Samurai to it’s gear limited top speed.
Direct ‘seat of the pants’ comparisons between the 1.6 and the 1.3 give the horsepower advantage to the 1.3 engine. I was completely amazed at how hard this giant-killer pulled above 3500 rpms. Which leads me to the only drawback that I’ve seen 1500 miles into this engine swap. The low-end torque and ‘luggability’ of this high strung 1.3 is somewhat lacking making rockcrawling a little difficult. Unlike before when most obstacles were point and shoot, I now need to pay attention and keep on top of my little compadre.
The real fun comes out when your in a mud hole, slimy trail, or on the snow. The throttle response and quick-rapping nature of the 1.3 makes flinging the mud an enjoyable art. If your thinking of rebuilding your 1.3 and you’d like some major performance gains, give Hugh at Reynold’s Machine a call. They can fix you up right!

 ZUKIWORLD Online – Everything Suzuki Your Complete Suzuki Automotive Resource for Editorial, Tech, Events, Adventure, Racing, and Forum

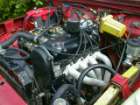
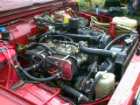

I know this has been around for a while but I am hoping someone could tell me where Reynolds Machine is located
Bakersfield, California
I have a 1992 8v engine .looking to have it rebuild I need more power can yall give that engine some kick?? And how much?looking for a hi performance 8v without changing things
Would like to know what kind of intake manifold you’re using for twin carburetors. I’m looking for this type manifold for my 88 Suzuki
The manifold was from a company called Hawk Strictly Suzuki, they are no longer in business. I think Petroworks may be selling them now. They are hard to find. Good luck!
I have a 95 Geo Tracker with a blown engine . I drive 225 miles a day as a medical courier in a Hondq Insight but I like my tracker better so I’m looking for a sidekick 1.3 engine that will give me better gas mpg ….have one?
quisiera saber que modificacion le debo hacer al motor 1.3 para que tenga mas potencia
I would like to have a price quote on rebuilding my 1.3 as you did in the article. Thank you!