Shrockworks SIDEKICK WINCH BUMPER
Shrockworks Makes a Fine Piece of Armor For Your Sidekick
Editor: Eric Bewley Story/Photo: Jason Hutchison
San Diego, CA – With the growing popularity and good trail prowess of the Suzuki Sidekick and GEO Tracker, aftermarket vendors are recognizing that these little “tucklets” have serious potential as hearty offroad adventure vehicles.

Shrockworks has answered the call for armament from many Suzuki Sidekick owners with their new bumper for Sidekicks and Trackers. For years Sidekick and Tracker enthusiasts have had few attractive options for replacement of the stock bumpers. Not anymore. This new bumper is first in a line of products Jim is releasing for our trusted sidekick vehicles.
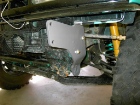
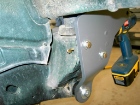
We had the chance to take a closer look at Shrockworks’ new piece and install it on our project vehicle for testing in Moab Utah for the Easter Jeep Safari. We did just that and actually installed the bumper in the garage of our rental condo with basic hand tools in about 2hrs. Granted we had already removed the front bumper plastic cover, but installation is extremely simple and the mounting system is the strongest system we have seen to date on a bolt on replacement bumper. We took some photos of the super simple installation to help all of you out there that may have questions, or those that may be considering this great product from Shrockworks.
Installation:
Step 1: Remove the front bumper cover and sub bumper. 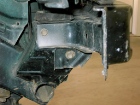 Step 2: Install the included front tube mounts. (We had to tap our mounts in due to a previously mounted tow bracket that deformed our cross tube) If you have this situation make sure you dont pound the mounts flush as they need to extend a bit to line up with the side mount.
 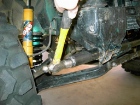 Step 3: Install the side brackets. Snug the bolts but dont tighten. (This will hold the bracket in place while drilling the hole in the next step)
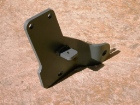
Step 4: Drill a hole through the front tab though the frame 
Step 5: Install the provided bolts through the bracket again dont tighten these. 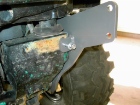
Step 6: Loosen the three side bracket bolts. This will allow easier installation of the bumper by allowing the brackets move. Step 7: On the front of the bracket you will notice 2 holes in each bracket. These line up with two sets of holes on each side of the inside of the front bumper. This is a great idea and allows for the user to adjust the bumper height for variations in body lift height.  Step 8: Lift the front bumper up and set it onto the brackets. Make sure you have the bumper centered on the vehicle. We recommend having a friend help, but it can be done by one person. Step 9: Install the 4 large bolts and related hardware and tighten. Step 10: Tighten the three side bracket bolts, and the bolt that goes through the drilled hole.
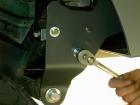
Step 11: Install your favorite winch. (depending on the style and size, you may have to trim your grill a bit)
Impressions:
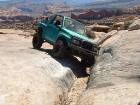
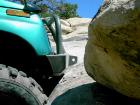
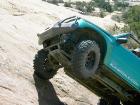
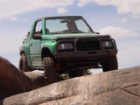
Well Installation is a breeze. By the pictures you can see that this bumper is built super tough. The bumper is a bit heavy and we did notice a slight drop in the front end even with out a winch, This drop is expected due to the extra weight and we will gladly give up a fraction of an inch to have some hard core protection on the front of our Sidekick. Shrockworks includes all the necessary hardware for any easy install so you can be assured there will be no trips to the hardware store. We beat this bumper on every rock we could at Moab, some of them intentionally! No dents only some scratches on the powder coating. Ground clearance and approach angle are excellent also. This bumper is tucked so tight to the body that we where able to run this bumper up and over rocks to get our front tires to gain traction.. Although a very solid winch point, we did notice the front tabs on the bumper will hit ledges when approaching at an angle. However these tabs are ½ thick and they have showed no signs of bending. Think of them as curb feelers for the rocks We give this bumper a THUMBS UP and kudos to Shrockworks for inventing a stout bumper that will be both at home on the streets and in your favorite rock garden.

 ZUKIWORLD Online – Everything Suzuki Your Complete Suzuki Automotive Resource for Editorial, Tech, Events, Adventure, Racing, and Forum




Do you still make this for the front winch bumper for a 97 tracker ? If so how much is it
They stopped production for vitara ’97 ,lookin for a second hand one(willing to pay full price)anyone??
how do i buy this braket for my 96 tracker 4 door
Contact Shrockworks. We believe they are still supporting this product.