 ZUKIWORLD Online – Everything Suzuki Your Complete Suzuki Automotive Resource for Editorial, Tech, Events, Adventure, Racing, and Forum

Installing a Ford 9″ rear end into the Sidekick.
Editor: Eric Bewley Photo/Story: Mike Hagen
Cottage Grove, MN -Why do you need a nine-inch? There’s a good chance you don’t. I wanted to do this because of a few problems I was having. First were the twisted axles. After smoking several rear axles and experiencing a rash of twisted splines, I began to carry spares. If your carrying spares of anything, you are planning for breakage. Sounds like a sure sign to upgrade. Second, my rear shoes would get full of mud and wear out quite often. Having wheeled a Sami for years with no parking brake, the Tracker was quite an improvement. But after adding more travel to the rear I found the cables getting pulled and damaged. Between the mud in the shoes and the damaged cables I found I was doing more maintenance than I thought I should. I soon started thinking rear disc. This is why I need a nine-inch.

After doing a little research I found that a 73 Ford Bronco rear axle is only 3 inches wider than a Tracker. With the front end widened, as seen in previous write-ups, this actually evens things up perfectly. The 5 on 5-½-bolt pattern also was a good reason for this axle.

Another reason this was a good donor was the availability of aftermarket gear sets. Yukon sells a 5.83, which matches my front set. The size of the pinion was also a good reason to choose the nine. Here is a pic of the size difference between the two 5.83 gear sets.

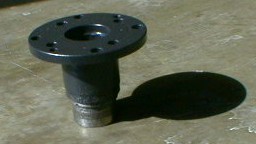
I really didn’t want to have a custom drive shaft made. After a little checking I found that the 76 Lincoln Continental had a flat pinion flange very similar to the Tracker. I took it to a local machinist and had it modified to fit a Tracker drive shaft.
Here is how it looks installed. Now if I damage a shaft I can run one from any salvage yard.

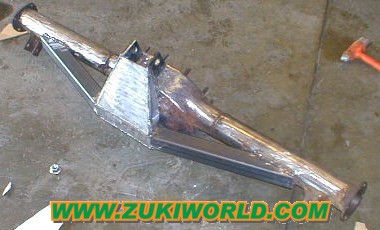
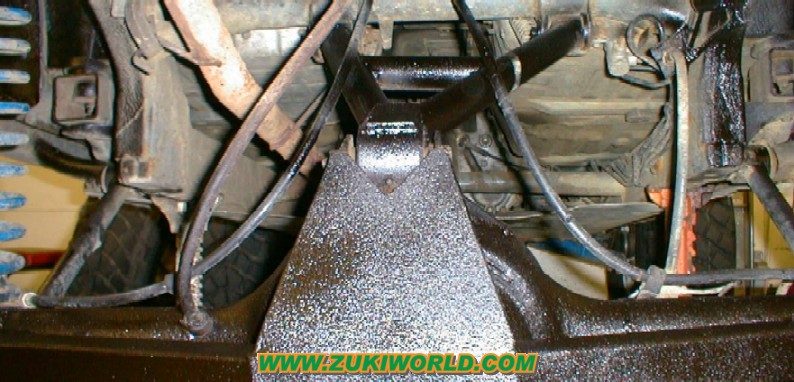
Not wanting to sacrifice clearance from a larger diff I decided to cut the bottom off. I welded steel from a semi frame to the bottom. If you’ve ever tried to dent a semi frame with a hammer you’ll know why I used it. I was actually able to gain 1 inch of clearance over the stock diff by doing this.

I’m not going to get into much detail about the links because I am not that happy with how I did this and I’m planning on changing it soon. My biggest problem was the lower links I used were too short for this kind of travel. However, the mounts on the axle worked out great. I also did the ramp set-up on this rear axle too since it worked so well on the other one.
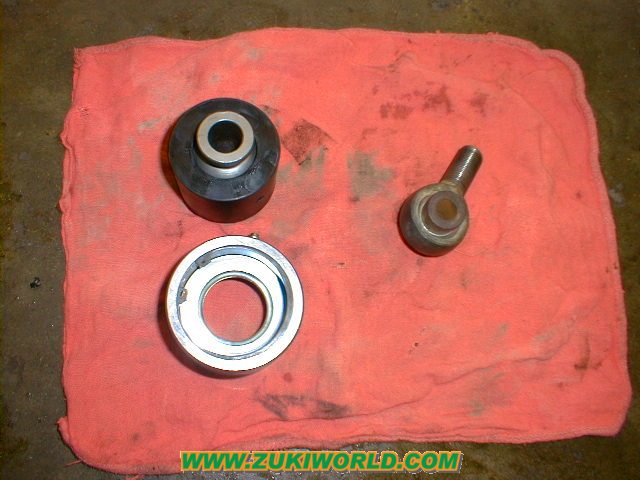
On the upper link I used a polyflex joint from Currie. Keeping the bulletproof thing going I opted for the biggest one they sell. Here is a pic of the polyflex joint next to a ¾ inch heim.
On to the brakes. I chose 99 Saturn SC2 rear calipers to use with 2 door front rotors from a Tracker. I made the brackets from semi frame steel also due to its strength.

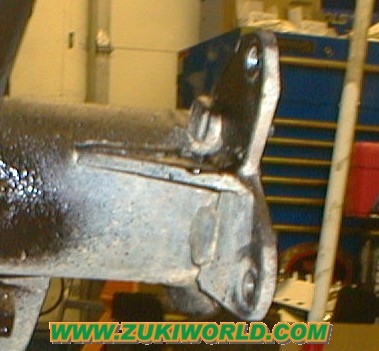
I mounted the calipers on the front and lengthened the E-brake bracket to clear the coil spring, which just happened to work out great to retain the original parking brake cables.
Now the cables go along the axle and up the v link.

Here’s the finished product.