 ZUKIWORLD Online – Everything Suzuki Your Complete Suzuki Automotive Resource for Editorial, Tech, Events, Adventure, Racing, and Forum

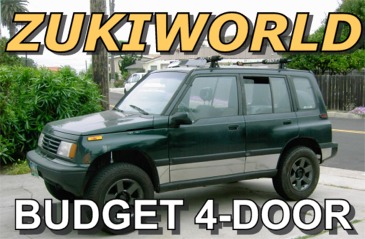
BUDGET SIDEKICK BUILD
Building a 4-door Sidekick on a Budget.
Editor: Eric Bewley Story/Photo: Jason Hutchison
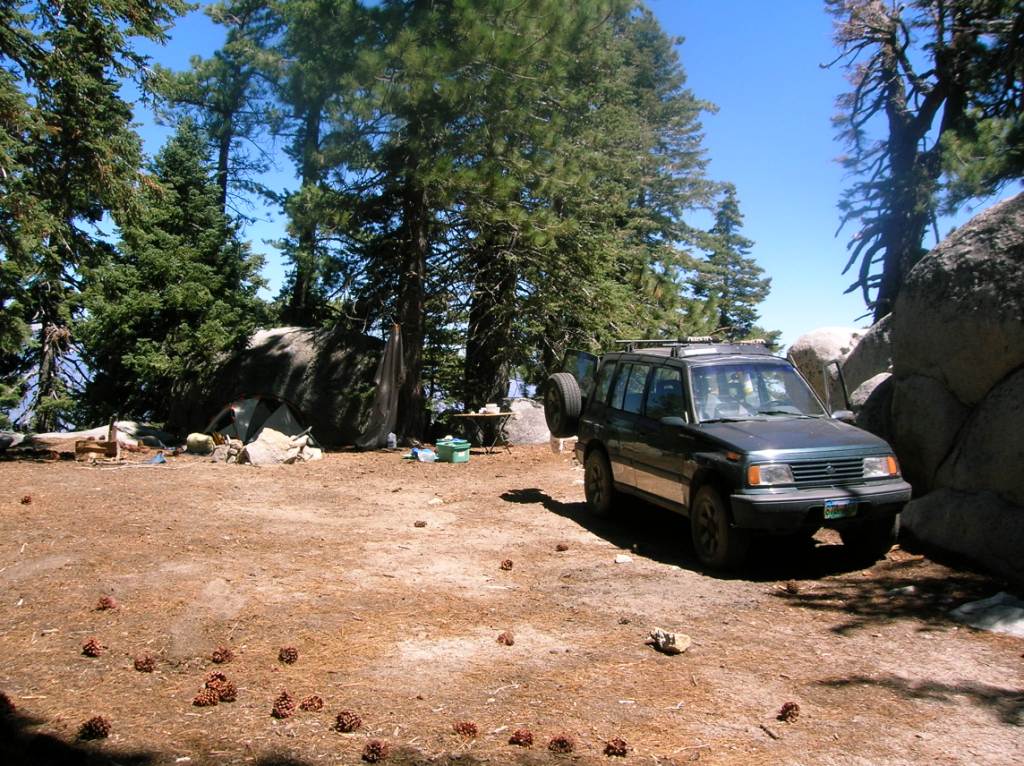
SAN DIEGO, CA. – We recently purchased a 4 door Suzuki Sidekick to do battle against rising gas prices. This vehicle will be used as a daily commuter to work and can be used for camping trips and mild trail runs or a trip up to the local ski resort with out breaking the bank. Gas in Southern California is almost four dollars a gallon. OUCH! Although or purchase is a bit rough on the outside the 16v Sidekick is easily hitting around 28mpg. Even with 120K on the odometer this was a steal at $1000.00. After several weeks of driving we decided to give the kick a small makeover to a more sporty/adventure look. After some searching we decided to perform some simple upgrades in hopes of improving looks and performance all with out deteriorating street-ability, or breaking the bank. Our make over begins with some inexpensive upgrades.
- A coil spacer lift from SKY OFFROAD DESIGNS ( aprox $150.00)
- A new set of KYB shocks and struts from HAWK STRICTLY SUZUKI (aprox $250.00
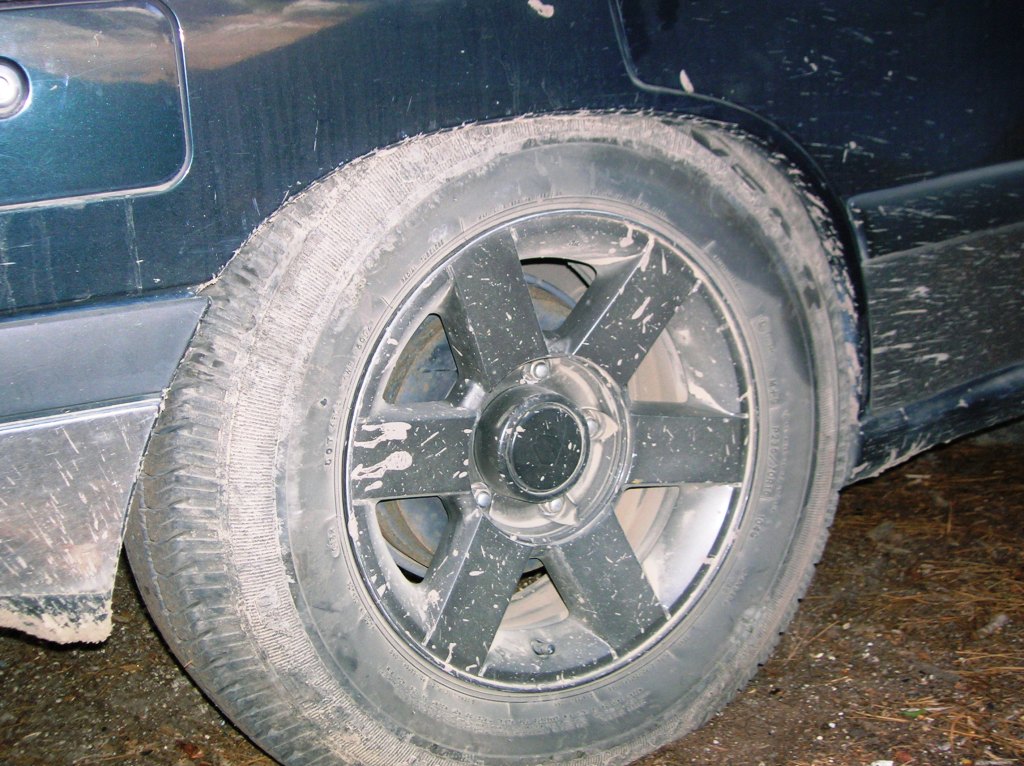
- A recycled set of Suzuki XL7 16 wheels and some dark grey metallic wheel paint. Check your local wrecking yard for wheels or give HAWK STRICTLY SUZUKI a call. Wheel paint came from the local Autozone. (aprox $200.00)
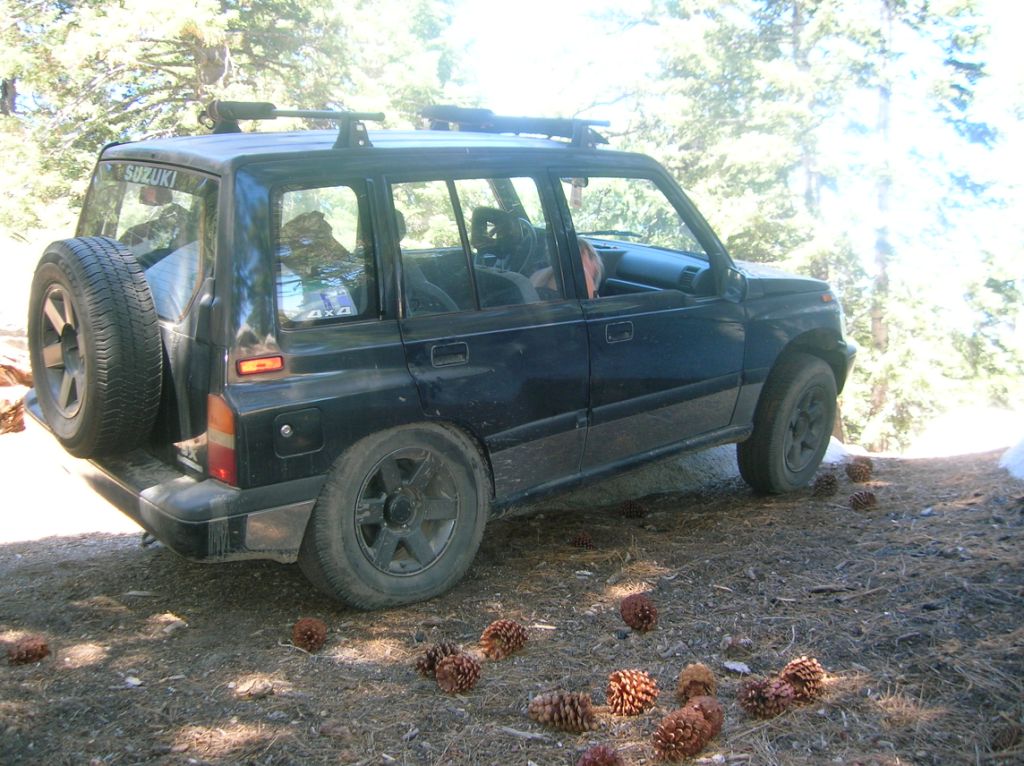
- A set of take off Jeep Liberty Renegade rubber Goodyear Wrangler SR-A P235x70R16R. (Craigslist $150.00)
Wheels and Tires: – We took some time and prepped the wheels and tires for installation on the vehicle. We lightly sanded the wheels with some 220 grit paper to scuff up the clear coat. We then applied two cans of the gray metallic wheel paint to 5 wheels. We let this dry and then applied a can of clear wheel paint to the wheels. Huge difference in appearance! We then had our new to us Goodyears mounted to the freshly painted wheels. (Its a good idea to leave a bit of paint for touch up. Our local tire shop did scuff our sexy new paint a bit when they performed the tire installation)
With new tires itching to be installed we started off with installing the lift from SKY OFFROAD DESIGNS. The kit comes with the following.
- 4 Coil spacers.
- 2 strut spacers and bolts
- 2 rear shock relocation brackets.

Since we where disassembling the vehicle for the lift we decided this would be a good time to replace our tired shocks and struts with a new set of KYB shocks and struts from HAWK STRICTLY SUZUKI. Of course we wanted the Old Man Emu product but since this rig is basically a pavement-pounder that may see the occasional camping trip or Baja surf trip we opted for the cheaper solution.
SKYS lift kit is a straight forward set up and inexpensive. This can be installed easily inside a 3-4 hr period if you have some basic garage tools.
- Socket set. (make sure you have a socket large enough for the top strut nut)
- Jack Stands
- Floor Jack
- Basic tools like a hammer, screw driver, pry bar etc.
- A vise was handy.
Lift Installation: – Back
Jack up vehicle and remove tires and set jacks stands under the frame of the car high enough to allow the rear axle to hang.
Remove the bottom shock bolts (since we had new shocks to install we removed the whole shock)  If you push up on one side of the axle with the floor jack the opposite side will articulate down and the coil spring will basically fall out.
 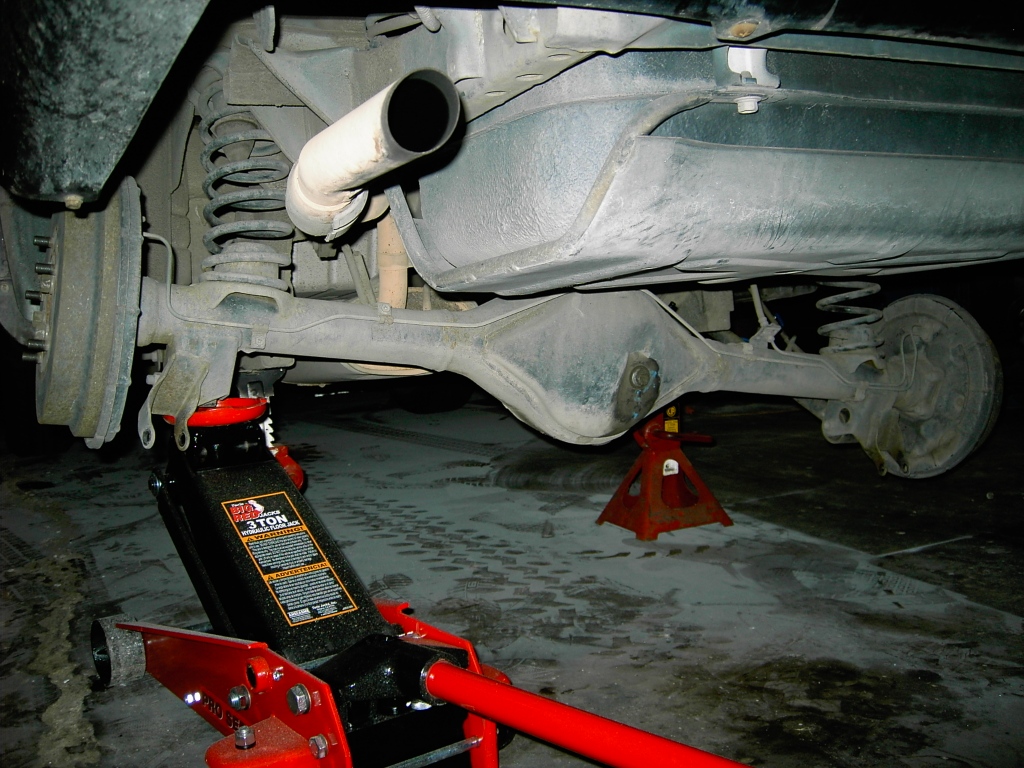 Clean up the upper spring mount and slide on the coil spacer. (WD40 and a rubber mallet work well)
 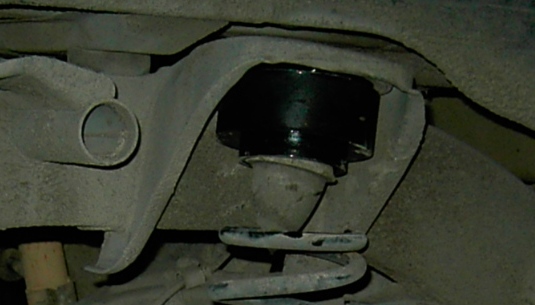 Reinstall spring and release the jack slowly and reseat the spring in the correct location on the bottom mount.
 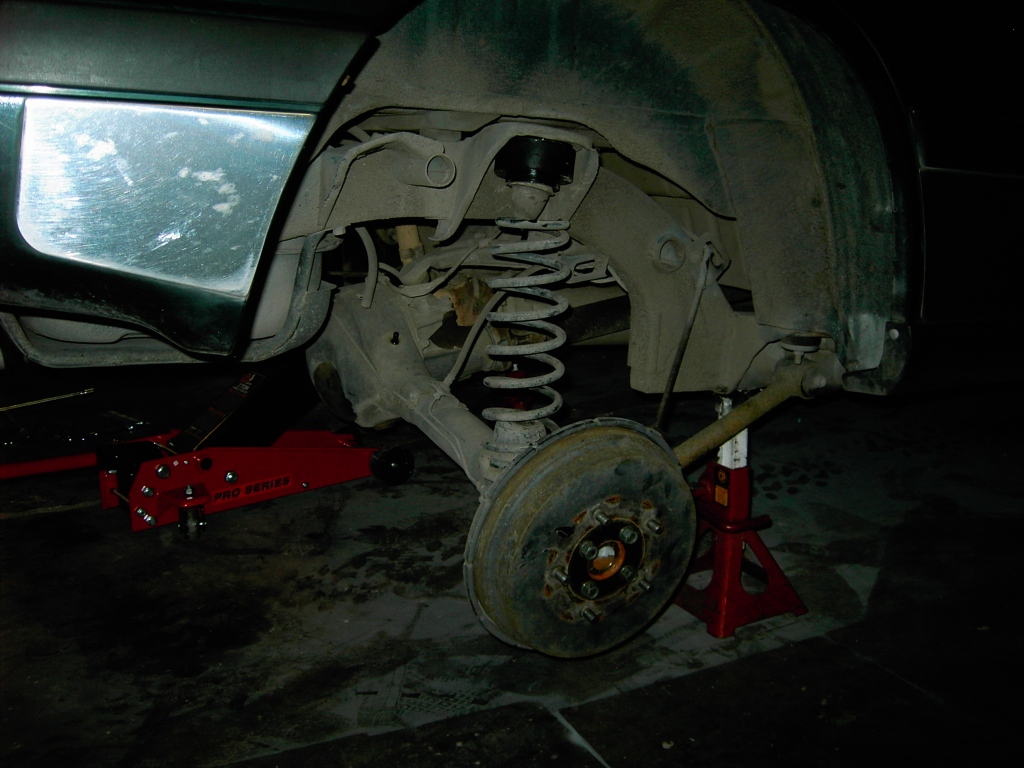 Install the shock bottom bolt, use the jack to raise the axle up and install the top stud in the stock location using the new provided hardware for the top shock mount.

Put on the new tires and wheels.
Note: At the time of installation the lift kit from Sky comes with a weld on shock relocation bracket. This has recently been upgraded to a bolt on version. We were not looking for any extra articulation so the brackets are still sitting on the work bench.
Lift Installation: – Front
Remove the sway bar nuts on the A arms.
Jack up vehicle and remove tires and set jacks stands under the frame of the car high enough to allow the front tires hang in the air. Remove tires. Remove the 3 bolts on the driver side CV shaft.  Remove the brake line clip that hold the line to the frame and the knuckle. Place jack under A arm and slightly raise the arm. Remove the top strut nut. (loosen the two strut bolts on the knuckles if you are planning to replace the strut)
  Drop the A arm down until the coil spring falls out. Its important to get the vehicle jacked up high enough and safely to allow this to happen.
 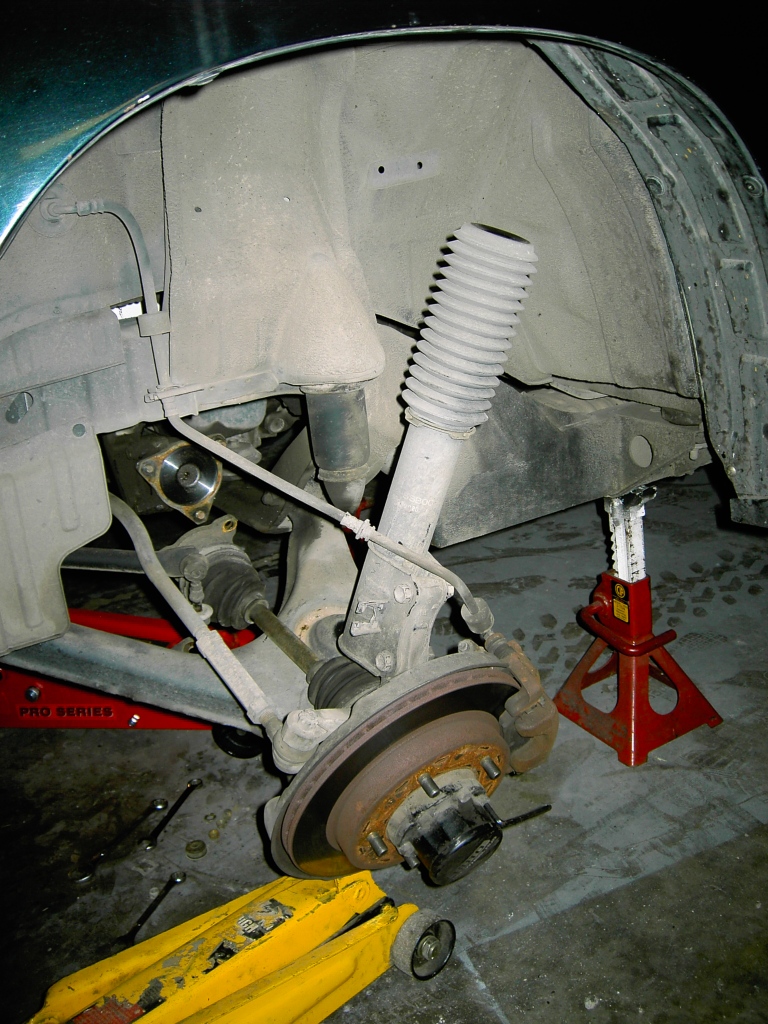 Watch the brake line! Remove the spring. Clean up the upper spring mount and slide on the coil spacer. (WD40 and a rubber mallet method again)
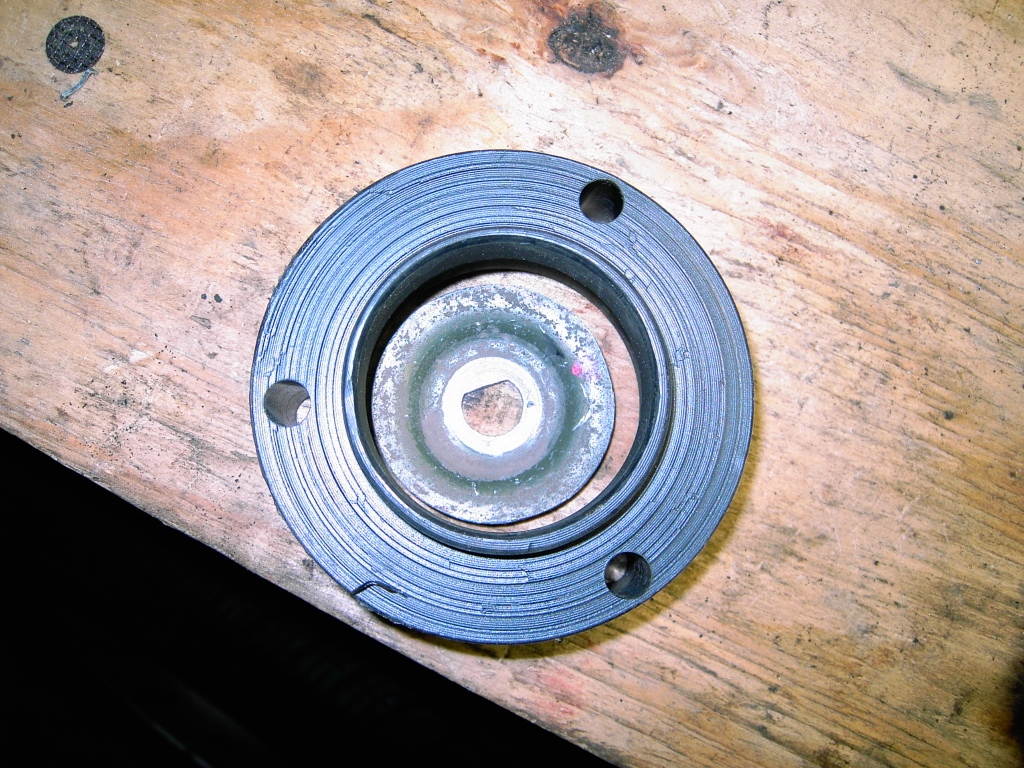
 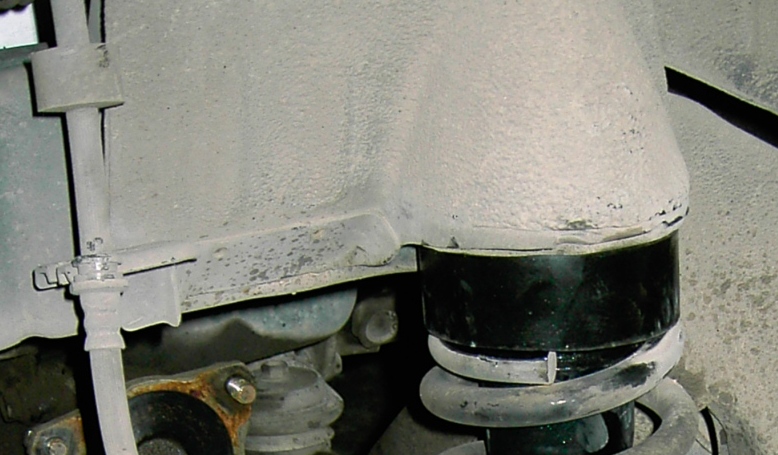 Remove the top strut mounts by removing the 3 nuts on the strut tower. We found a clever way of pressing out the stock bolts in the strut spacer.
  Install the strut plate and bushing with the spacer back into the strut tower.

If you a replacing the strut now is a good time, If not jack up the assembly into the newly spaced strut plate Note: First question everyone asks is are the KYB struts longer
we laid the struts side by side and confirmed that they are the same length as stock Suzuki  First problem. The stock top strut washers that install on the top of the strut bushing plate did not fit in the hole in the spacer
  Some quick work with a bench grinder or right angle grinder and whamo.. problem solved.

Reinstall nut on top of strut. Reinstall CV. Repeat for the other side except the cv actually has to be pried out of the front housing. Install the new tires Drop the car down and dont forget to reinstall the sway bar. then perform a quick tape measure alignment with the help from a friend until I was able to have a professional alignment done. One may have to perform some minor trimming on the bottom of the front bumper.
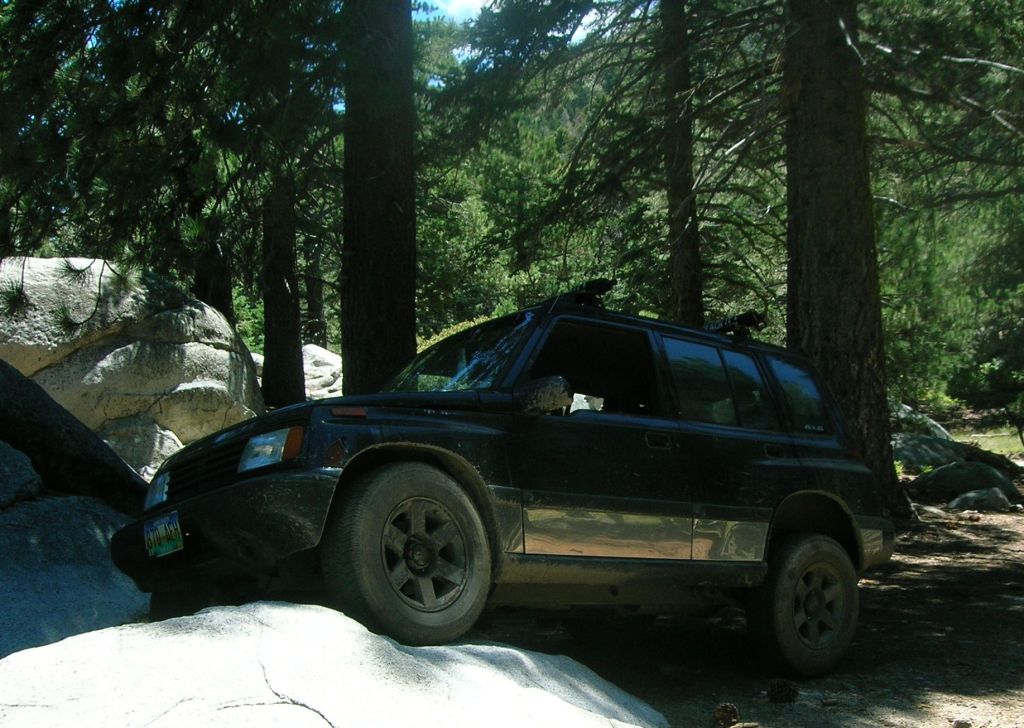
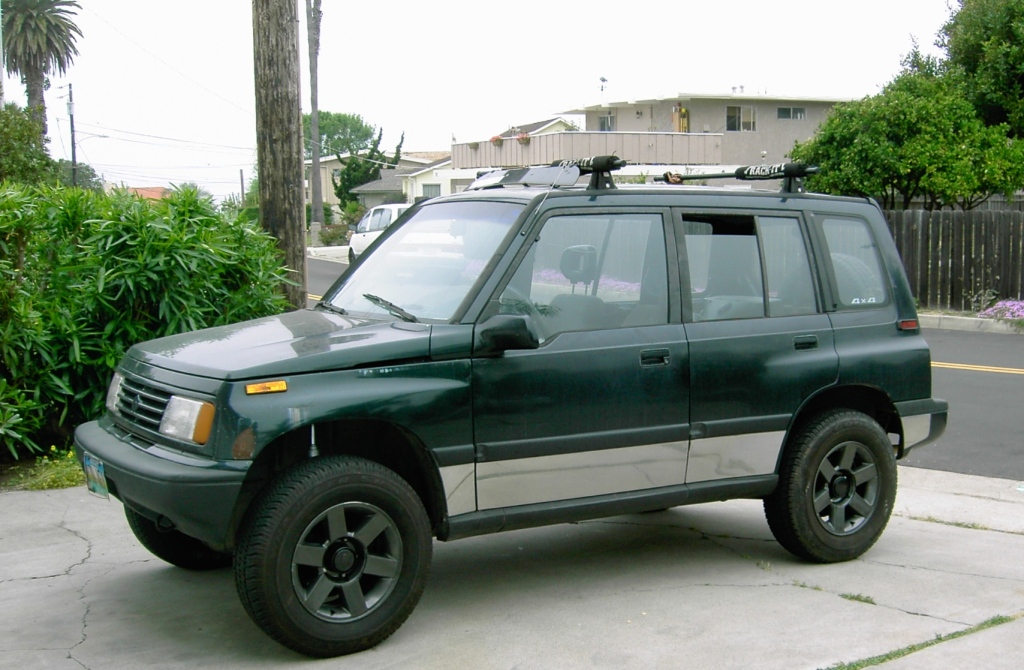
Done! So less than 2000 dollars later we have much better looking rig that is fun to drive and retains good street manners. Here is a before picture, excuse the poor quality and a picture after the products are installed.


Impressions – We have driven this setup for about 10K miles and the struts and shocks are much firmer than stock which results in much better handling. Gas mileage is consistently about 24mpg at 75-85mph on the highway. Gearing isnt effected too harshly. First is still manageable and 5th is still usable except on steep hills. We have gone on several camping trips and the 4 door really shines on gravel forest roads. Rallying is awesome with the longer wheel base and bigger tires. We did find that the P235x70R16R on the XL7 wheel actually compresses up into the rear wheel well and rubs on the rear inner fender under heavy compression. Initially I thought this was OK until I realized the edge of the fender was cutting the tread on the tires. Must have been those 1 foot whoops at high speed . After that trip I rolled the inside edge of the fender back up and out of the way. If your going to run tires this size with thick sidewall tread you may run into problems with the rear fender and you may have to extend your bump stops.