 ZUKIWORLD Online – Everything Suzuki Your Complete Suzuki Automotive Resource for Editorial, Tech, Events, Adventure, Racing, and Forum

OPERATION: ROCKSTAR
Building A Stadium Rock Sidekick On A Club Band Budget – Part 2
Editor: Eric Bewley Story/Photo: Mike Hagen
COTTAGE GROVE, MN -In our first installment of this series we posed the question How far can you go with a Trackick? In this second part we pick right back up with our builders in the shop for build days three and four. We started our day by removing our 2wd transmission and installing our 4wd trans and t-case. We decided to weld the rear axle since it was cheap and we thought a lincoln locker should be fine for an off road only vehicle. Only time will tell if this was a mistake.
Dan removed the dash while I started welding up the rear axle. 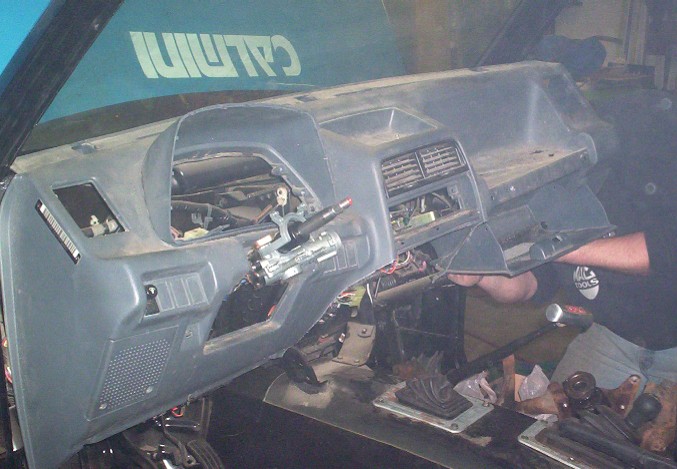 Next the heater assembly was removed to make room for the battery. The stock battery cables and under hood fuse block were then pushed through the heater hose holes
  A thick piece of insulation that was pulled off the dash was placed under the battery to prevent it from getting cut by some of the bolt heads that we there. We bought an Optima because the battery was being placed inside. The Optima is sealed and we felt safer with it. We really dont want battery acid dripping on us in the case of a rollover. We drilled 2 holes in the stock dash mounts and bolted the stock battery hold down into place. Then the fuse block was mounted and the battery was hooked up.
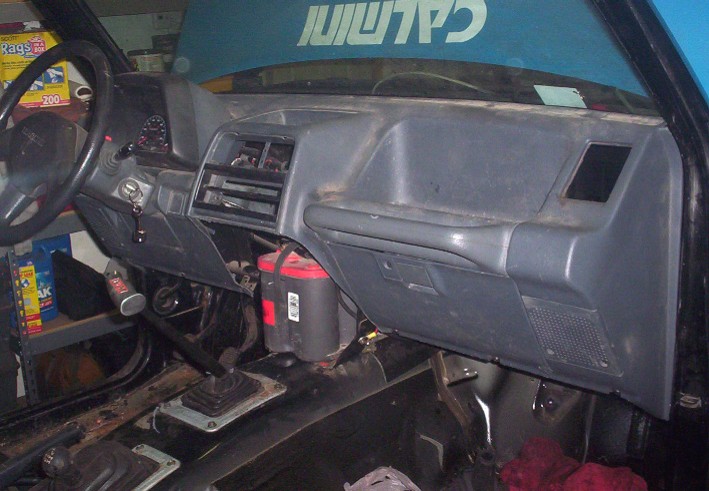
Then the dash was reinstalled.
 We are going to move the rear axle rearward far enough to fit a 4wd 4-door rear drive shaft. So the coil cups needed to be moved.
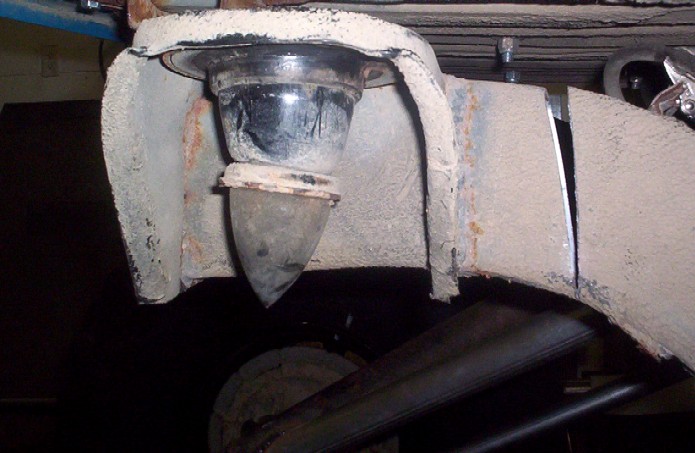
I attached the rear drive shaft to the axle and placed it where I wanted my angles to be. Then we mocked up the rear links with some pipe we had lying around.
 Then we went out back to a 4door frame we had and cut the center out of both sides for some stock frame material. Next we extended the frame to match the coil cups on the axle. At this point we called it a night
  The next day we started by capping the frame and notching the tailgate for some exhaust tips.
  Then the rear links were rebuilt with some DOM tubing to match the mockup links. With the rear pretty well wrapped up we moved to the front. The stock aluminum housing will clearly not hold up to what we plan on throwing at this rig. To try to keep costs down we are going to modify a Sami housing to fit our plan. First we removed the ring, pinion, seals and races to leave an empty shell. Then we cut the oil gallery off the bottom of the snout.
This needs to be done to clear the cross member.
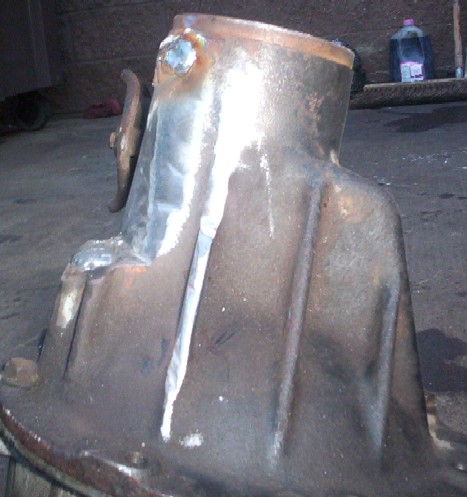
I then bolted it into the aluminum housing and mocked it up in the frame of our rig. I then slid a ½ inch shim under out pinion between the snout and the cross member. Then I was able to accurately see where the pinion mount needed to be welded. I tacked it on and removed the whole assembly so the pinion bracket could be welded on better. Also the Oil gallery holes needed to be filled.  After some grinding, welding, and cleaning we were ready to reinstall the ring and pinion. We installed a locker in a Sami carrier and assembled it in our housing.
After some debate we decided that we were not comfortable with any aluminum in the front axle. At this time we decided to stop this part of the install and order a CALMINI Anvil in the morning.
We moved on to mounting the seats. Dan scored some 5-point harness seats from a guy that drag races for real cheap. It seems that drag cars seat and belt assemblies expire and have to be replaced after X amount of years. We wanted the seats mounted so we could gauge how much room was needed for our heads and seats since our next stop is tube work.

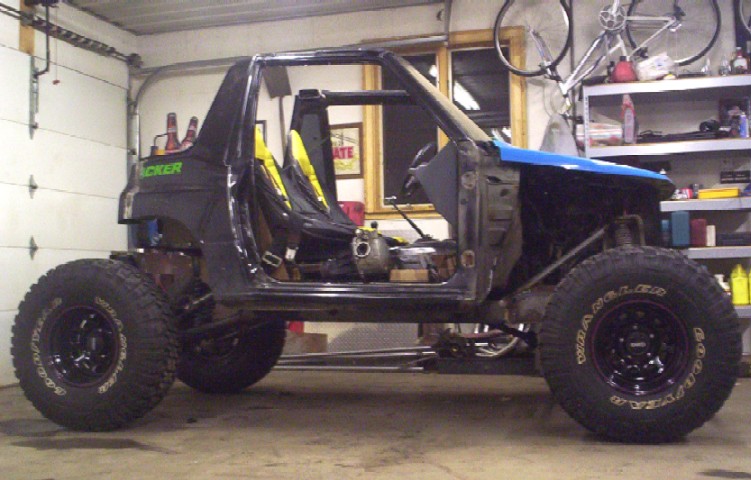
Operation Rockstar is really taking shape here in just day four of the build. The body lines are flowing nicely and will only be accented by the upcoming tube work. Click here to join the Q&A Discussion on the ZUKIWORLD Forum.
TO BE CONTINUED…