 ZUKIWORLD Online – Everything Suzuki Your Complete Suzuki Automotive Resource for Editorial, Tech, Events, Adventure, Racing, and Forum

ROCKY ROAD OUTFITTERS
ROCKSTEADY Lift Installed And Trail Tested.
Editor: Eric Bewley Story/Photo: Jason Hutchison
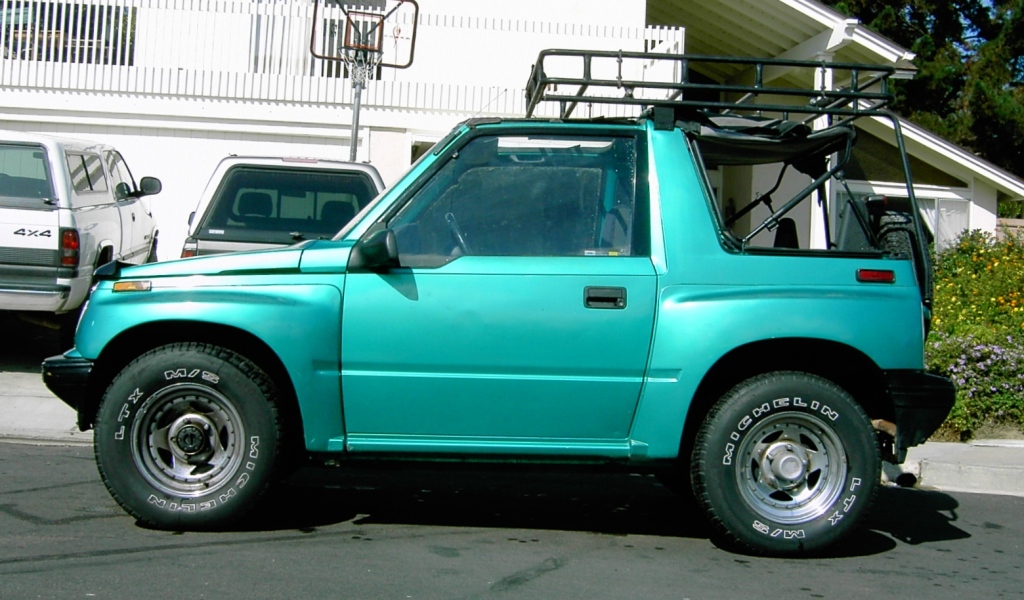
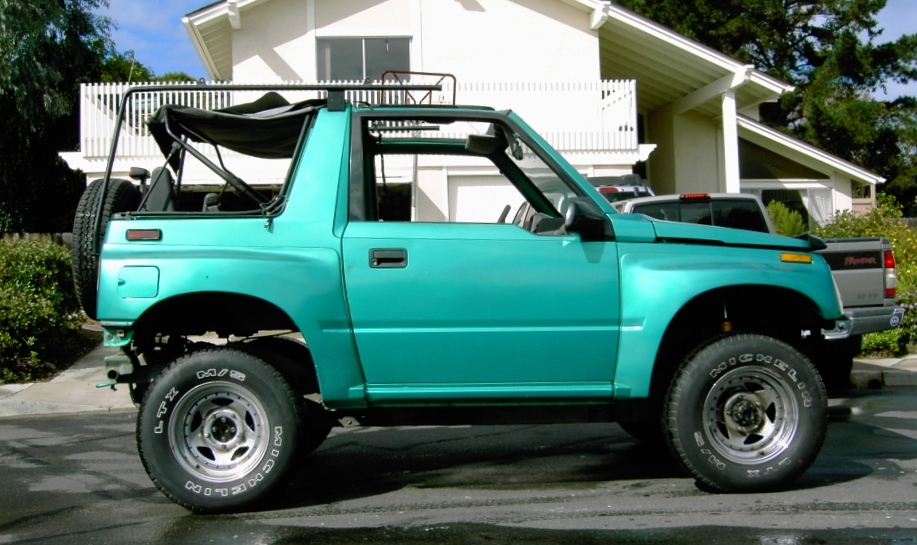
San Diego, CA -The next phase of our Suzuki Sidekick project consisted of adding a suspension lift to our recently installed 2 body lift to round out a ROCKYROAD 4.5″ Rocksteady Kit. The OLD MAN EMU 1.5suspension kit with 1 coil spacers combined with the 2″ body lift offered by SKY’S OFFROAD DESIGN gives any stock sidekick or Sidekick a total of 4.5″ of lift and plenty of room to clear 31″ tires. We opted for an extra wide tire of 11.5 inches and a heavy offset wheel (15 x 8 with 2″ of backspacing). We like the wide stable look of offroad vehicles and this Sidekick sporting this setup should look really good.
Installation was a snap. Basically follow along the with the factory service manual for the installation instructions because the kit retains all of the stock suspension components. What you get is a new set of OME coil springs, a new set of OME struts, Coil spring spacers, and a set of Doetch Tech Shocks for the rear axle.

The first section of this review we size up the OME components against the stock Suzuki parts. The last section will be a quick install summary on how we did the install and a basic overall impressions of the kit. Be sure to tighten all your bolts per the Factory Service Manual Specifications (FSM) after installation, and either replace the split lock washers with new washers or switch to nylon locking nut. (we found all of our metric fasteners readily available at our local Napa autoparts)
Component Comparison
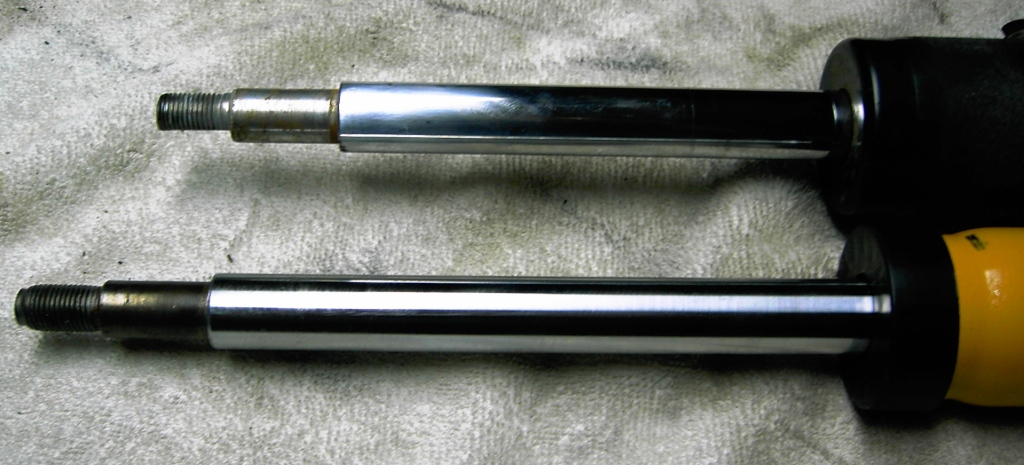
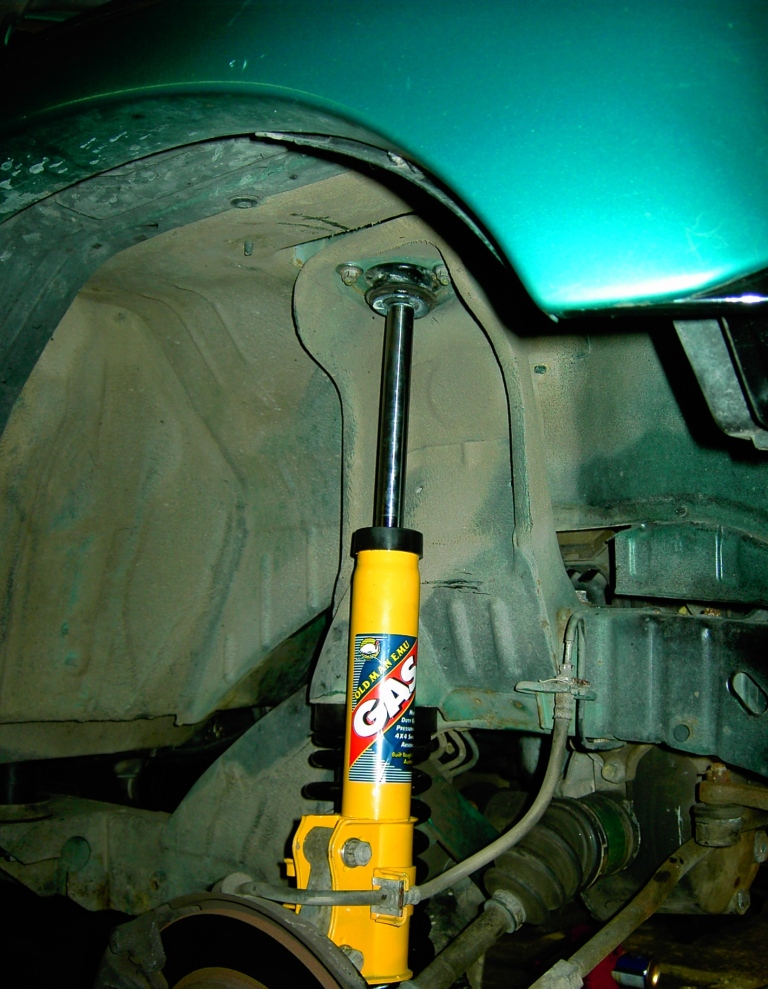
First off we took a look at the struts. We are excited to run OME struts to see if all the hype is true in regards to excellent handling and smooth operations. Overall the struts look pretty similar to stock. We did notice that the struts are definitely longer than stock which should provide additional down travel of the front suspension. We dig the hot yellow color too.

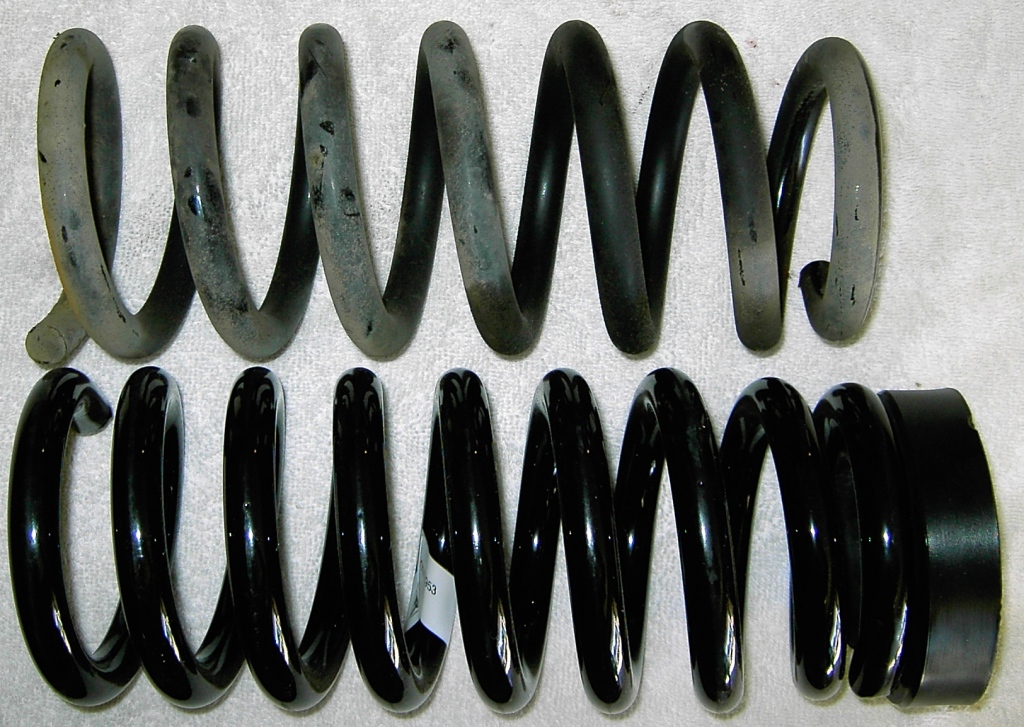
Here is the beauty of running OME springs. They offer a variety of spring rates so you can dial in the suspension to your preference. If you don’t intend to run aftermarket bumpers, winch and all the accessories then a light duty spring might just be the ticket for you. We opted for the heavy duty springs because we fully intend to equip this vehicle with all of the essentials. Another consideration that should be made is tire and wheel width. The front suspension on these vehicles acts as a lever which is different from a standard solid axle set up. The wider out the front tire is the more leverage there will be, thus resulting in more compression of the spring. Once you have your plan together, give Rocky Road a call to discuss your project. The technicians will be happy to assist you with your spring selection for your project.
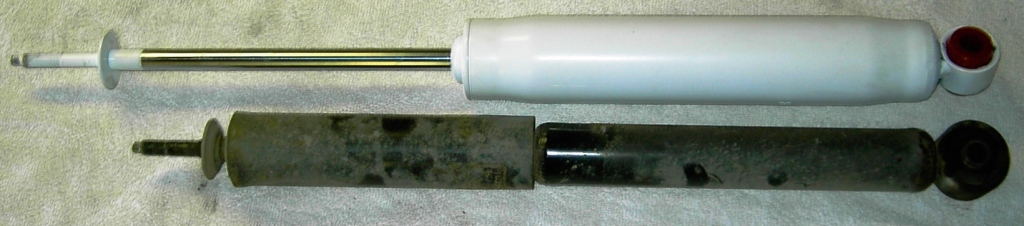
Doetsch Tech Shocks are widely known as having excellent ride characteristics. We were stoked to see that the RockSteady kit came with top quality shocks to round out the package. When comparing these shocks to the stock shocks we can see approximately 3 inches of extra length This should provided our kit with just a bit more of down travel.

Any offroad project consists of considerable talk and consideration around tire selection, application, size, and well,, just how darn cool they look. We searched resource after resource. Looking for the best deals. We even tried ebay but it always seemed like somebody out there wanted to pay a little more for the tires than us. We then stumpled across the 4 WHEEL PARTS WHAREHOUSE deal on the the Super Swamper LTB. At right around 100.00 per tire this was definitely in our price range. So we ordered up 5 new swampers with a set of black rockcrawler type steel wheels. 4 WHEEL PARTS WHAREHOUSE mounted balanced and shipped 5 tires to our door for way cheaper than any of the local shops we checked.
Installation:
We installed this lift in our two stall garage with basically simple hand tools. No welding or major cutting was necessary other than some sheet metal on the inner fender well. We started with the rear axle as we were a bit hung over from the previous nights festivities and this seemed like a good place to start.
REAR SUSPENSION: Chock the front tires and jack up the back of the vehicle. We then used a set of jack stands under the rear portion of the frame to keep the back of the car elevated. Remove tires and place under the vehicle.
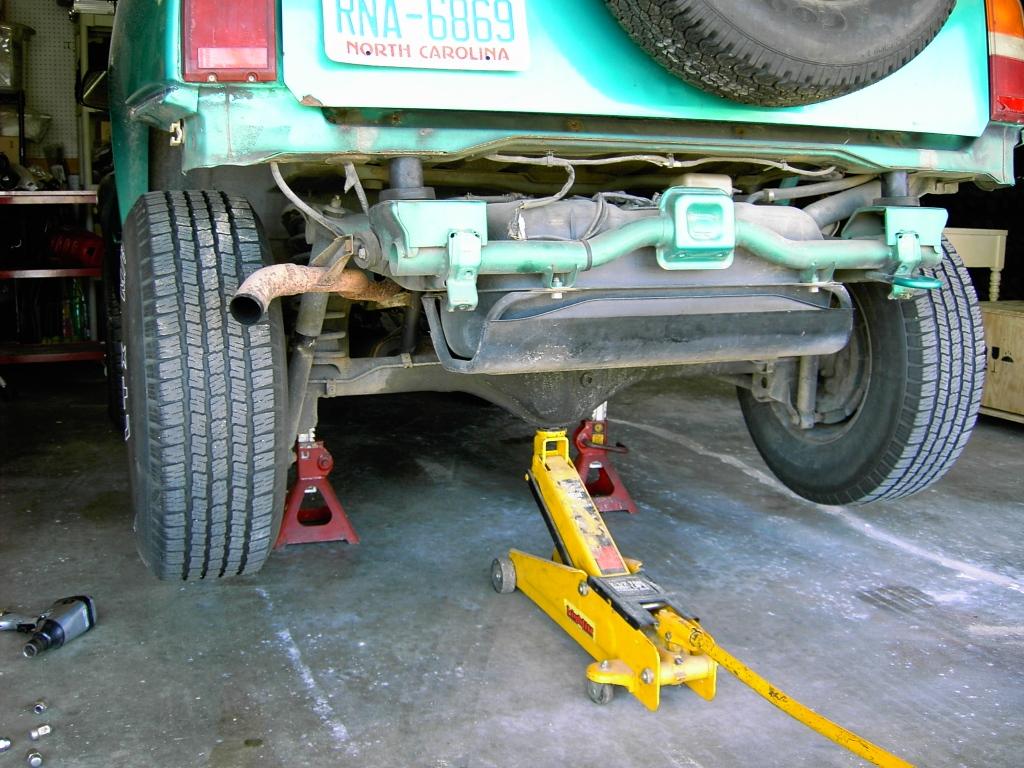
Using a jack under the rear differential we jacked up the rear axle and removed the shocks, and any of the brackets that held the miscellaneous lines in place (E-brake, breather hoses etc etc)
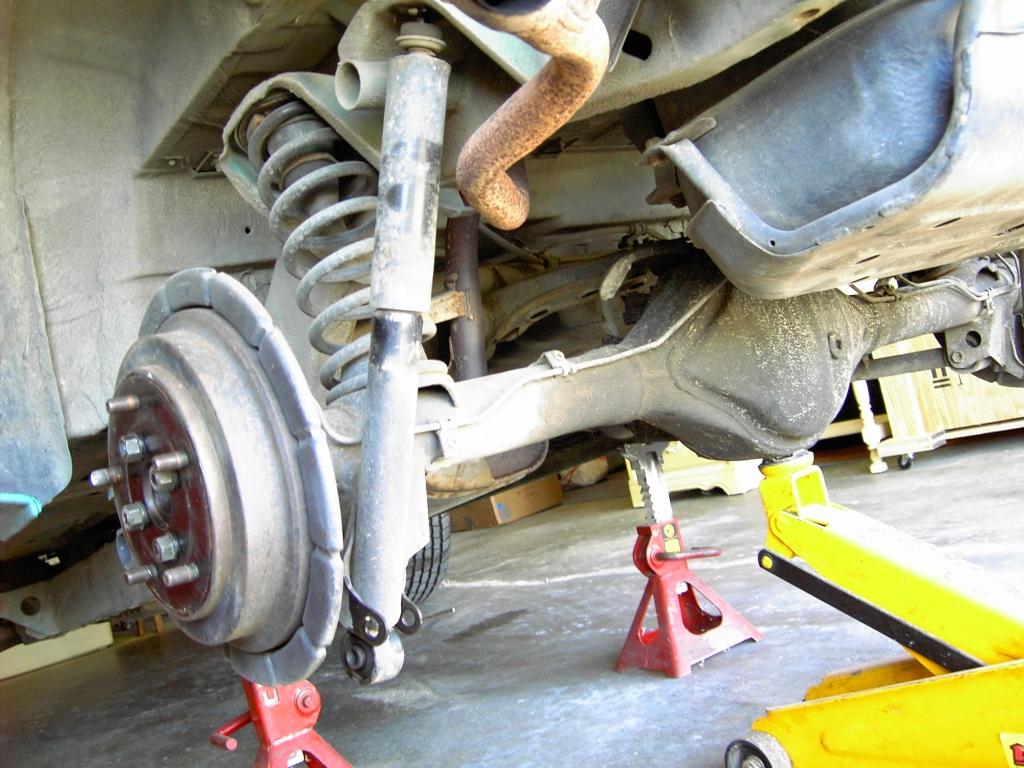
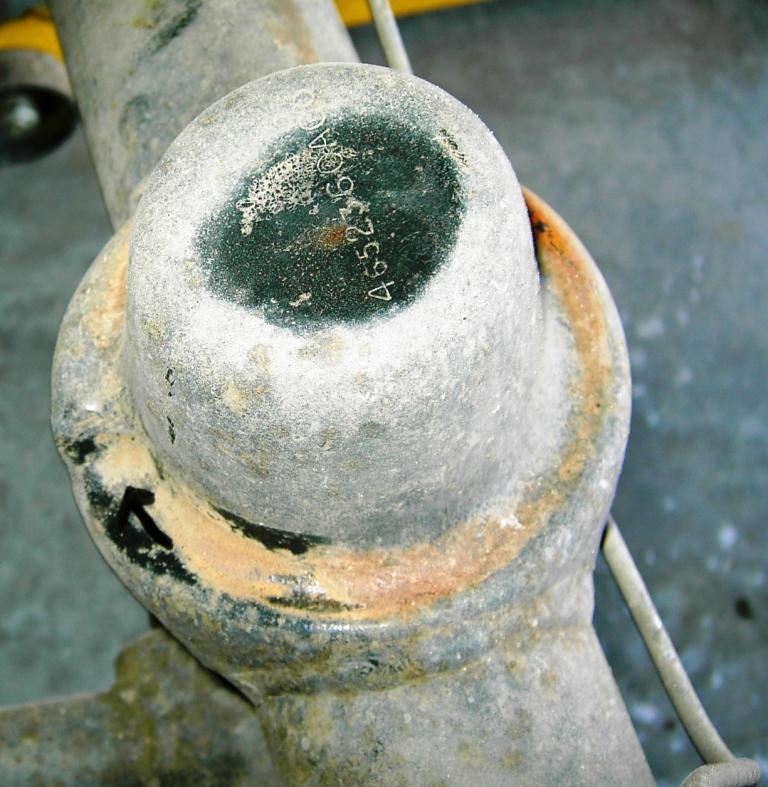
We then let the rear axle drop all the way down. The upper ball joint will limit the downward travel. The stock coil springs will almost fall out at this point
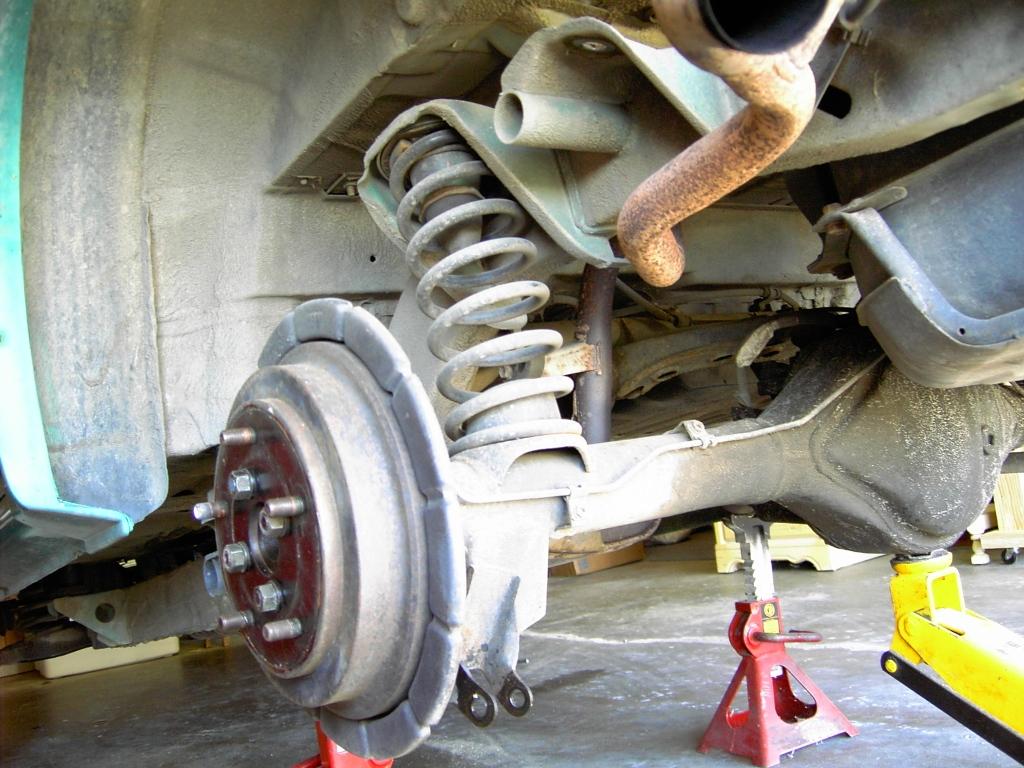 Remove both rear coils and clean up the bump stop and the coil seats on the axle.
 Next we slide the Rocky Road coil spacer up on the bump stop cone on the top coil seat. We then installed the Old Man Emu springs on one side of the vehicle. Make sure you align the spring with the detent on the spring perch on the axle.

Installing the second side by repeating the steps from the first side. You may have to push down on the axle to get the spring over the coil seat on the axle or even jack up the opposite side your installing to get enough room to install the Old Man Emu springs and Rocky Road coil spacers. We have done it a couple times now with the OME springs and can just let the rear axle hang while we muscle the springs over the lower coil seats onto the axle seat.
 Install the shocks by inserting the top of the shock into the factory mount on the frame. The ROCKSTEADY kit comes with new bushing for the shocks so the stock equipment can be discarded. We saved the jam nut from the top of the factory shocks and installed it on the top of the new Doetsch Tech Shocks since the set up
  Jack up the axle until the lower shock mount comes into alignment. Be sure to install the metal sleeve through the shocks lower poly bushings We recommend using a fresh lock washer on the reused stock shock bolts or switching to a nylon locking type nut.
 Recheck all of the bolts and tighten per FSM.
Reconnect all your brackets to properly locate the axle breather hose, break cables and any of the other items that may have been loosened in preparation.
FRONT SUSPENSION: Just like the rear suspension jack the car up and set it up with jack stands to suspend the front end a good distance off of the ground. Be sure to chock the rear tires

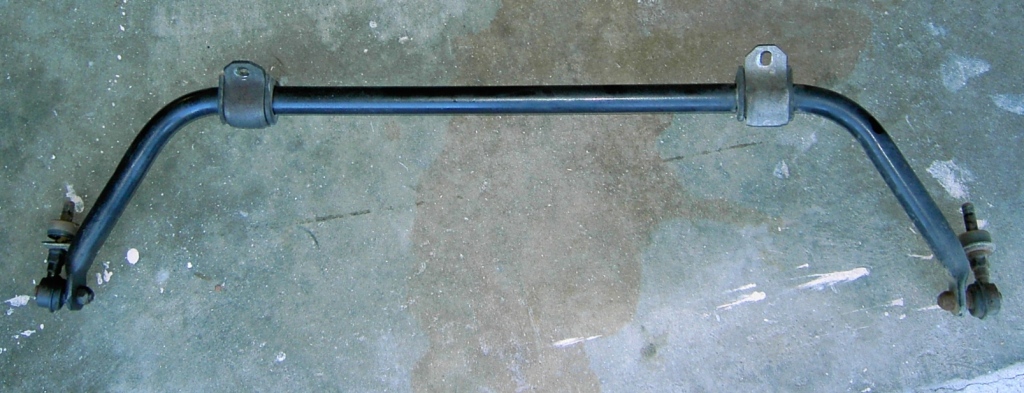
We elected to take off the sway bar completely. Make sure you reinstall the bottom nut onto the suspension bolt. (If you do a lot of pavement driving you may want to reinstall this to limit body roll)
Remove the brake line clips to allow the line to stretch freely 
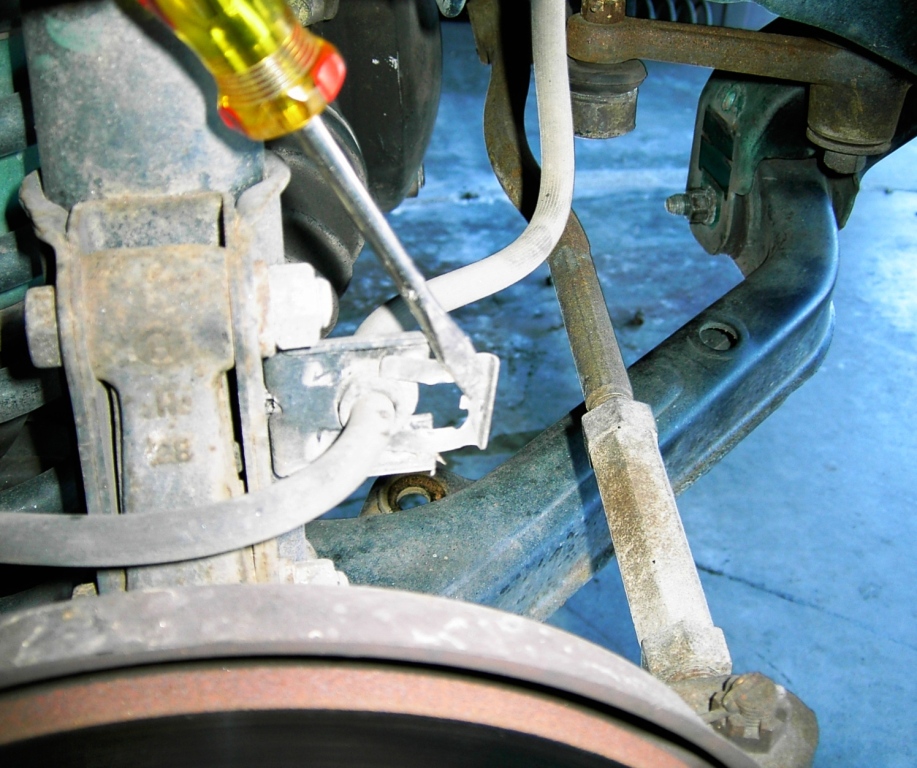
Remove the lockout hub and take off the snap ring that secures the CV axle location in relation to the spindle (this will allow the axle to slide back under full drop and not limit the suspension.


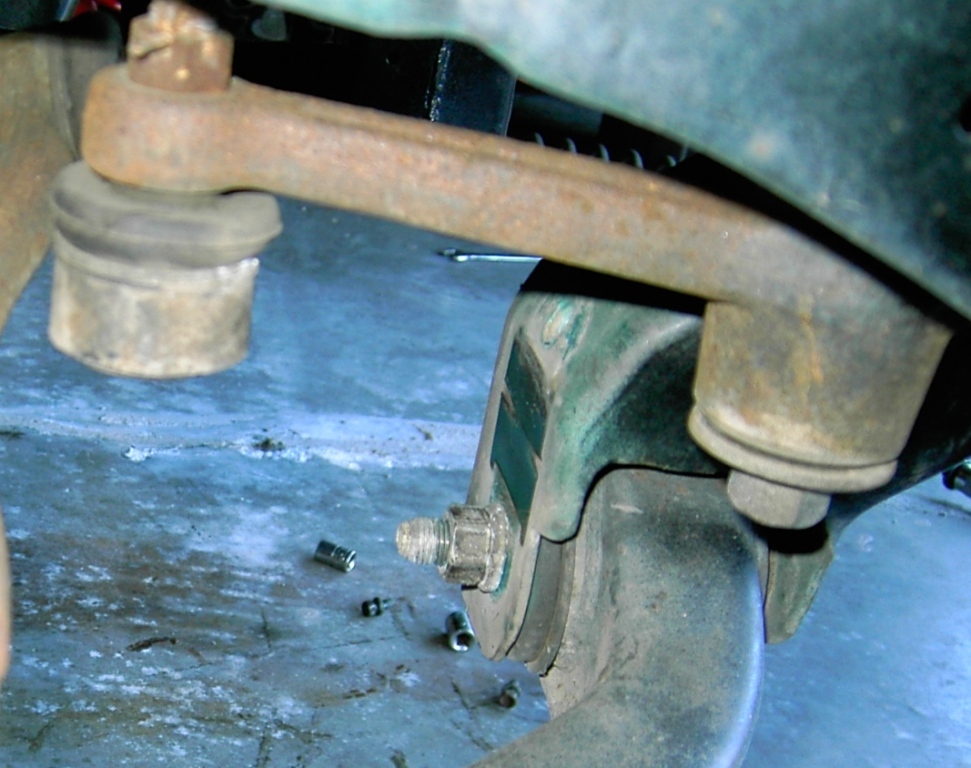
Disconnect the tie rod by removing the nut from the ball joint and extracting the ball joint from the steering knuckle. Position the jack under the front suspension and jack up the suspension up until level to relieve any tension. (Once removed tuck this out of the way. A bungy cord is helpful)
 We elected to remove the CV’s from the inner axle housing.
– On the Driver side remove the 3 bolts that connect the CV axle to the intermediate shaft.


– On the Passenger side we used a small pry bar to pop the inside cup of the CV axle away from the housing. (It may help to jack up the suspension so it is level and pry as the suspension is lowered. )
 Loosen all of the strut bolts but dont remove completely. (you will have to remove the air filter on the driver side to do this)

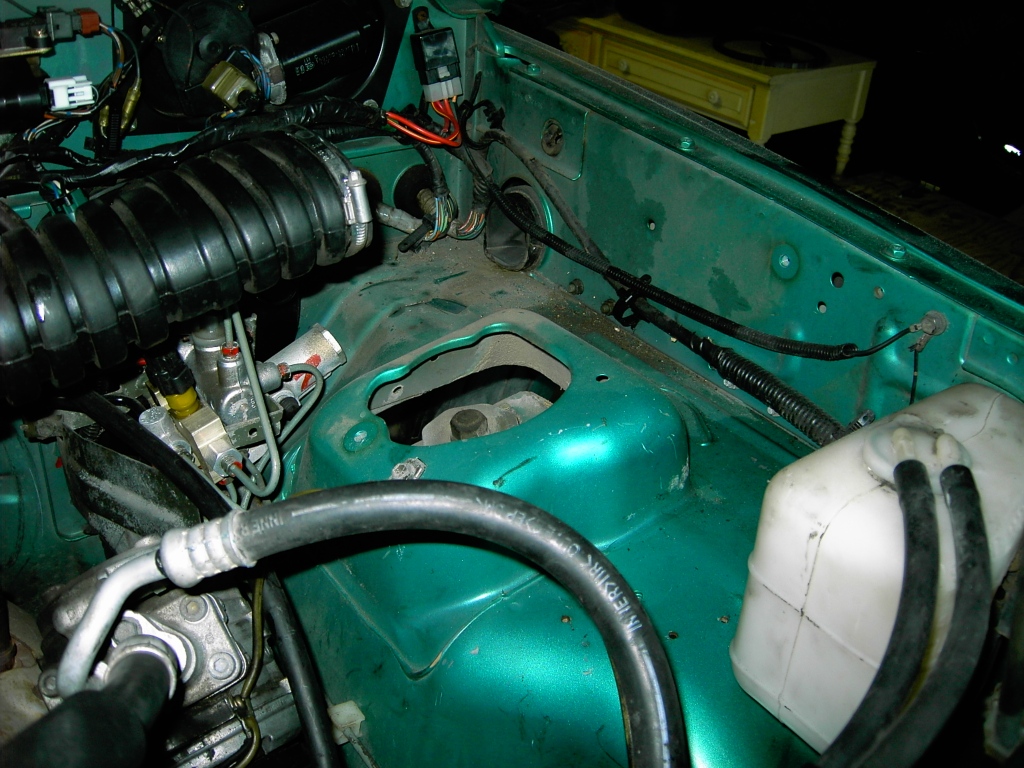
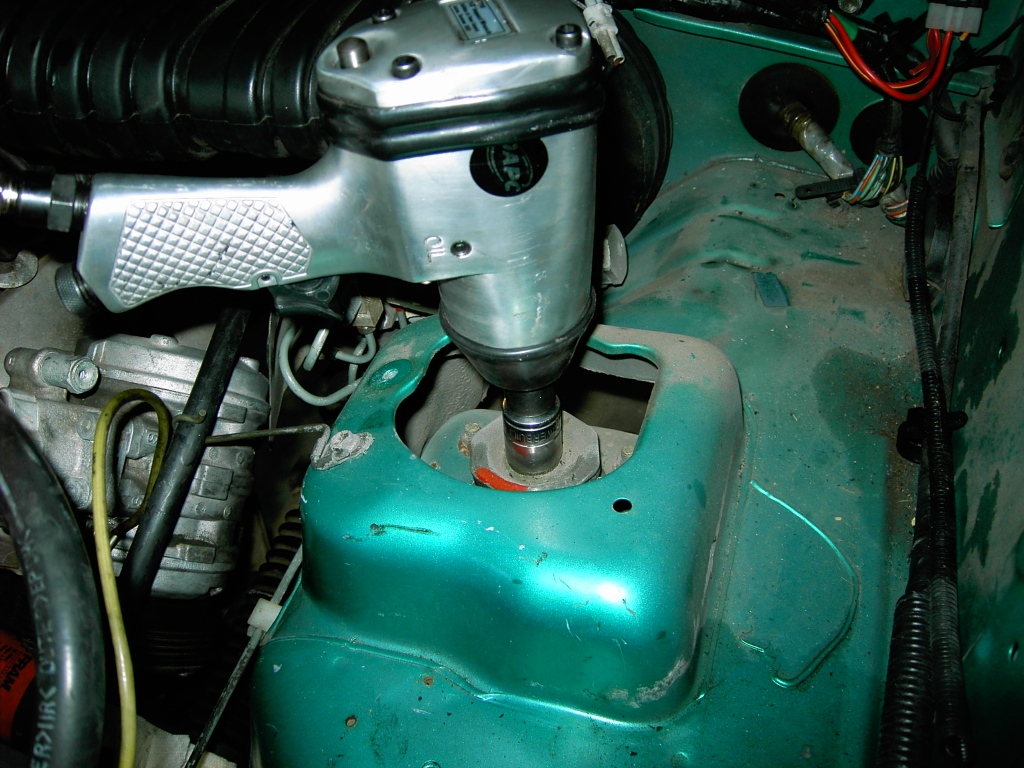
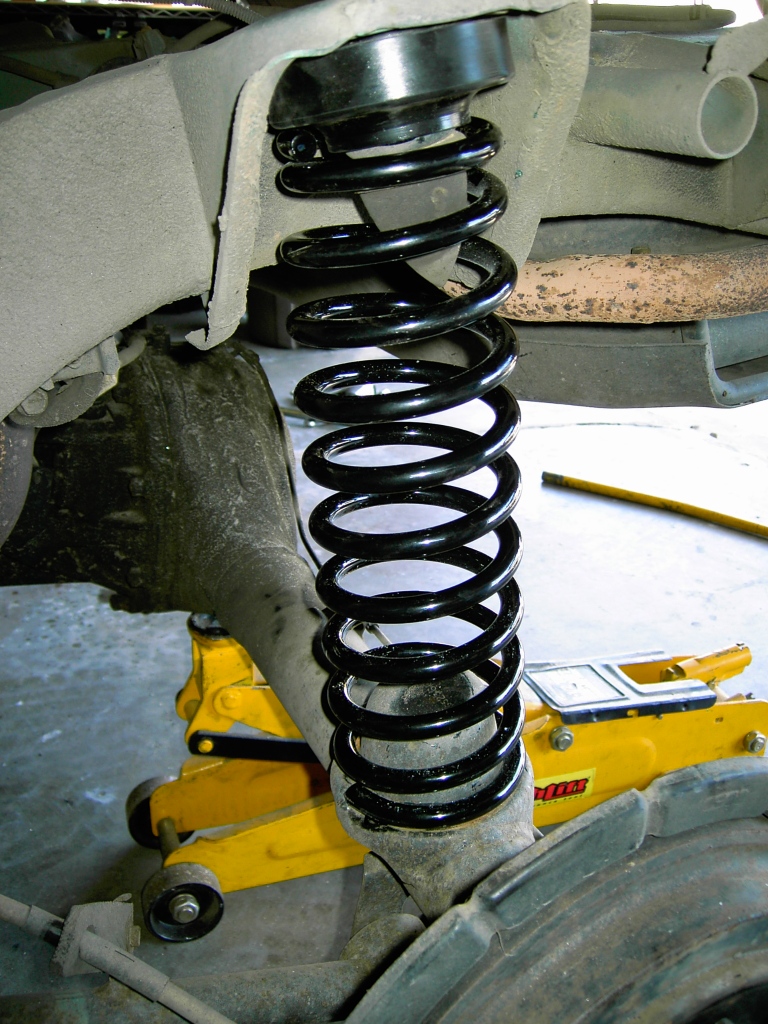
Raise the suspension with a floor jack. Remove the top strut nut and slowly lower the suspension with the jack. Grab the top of the strut as you lower the suspension and BE CAREFUL of the coil spring. They are under a large amount of compression.

Once the suspension is lowered all the way the front A arms will have considerable droop. (This is the reason we recommend suspending the front of the car up a considerable amount to allow for the suspension droop)
 The coils spring will pop out of the lower suspension coil spring pocket.
Support the Steering knuckle with a bungy cord or ratchet strap to keep the knuckle from stressing the brake line. Remove the factory strut and replace with the Old Man Emu strut
 Clean up the bump stop and slide the ROCKSTEADY kit coil spring spacer over the upper bump stop.
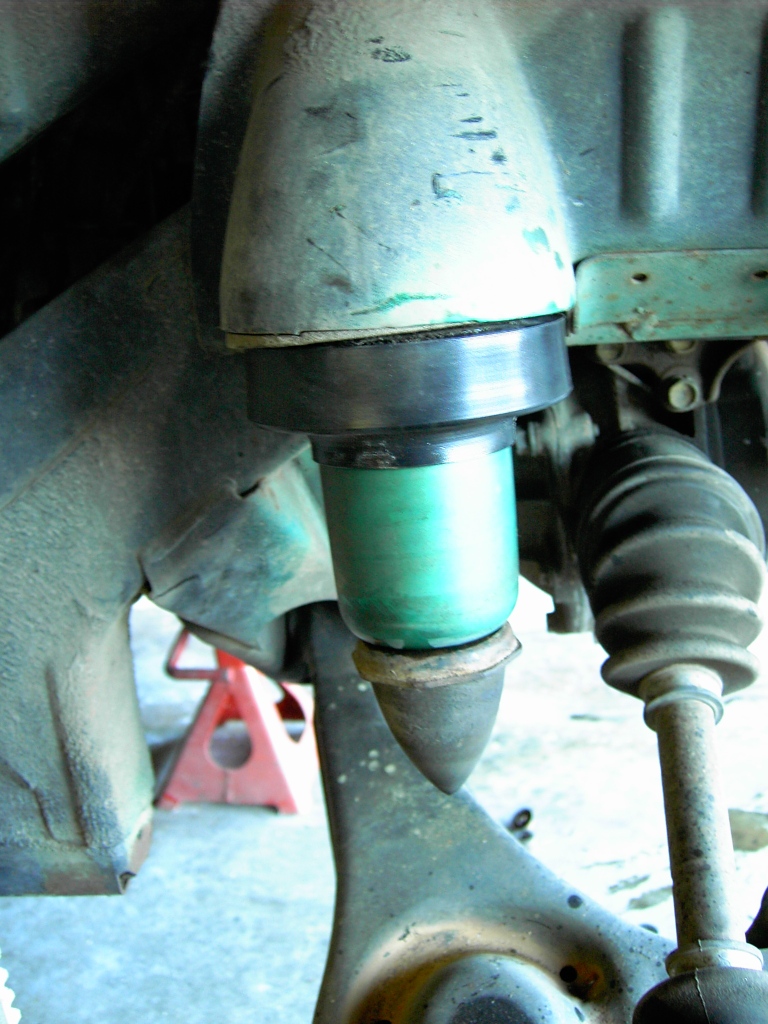 Install the Coils spring over the bump stop.
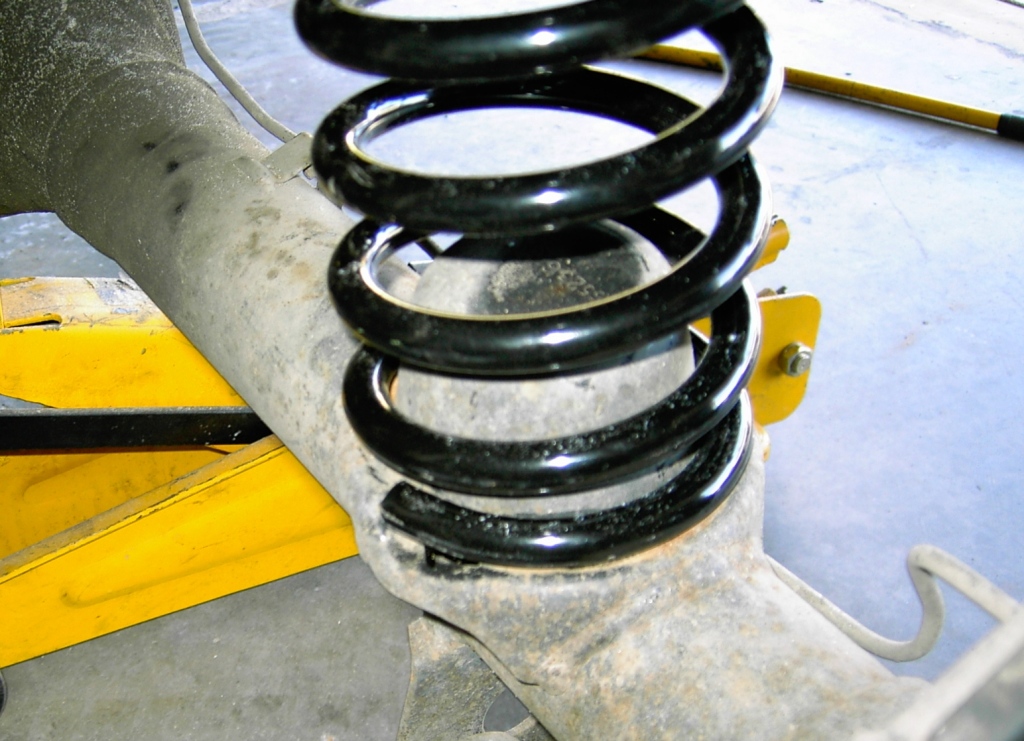
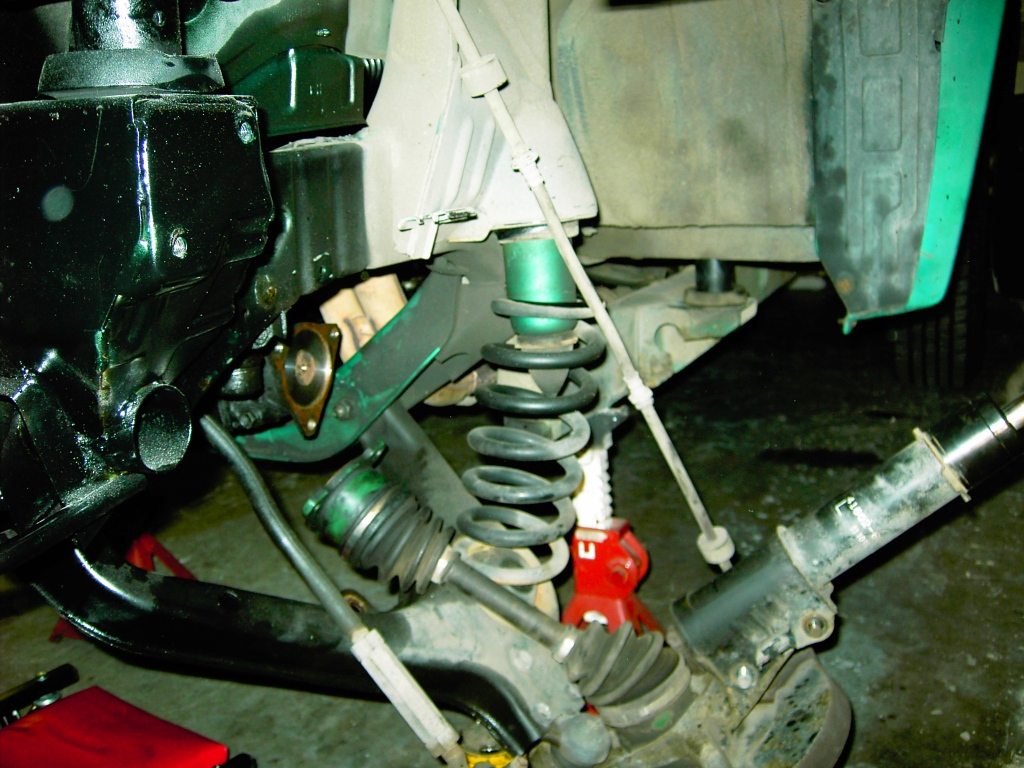
Here is the tricky part.. We took the floor jack and positioned it under the lower ball joint of the steering knuckle. We then lined up the coil spring with the coil spring bucket in the lower A-arm of the suspension aligning the pig tail into the pocket in the lower A arm. As you jack up the suspension guide the bottom of the coil making sure the end of the coil spring stays in the correct position lining up the pigtail with the pocket in the A arm. (on the passenger side you also have to guide the CV into the housing.)
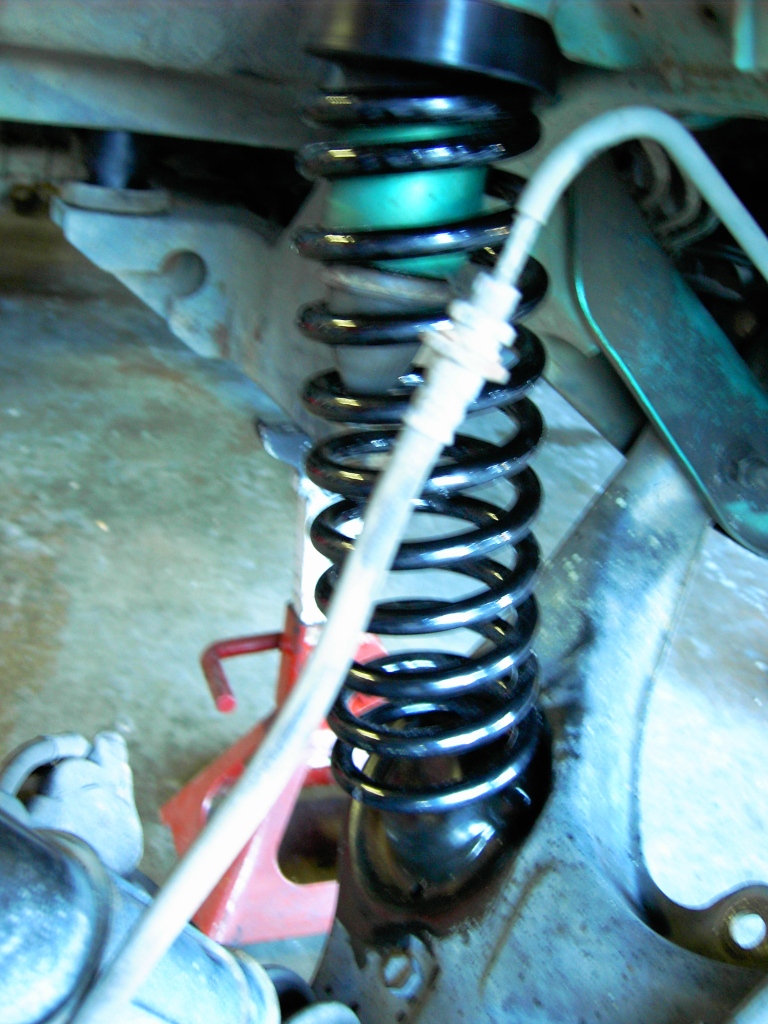 Once the coil is seated continue to jack the suspension up and guide the top of the strut back up through the hole in the strut tower mounts.
 Once the strut is seated completely in the upper mount. Install the provided nylon lock nut onto the top of the strut making sure to use the stock metal washers.
Repeat the steps for the second side.
Finish up by reinstalling all the items removed, tie rods, brake line clips, air filter etc, that where removed making sure you tighten the bolts to the FSM specifications.


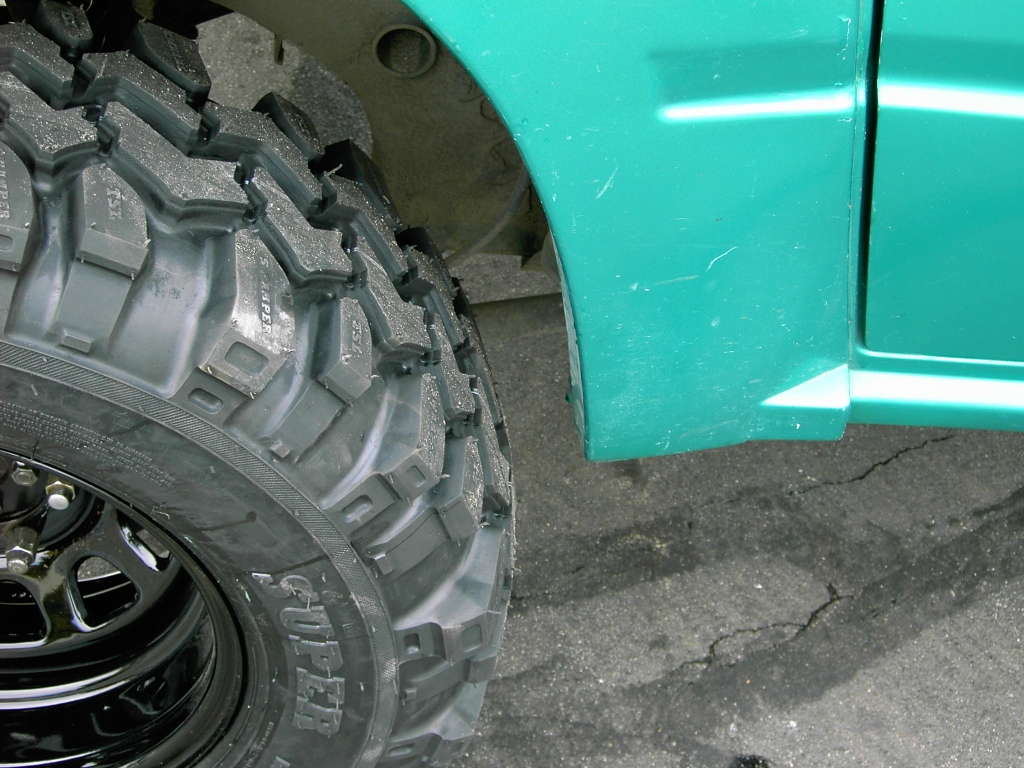
Tire Rub
Well as we suspected there was a bit of tire rub on our vehicle, We have a nonstandard situation because we have a vintage Bushwacker Wide Body fender kit on our Suzuki. With the wide body and the really wide tires, we had A LOT of tire rub when turning. Fearing this would only get worse under flex of the suspension we decided to do a Hagan widening of the front suspension as this will considerable push the front tire forward. We had been planning to do this for the advantage of only carrying one CV shaft.(you can find all the details of this in the Article Archive) So back into the garage we went. Those of you electing to not run wide tires and wheels with heavy offset should experience minimal tire rub. Here are a couple shots before and after the Hagan widening of the front end.

Driving Impressions:
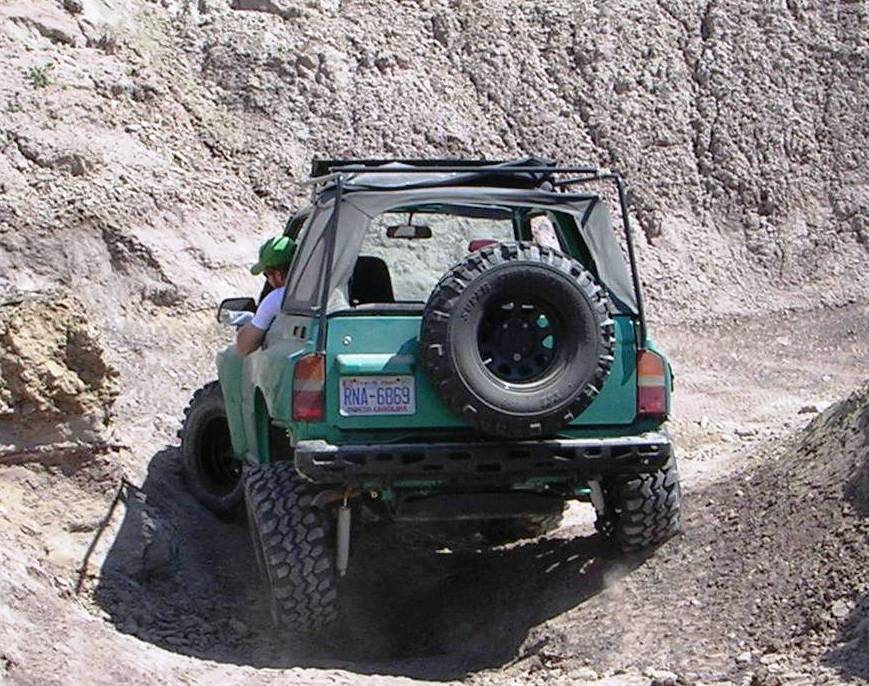
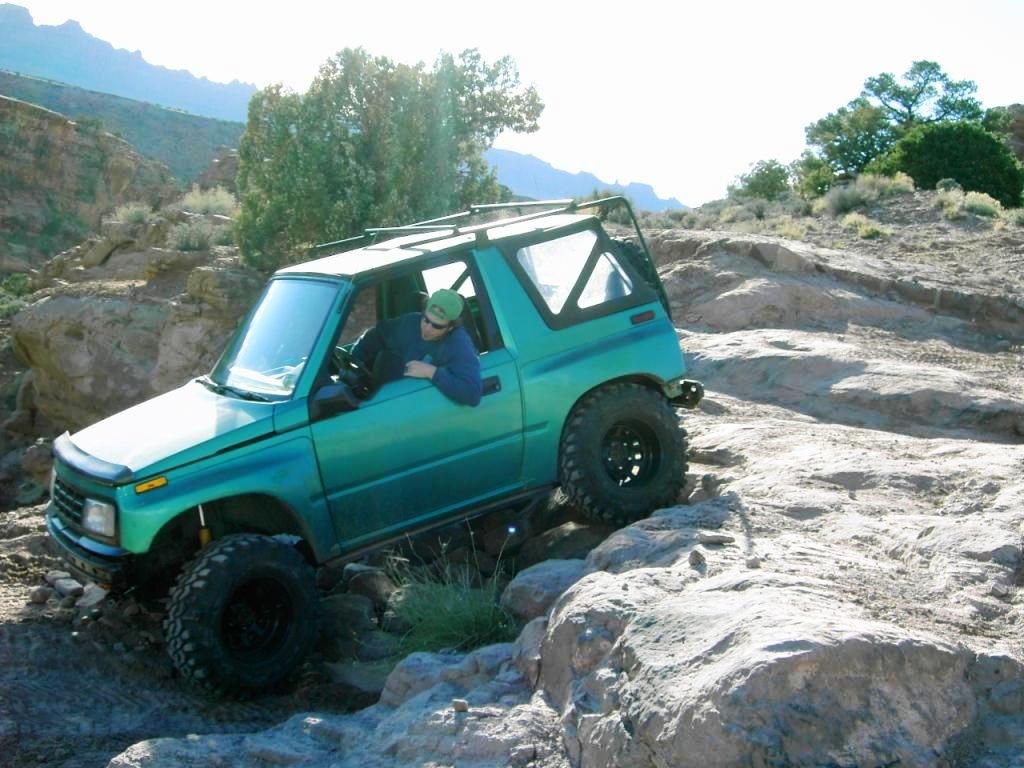
So far we have had the suspension installed for several months. The OME products are awesome. Ride is firm and predictable. We expect the car to soften a bit with the addition of bumpers a winch and all the other cool things we need for our offroad adventures. Again we selected the Heavy Duty springs if you dont plan to run all the extra gear you may want to opt for a lighter set of springs say the medium or the light springs. We had the chance to take this car to Moab and Tierra Del Sol as well as to run a lot of great trails locally. The suspension works very well and with this modestly modified Sidekick we kept up with all the big boys (The Poison Spider Customs entourage was following our band of zuks through Pritcherts Canyon 5 plus rated trail in Moab) . Sure we cant take all the hard lines but we made it through only needing a strap twice. We are sure that with the addition of a front locker would have avoided the need for anystrap! We also had a lot of opportunites to air out our little rig on some of the flatter trails. The suspension catches air and sucks up the bumps really well. The only thing we did notice was that had incurred small dents in the rear shock bodies with the axle housing. We can only imagine that this must have happened during out modest attempts to catch air in Moab. A couple minutes work with an angle grinder would prevent this from happening in the future, or you can relocate the shock a bit higher which will require some light fabrication work.


Woops should have read better the first time, sorry haha
What size tire and wheel combination did you run and was there any rubbing at full flex? I’m planning on doing the same lift and your Sidekick looks nice and stought. Thanks