 ZUKIWORLD Online – Everything Suzuki Your Complete Suzuki Automotive Resource for Editorial, Tech, Events, Adventure, Racing, and Forum

SKY’S OFFROAD DESIGN
New Bolt-On Samurai Traction Bar Kit.
Editor: E. Bewley
SPRINGFIELD, OR – Sky’s Offroad Design also know as Sky Manufacturing is always thinking of, designing, and testing new ideas and products and has recently refined one of their first ground breaking products, the traction bar for the Suzuki Samurai. As anyone who has experienced it knows, soft-short springs and large tires usually equals disaster to the springs and driveline u-joints. One of the most successful ways to eliminate this problem is to add a traction bar which is designed to reduce or eliminate axle wrap. We we’re fortunate enough to have one of their first revisions of traction bars on our original project vehicle named Wedgee back in the day. It worked miracles then, and now making the Samurai vehicle even more of an offroad performer.

Installation of this new kit is a snap. Welding skills are not required as in previous revisions making this kit more accessible than it’s predisessor and competitors product. Below are our installation instructions. Installation time should be approximately 3 hours.
A look at the complete kit laid out for inspection. 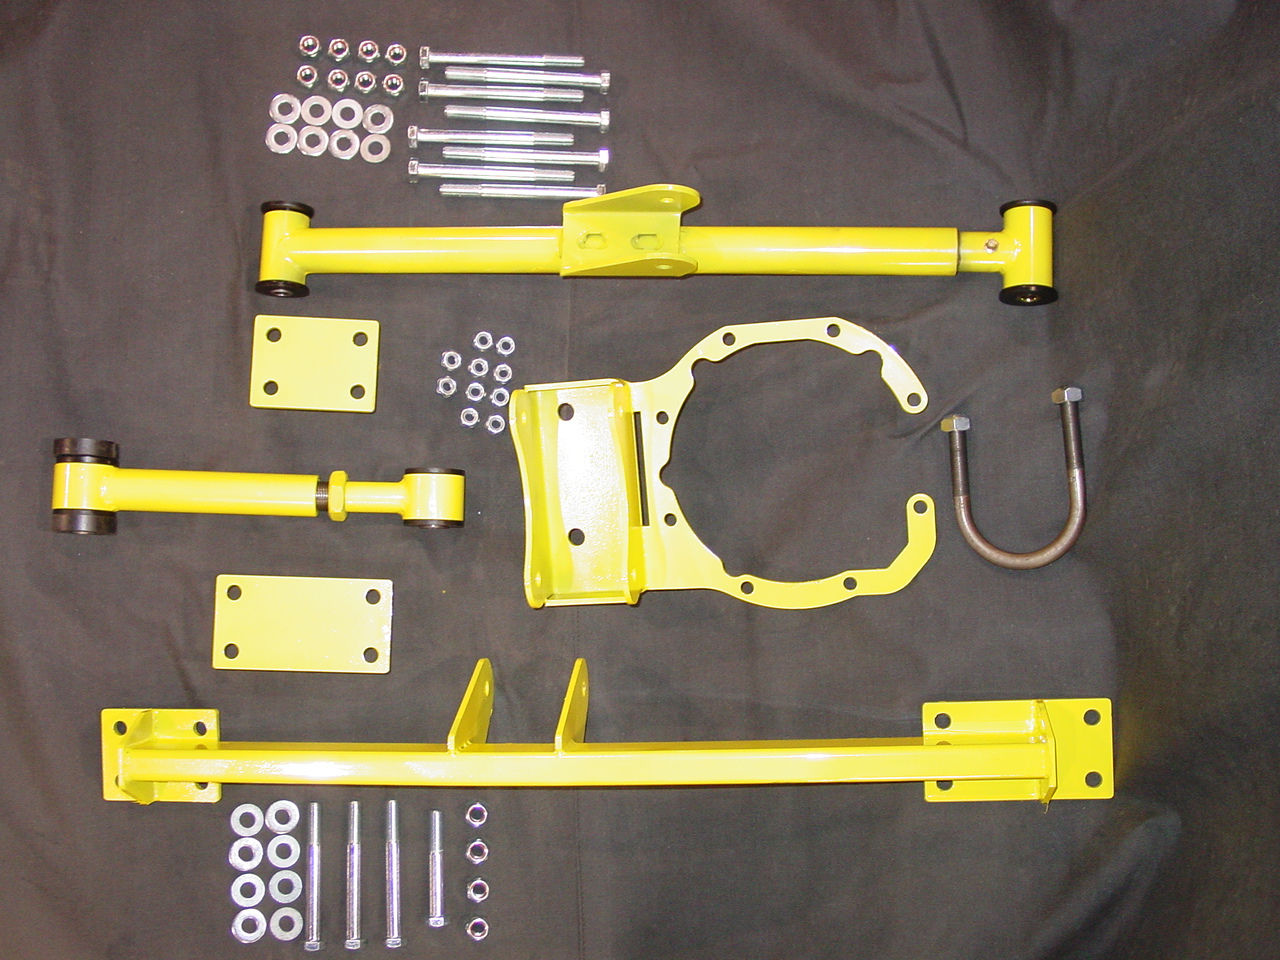 Remove the nuts and washers on the studs that hold the 3rd member to the axle housing. Install the main bracket
 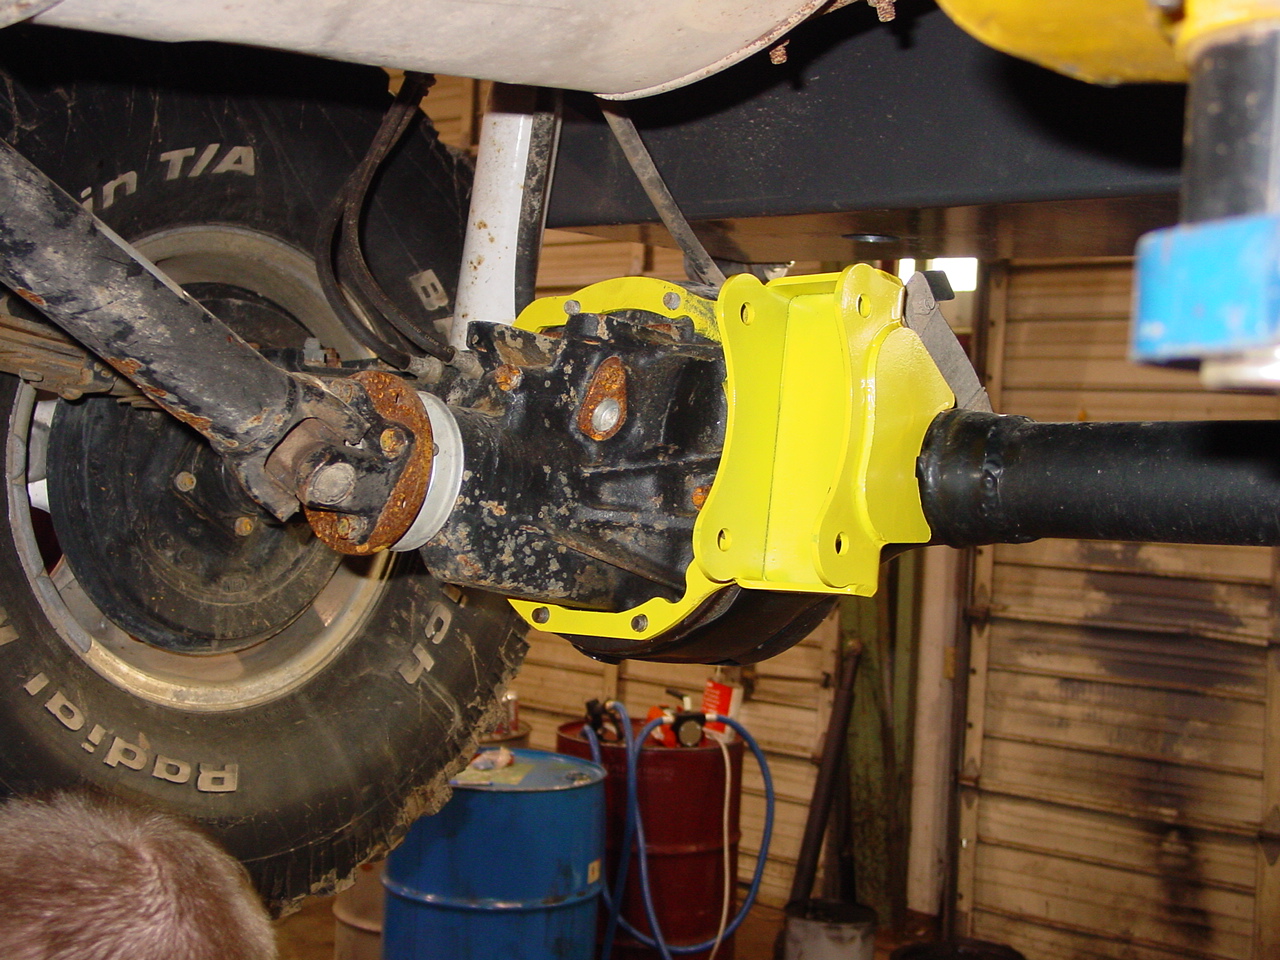 Fasten the bracket to the 3rd member using the supplied nylok style nuts.
  Modify the fuel line holder bracket on the frame as shown.
 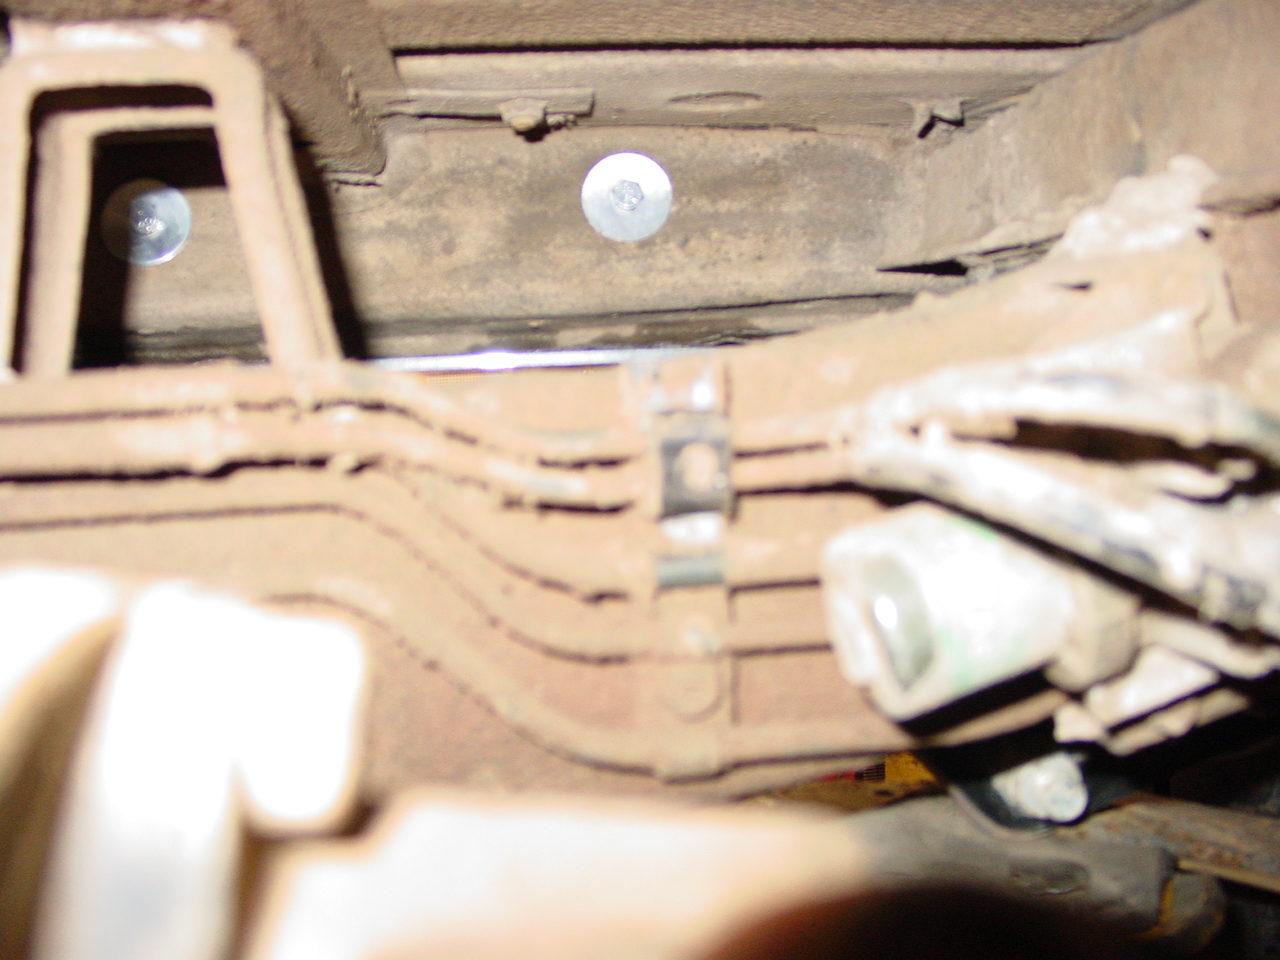 Install the upper mount crossmember into the chassis
 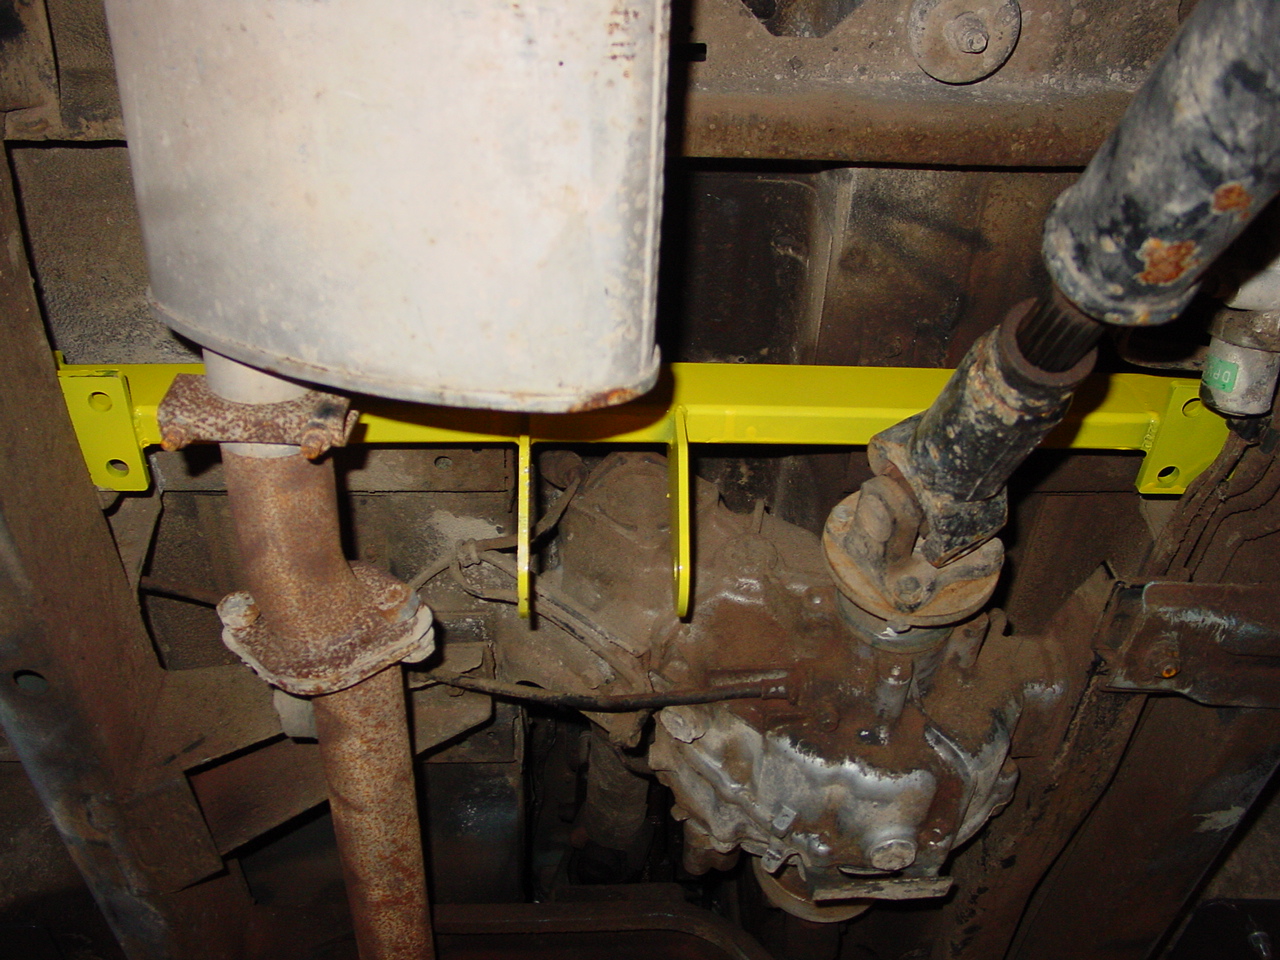 Using the supplied hardware attach the lower plates the the upper crossmember mount as shown.
  Repeat on the opposite side.
  Snug down the hardware.
  Install the supplied u-bolt as shown.
 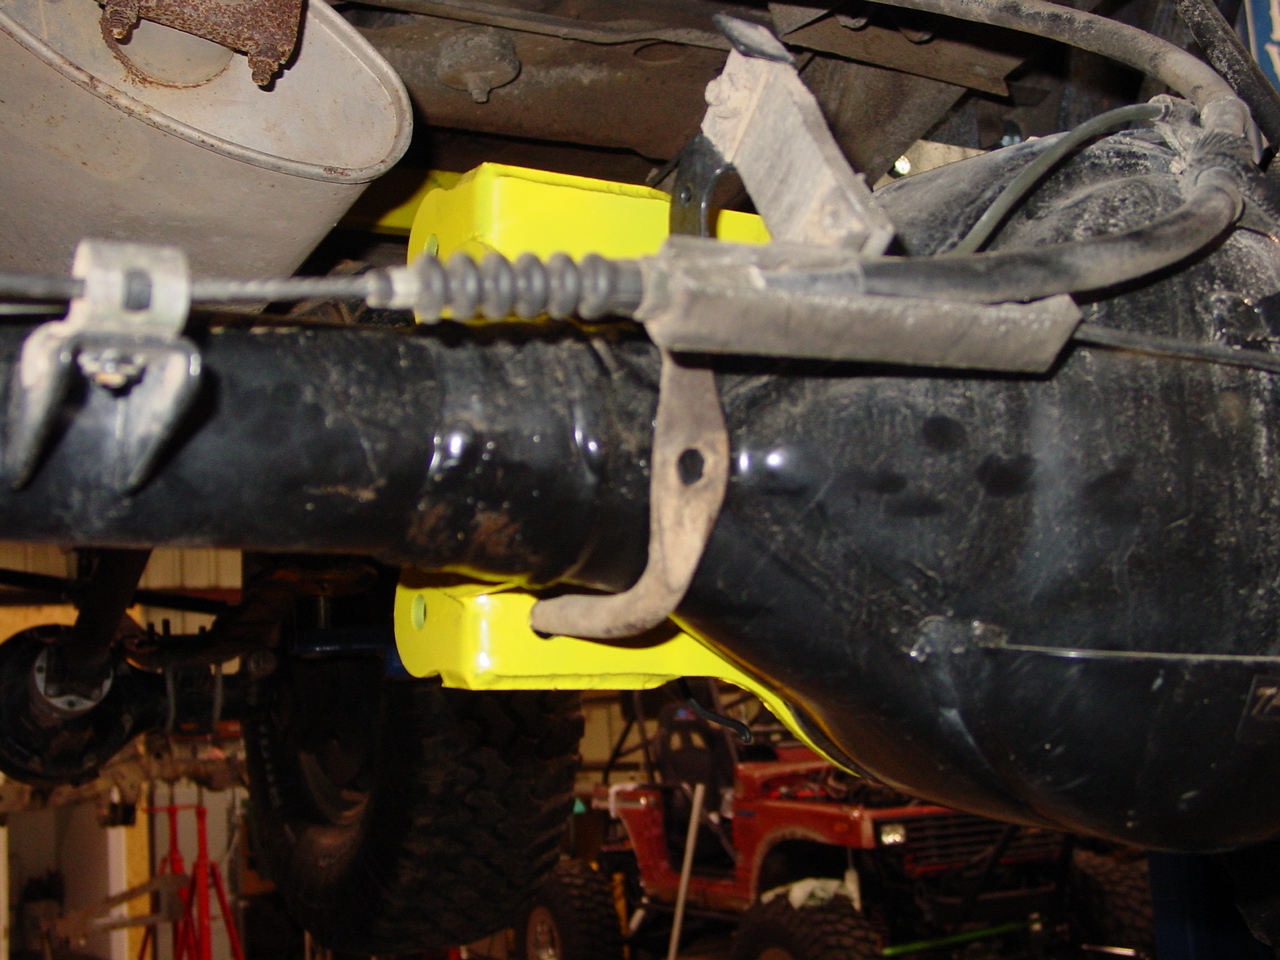 Typically with installations like this, the exhaust system will be in the way. Remove to finish installation. A new exhaust will need to be routed after installation is complete.
  Ah, plenty of room to work.
 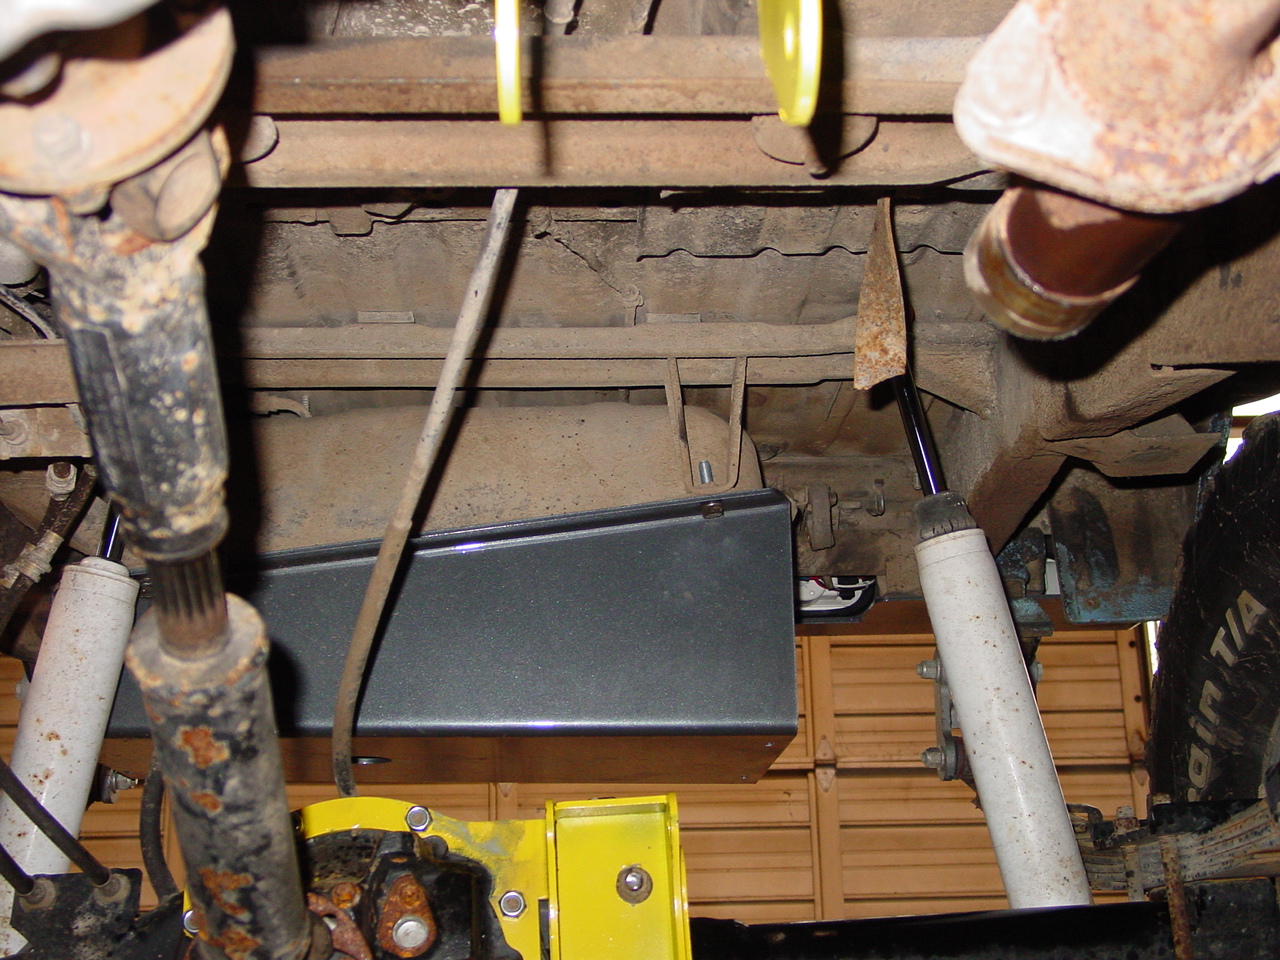 Install the lower arm as shown. Lubricate the tubing before you install.
  Install bolts, washers, and nuts hardware to the link. Do not tighten at this time.
 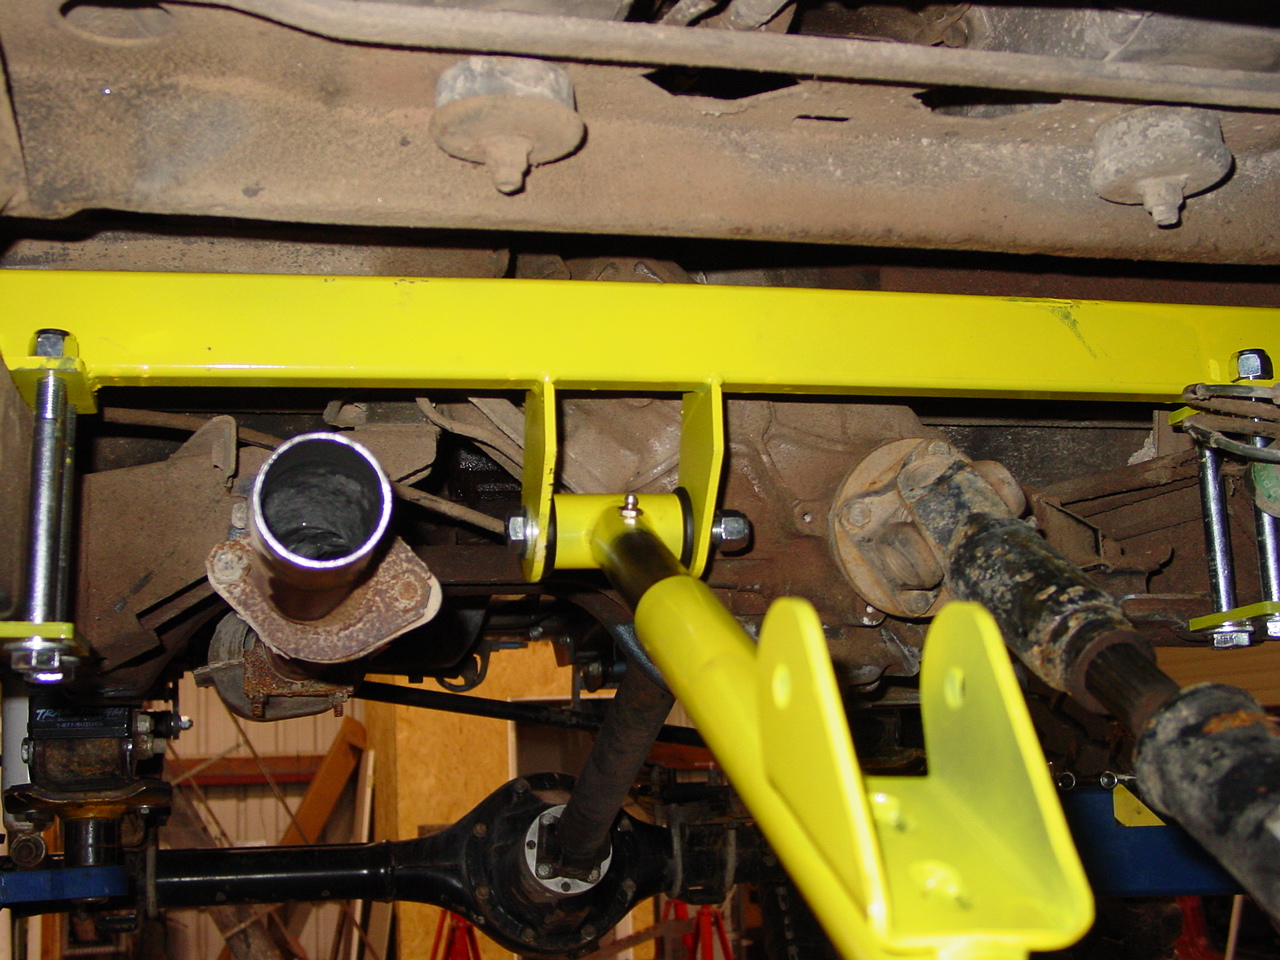 NOTE: before installing the lower link in place prepare the link by greasing the smaller tube that rides inside the larger with your favorite type of high pressure wheel bearing grease.
  Lower the vehicle so that it is setting at ride height with the vehicles weight resting on the suspension as normal. Install the upper link as shown. Adjustment to the length of this link MUST be made with the vehicle’s weight on the suspension.
 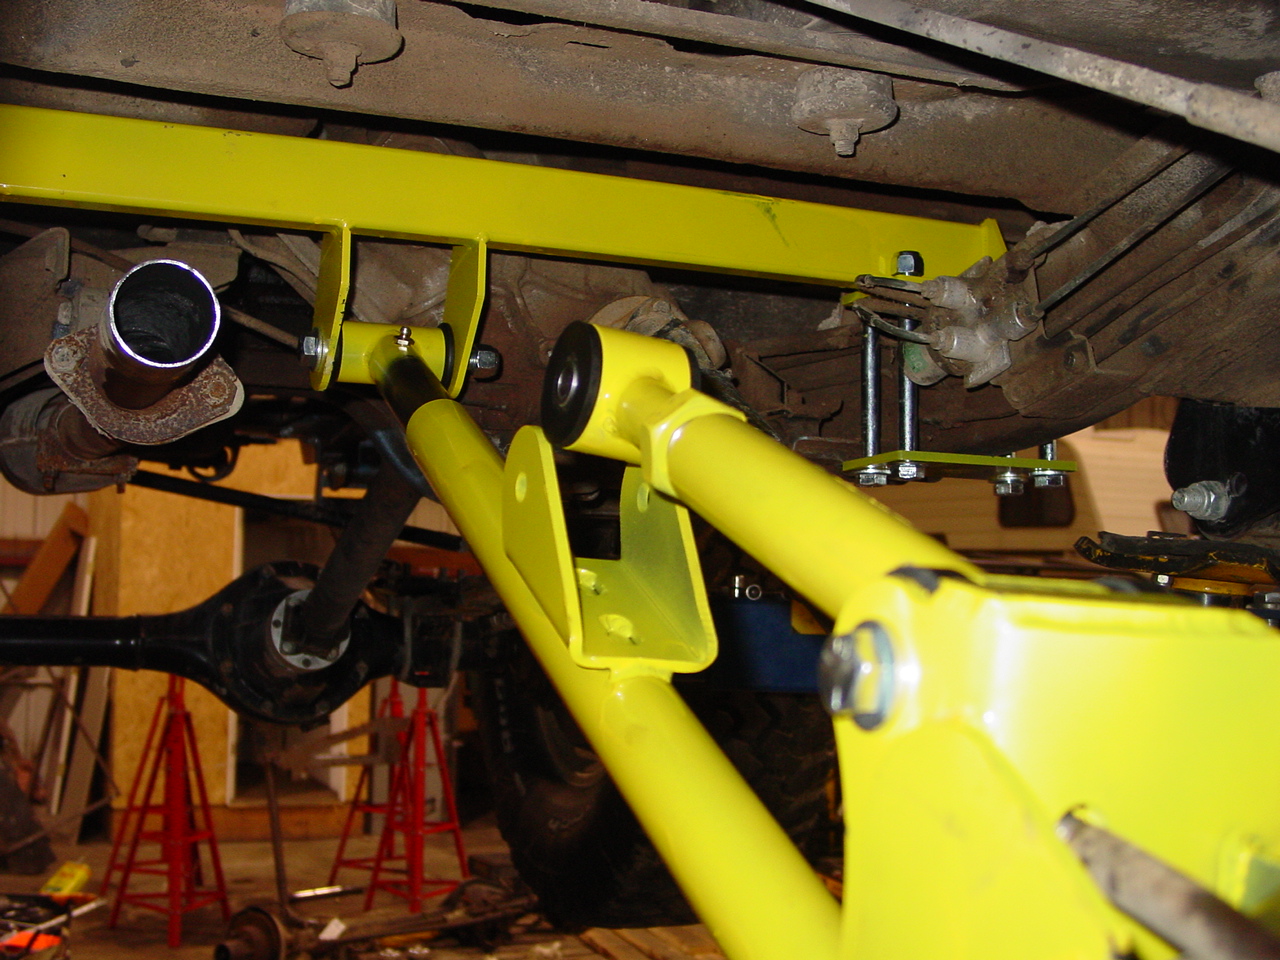 Install all bolts, washers, and nuts but do not tighten at this time.
 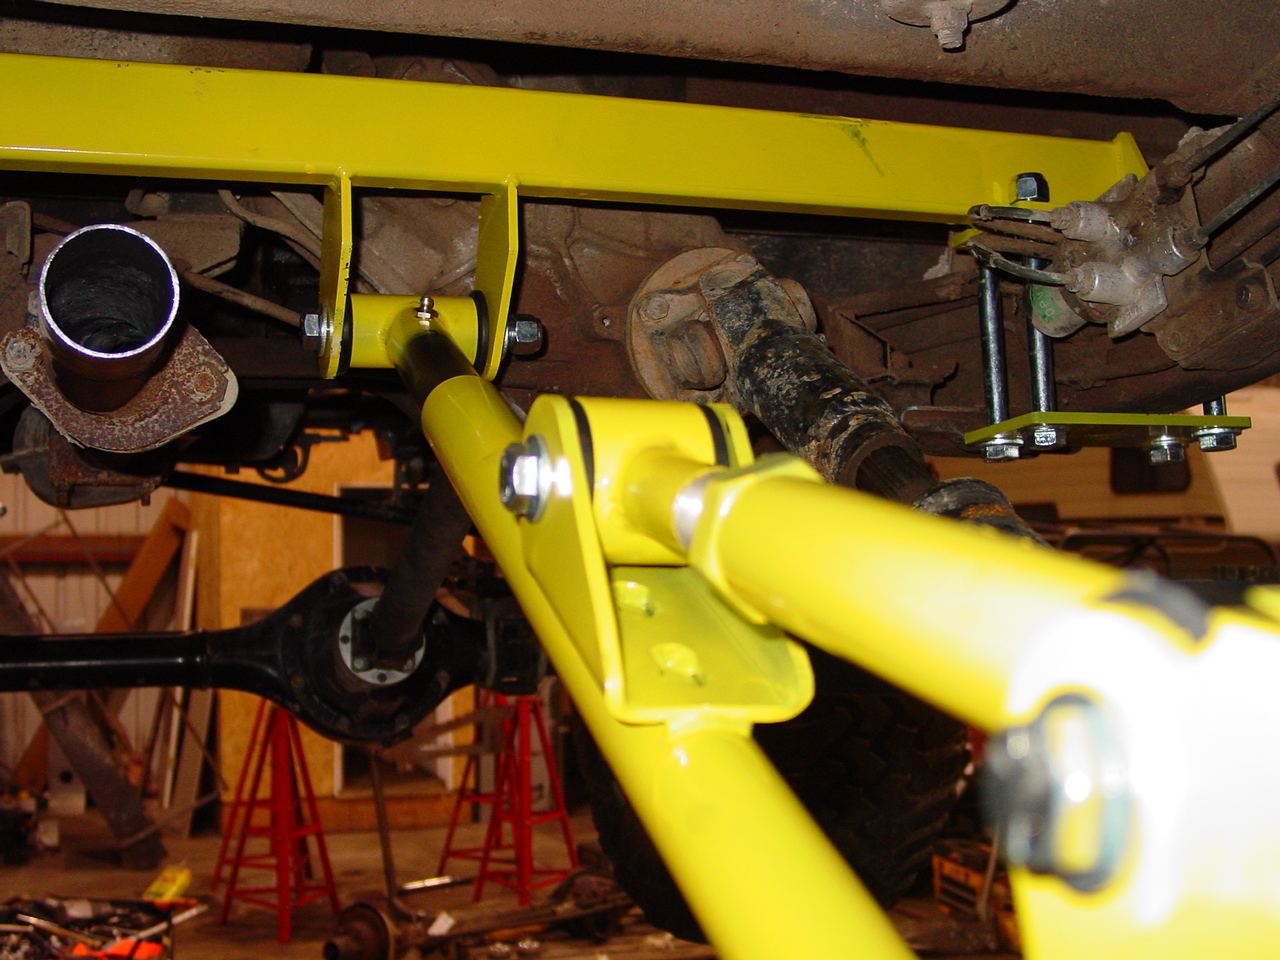 Tighten all bolts to factory specification. Re-check torque after 100 miles of driving.
  Tighten all bolts to factory specification
 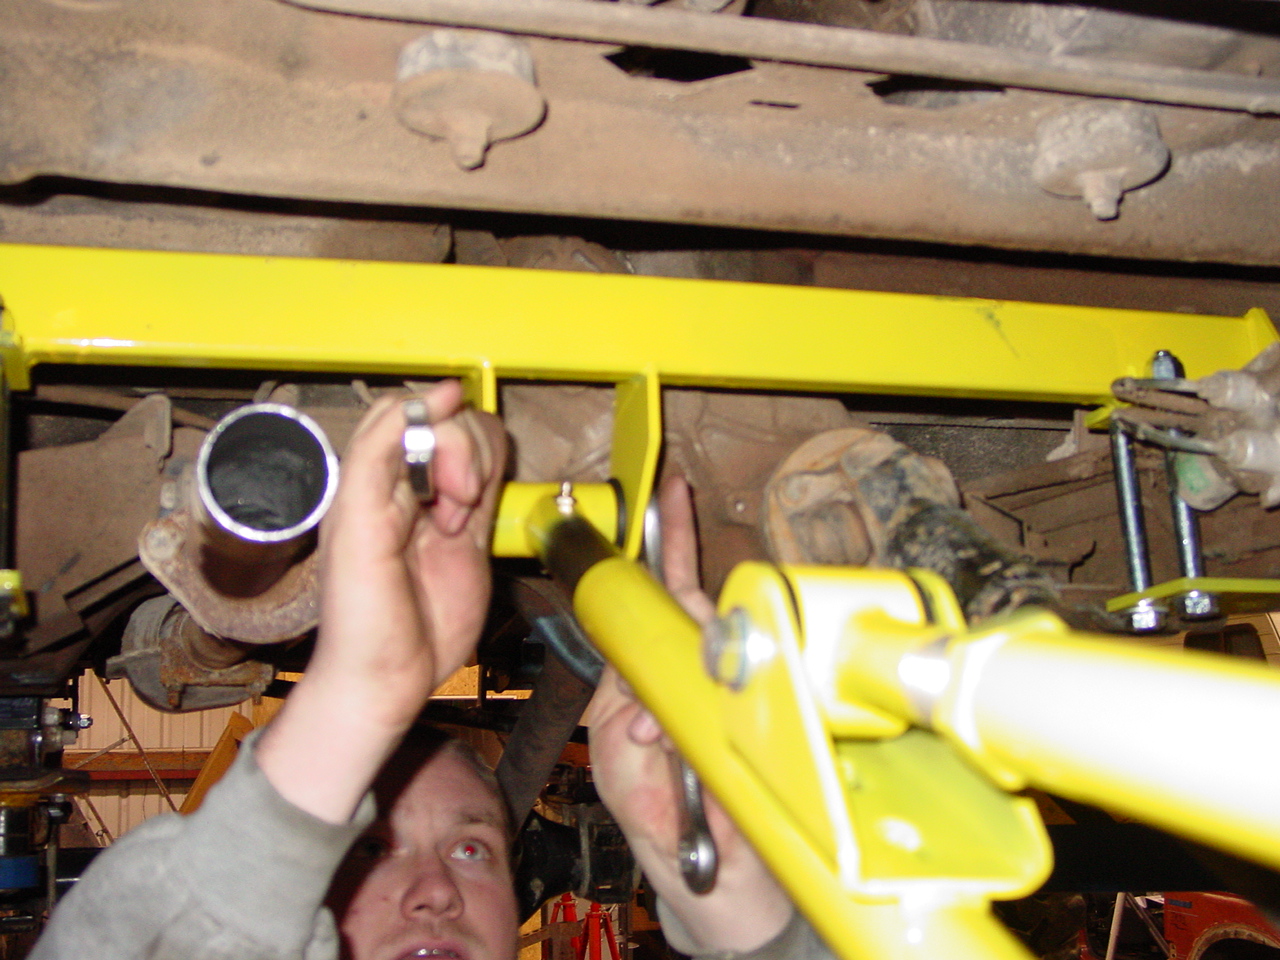 Lubricate the slider bar assembly as shown.
 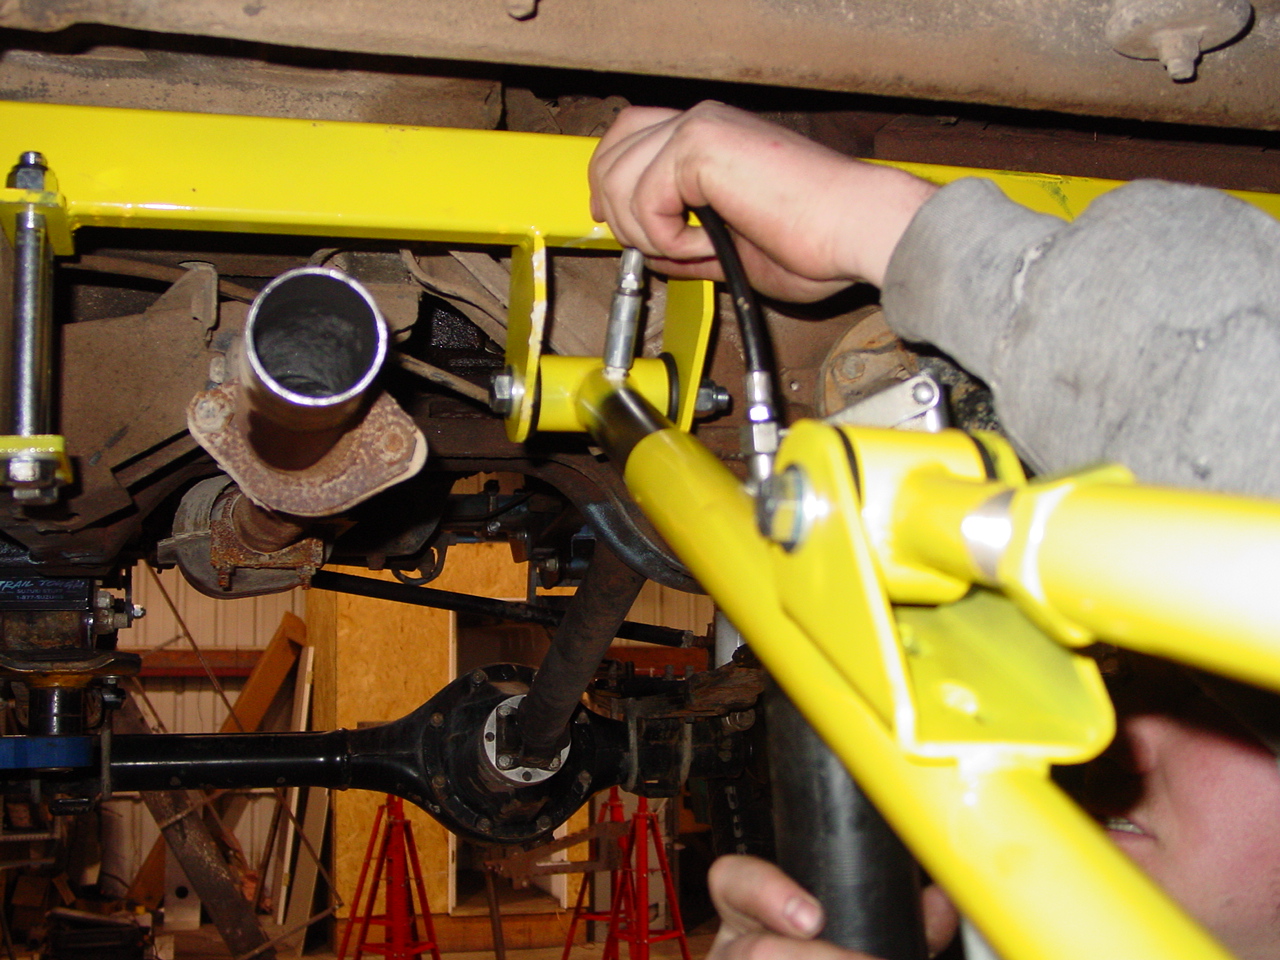 Remember to tighten the jam nut on the upper link.
 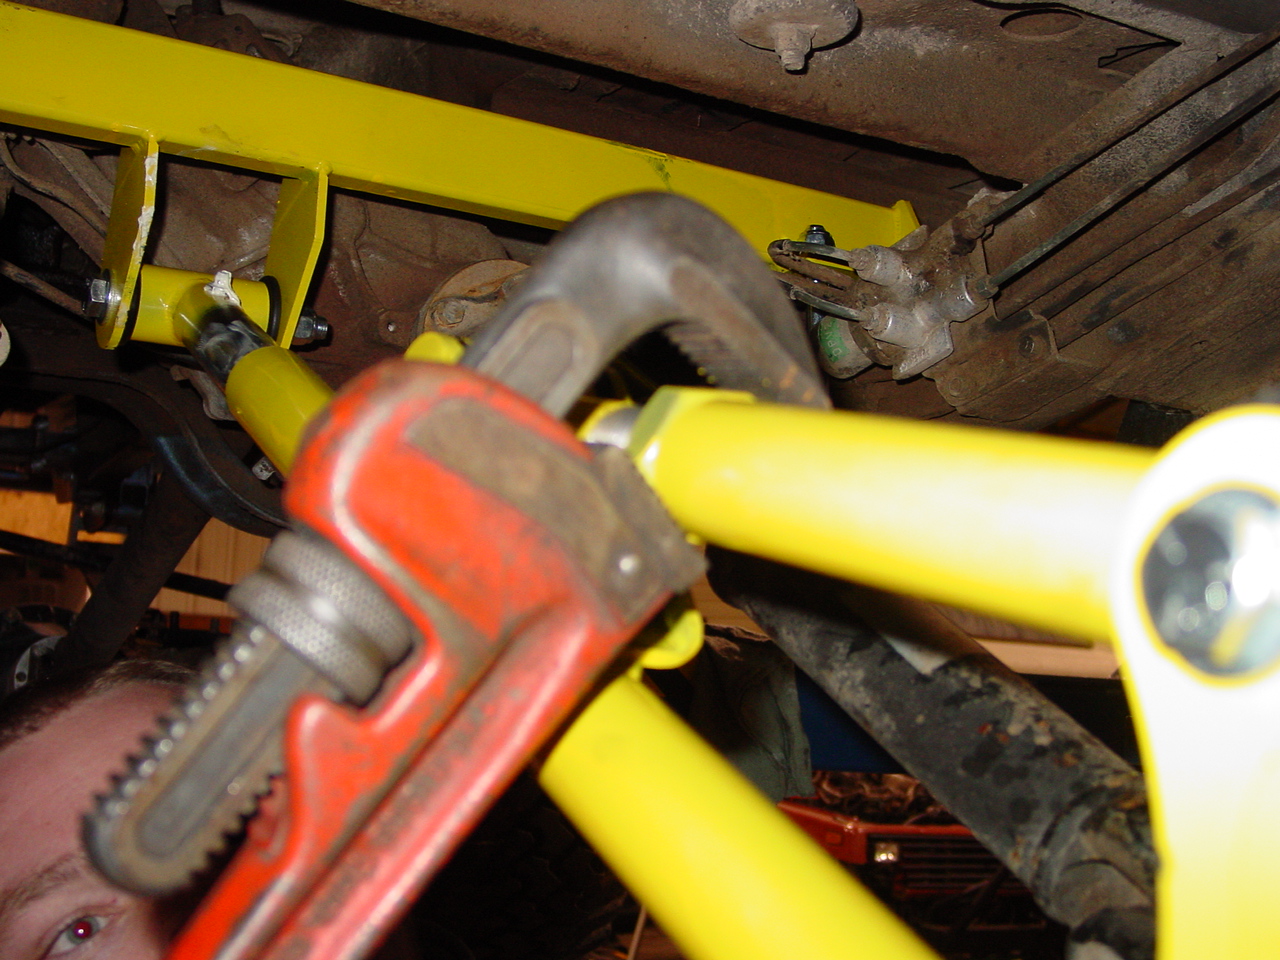 Picture of the ENTIRE system installed. Click on photo for a hi-res picture.
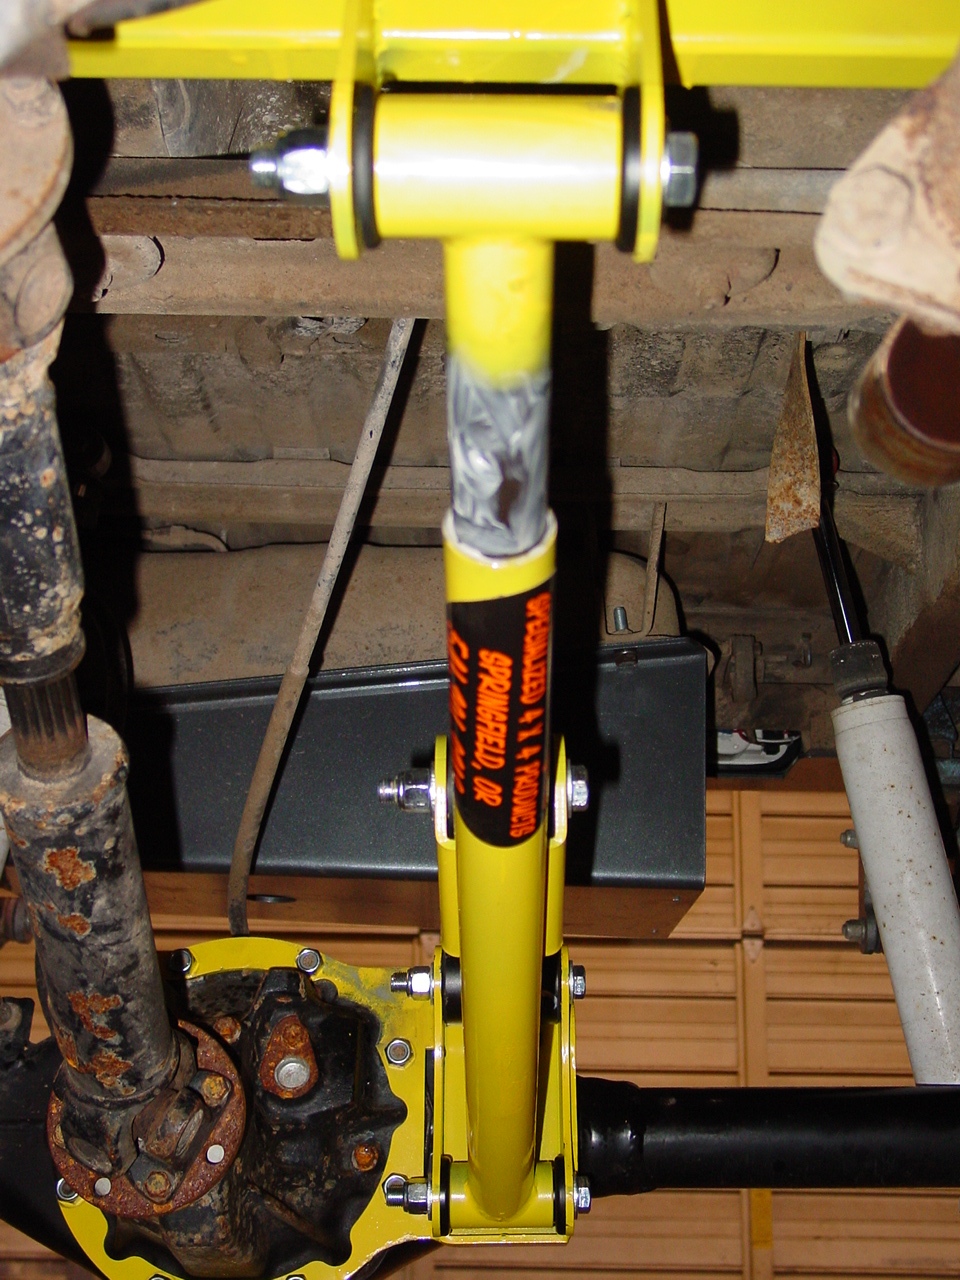
Immediately upon driving the Samurai it was noticed how much this device does. The vehicle ‘squats’ less upon acceleration and behaves much more predictably on step type obstacles where there is a considerable amount of torque placed on the rear of the vehicle during the accent.
Sky’s Off Road Design
(541)736-3743![]() (541)736-3743
(541)736-3743
3580 Marcola Rd. Springfield, OR 97477


Hello, I wanted to know how to purchase the New Bolt-On Samurai Pull Bar Kit. I await your response, thank you
Contact them directly:
8-4 M-Th PST – Phone 7:30-12:00 and 12:30-3:00 PST (541) 736-3743
SKY-MANUFACTURING.COM
i am from Trinidad and interested in purchasing a traction bar for my suzuki jimny