 ZUKIWORLD Online – Everything Suzuki Your Complete Suzuki Automotive Resource for Editorial, Tech, Events, Adventure, Racing, and Forum

TRAIL TOUGH GEAR PACKAGE
Low Gear Package For Your Suzuki Samurai.
Editor/Photo: Eric Bewley
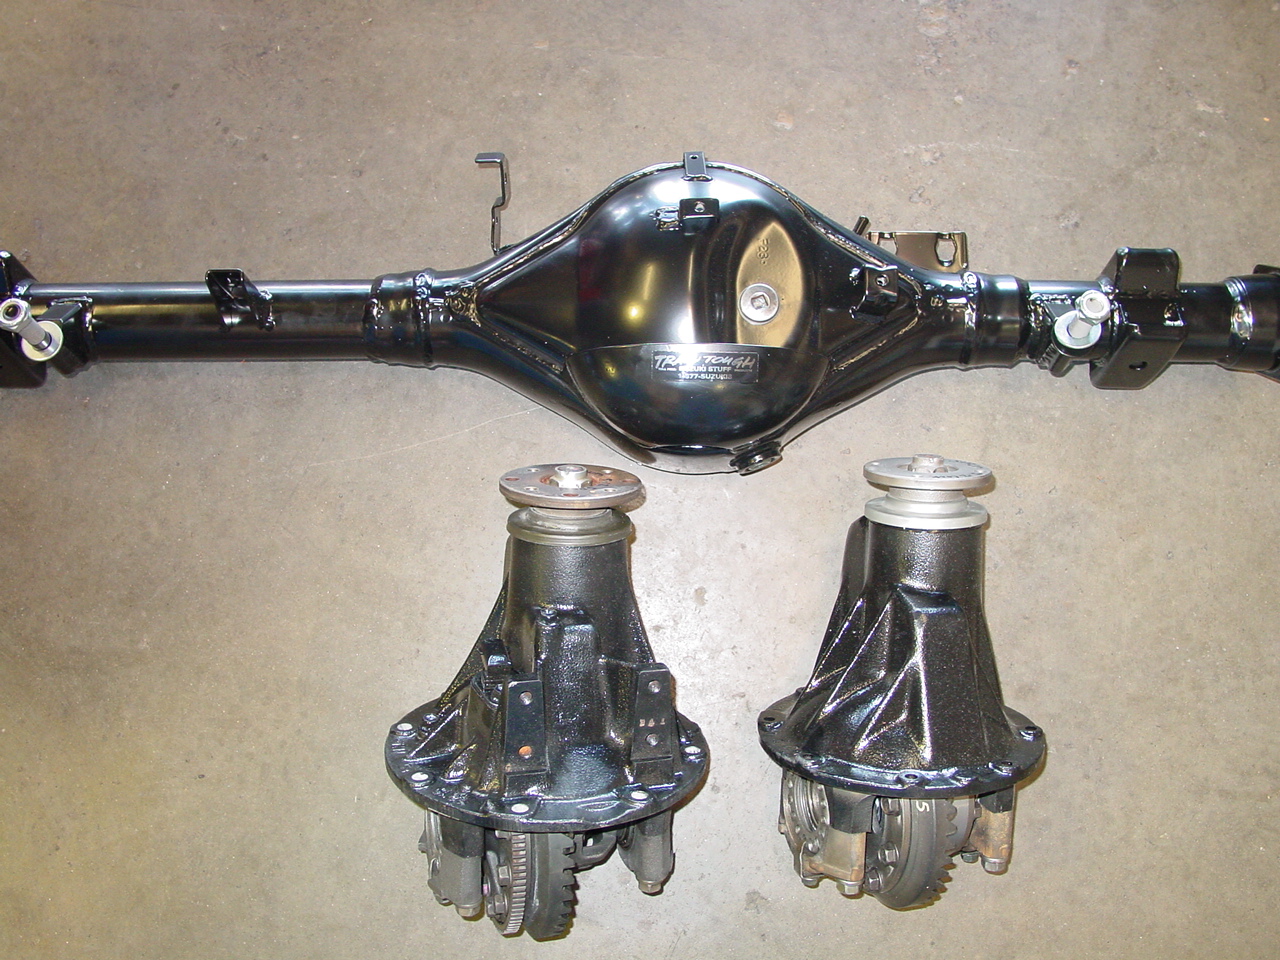
MEDFORD, OR -Lower gears are always welcomed on any offroad vehicle. Trail Tough offers many different gear packages for your Samurai making it possible to have several different and effective gear combinations. When we did the Trail Tough YJ Spring Suspension Lift, Brent recommended their no-hassle ready to bolt-in gear change package includes 4.62 or 5.12 Sidekick ring and pinion gears set up and installed in a Samurai front housing, a matching Sidekick rear 3rd member with drilled flanges for the Samurai drive line, and their Hybrid axle housing. Shock mounts, diff caps, SPOA perches, and Lockers are not included but can be purchased separately and installed at no extra charge. All of this for the list price of $649.00. which dramatically improves the gearing of the Samurai, in effect giving 5th gear back, making it possible to drive a Samurai with 33″ tall tires normally and adding even more “oomph!” when you install a low range t-case.


Below is a brief set of instructions and a few photos to help you along your way. The installation is simple, although a little time consuming; it can easily be done with common hand tools.
1. Support and secure the vehicle on jackstands so that the wheels are barely touching the floor. Remove the front and rear drivelines.  2. Disconnect the steering, shocks, springs at the frame mount and shackle, brake calipers, and steering stabilizer (if equipped).
 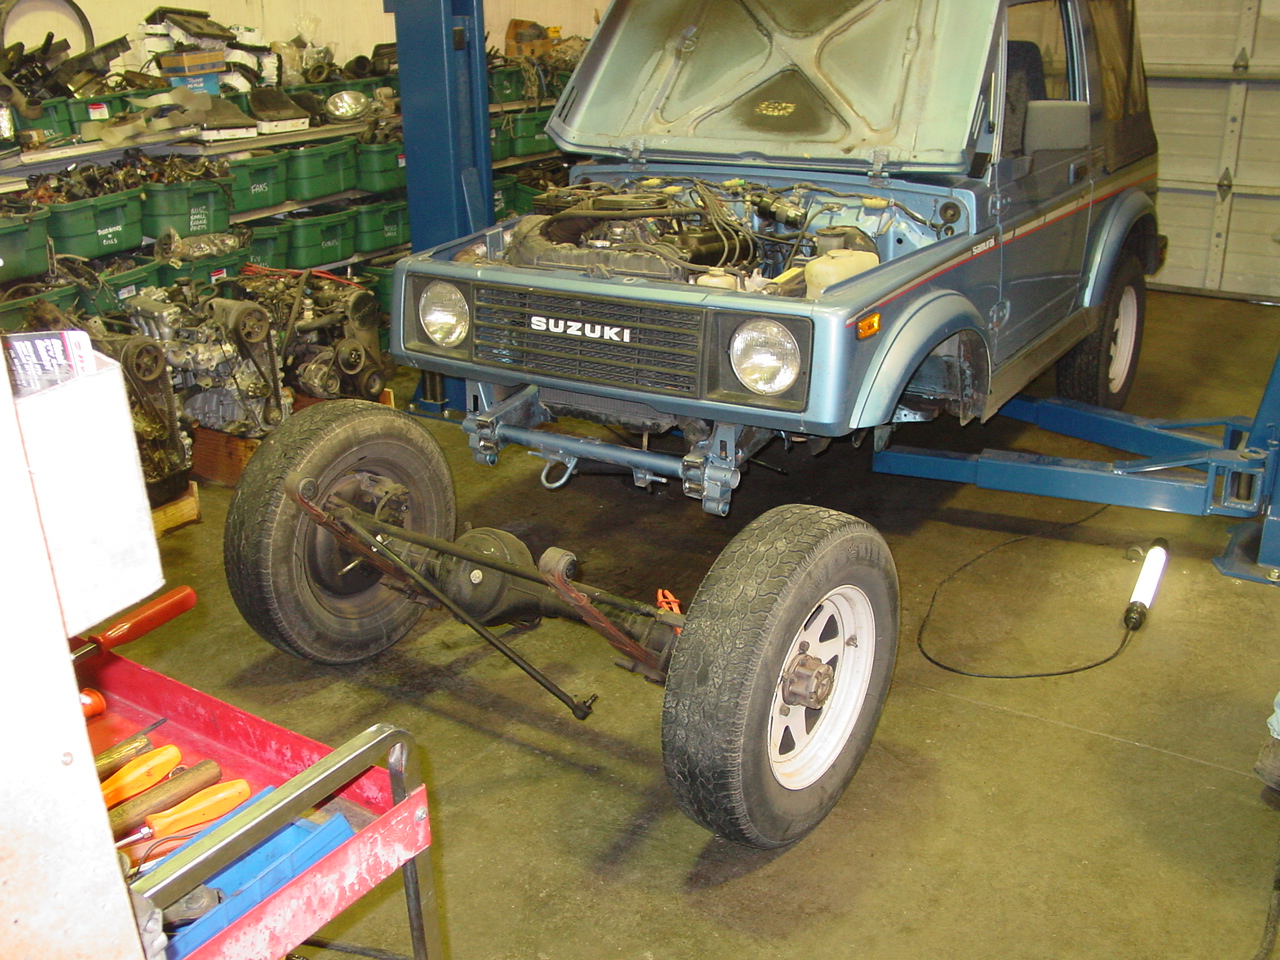 3. Remove the axle assembly from the vehicle and using jackstands or other means support the axle so that the wheels and tires may be removed.
a) Drain oil from the frontend.
b) Remove wheels and brake rotor.
c) Loosen the 4 bolts behind the hub that hold the hub assembly to the spindle.
d) Pull the axles out.
e) Remove third member
f) Install the new third member and reassemble the front end.
g) Install complete axle assembly back under the vehicle.
h) Reconnect steering, shocks, springs, and brake calipers.
i) Reconnect front driveline
j) Install wheels and tires.
4. Disconnect rear axle assembly from vehicle, e-brake cable, brake line(s), shocks, springs at the axle housing.  5. Remove axle housing assembly from vehicle. Pull wheels, drums, backing plates, hard brake lines, and axles out of unit.
 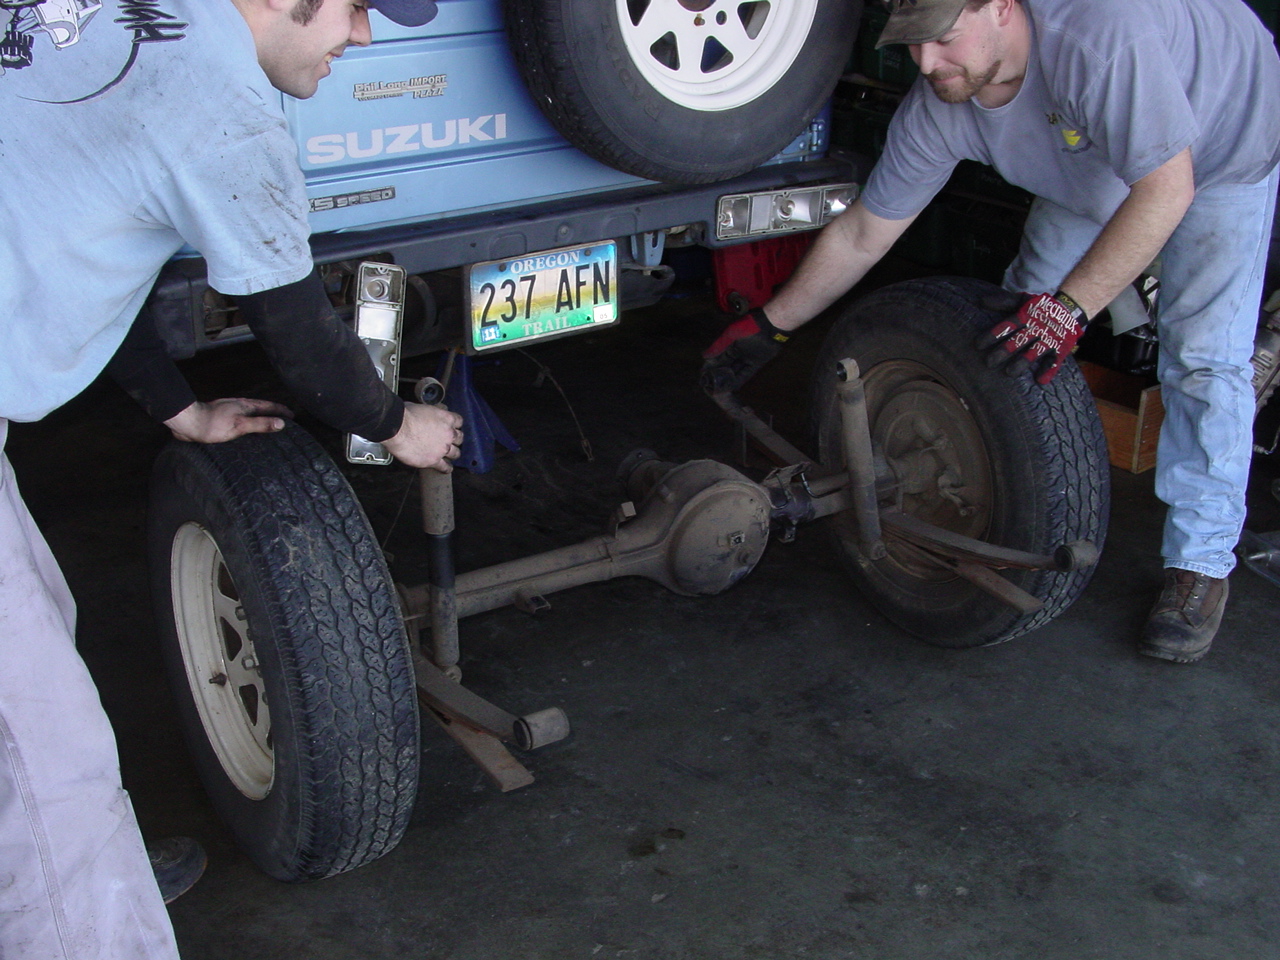 6. Install new Trail Tough housing under vehicle.
 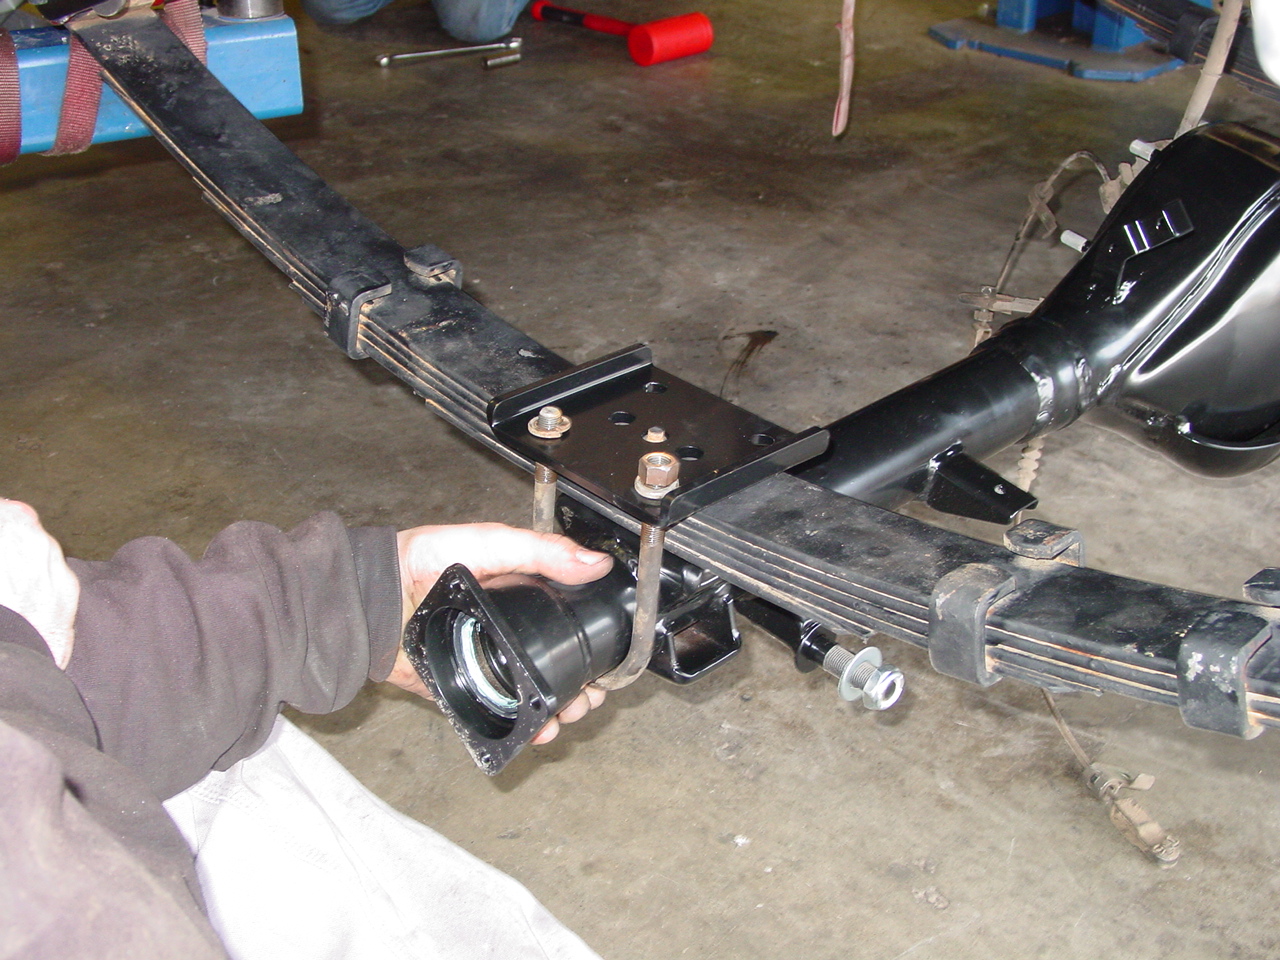 7. Install new third member.
 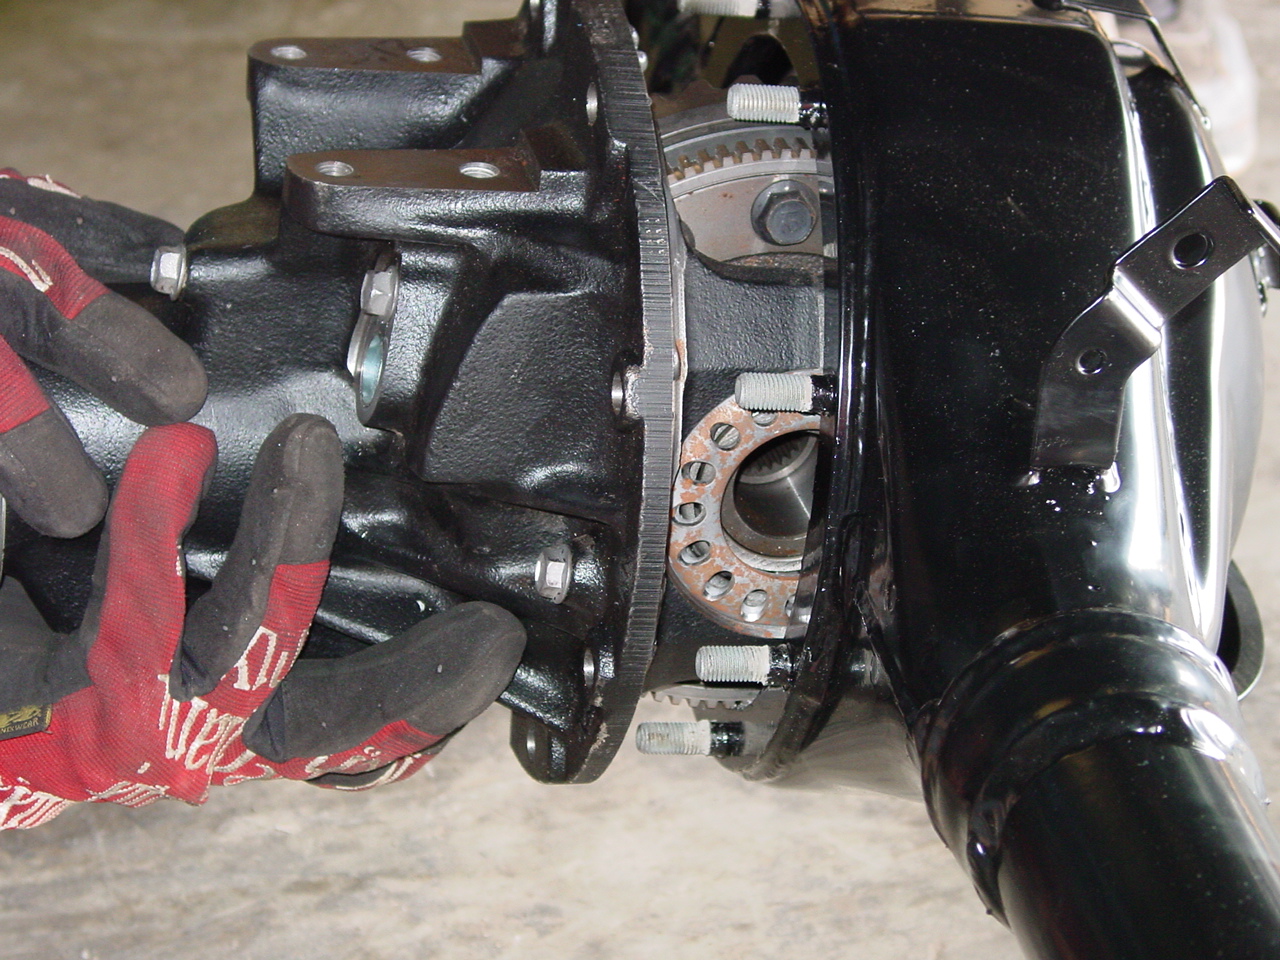 8. Install axles, backing plate, and drums.
  9. Install e-brake cables, hard-brake lines, reconnect shocks, bleed brakes, Install wheels and tires.
  10. Reconnect rear driveline, fill differentials with oil, recheck your work.
Installing this Trail Tough gear package into the project Samurai greatly improved it’s on-road performance and it’s ability to keep up with traffic. It is once again easy to get from point A to point B without having to drive it like we stole it. No doubt this will add to the off-road ability too as soon as we install a low range transfer case, but that is a story for another day…