 ZUKIWORLD Online – Everything Suzuki Your Complete Suzuki Automotive Resource for Editorial, Tech, Events, Adventure, Racing, and Forum

Project TRICKER-KICKER
Calminis 6″ Combo Lift Kit, Theres More Then Just Clearance To Gain. -Junior
RENTON, WA. Im certain Suzuki had no idea theyd be creating an American phenomenon when they designed and manufactured the Suzuki Samurai, and now the same can be said for the Sidekick. Does the madness ever end? “Hopefully not” says Steve Kramer at Calmini Products. “Not just because business is good”, reports Kramer, “because were having an absolute blast discovering new ways to modify these little trucks”. Next youre going to tell us you have a lift for the Grand Vitara and XL-7 I had to ask. “You betcha”, he responds.

Lifting a Sidekick differs tremendously from its younger brother in the Samurai, and it introduces a whole new set of geometrical challenges. The most obvious difference is the independent front suspension and constant velocity axle shaft system. Calmini has accepted market demands to develop an off-road suspension system meanwhile retaining street ability and reliability of a stock unit.
We began with the usual blocking of the tires and disconnecting the battery cables. Then its a second visit of the installation instructions and confirmation of the parts to the parts list provided by Calmini. 

Then we removed the grille and headlamps. Note the body mounts bolt hidden beneath the headlamp
Next, we removed the front and rear bumpers. This is as easy as four to six small bolts each. If you intend to run only the body lift, retain the bumpers as Calmini provides mounting hardware and relocating brackets for the front. The rear bumper just simply reattaches to the original location. Unfortunately there just isnt anything that can be done about the gap between the stock rear bumper and the body. Obviously its better to run the entire 6″ kit and after market bumpers.
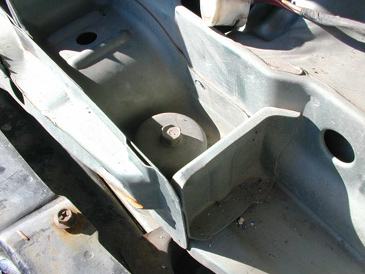
Now its time to remove all the nuts from the body mounts. Before you start jacking the vehicle up be sure to check a few things. Like brake lines, wires, and vacuum lines etc.
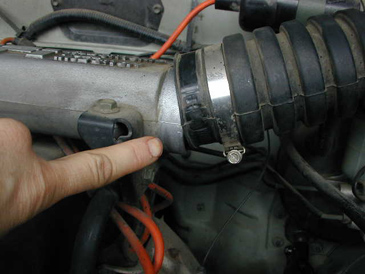
air intake
Here we note a few items; Like disconnecting the air intake from the air/fuel injection housing as shown here. And here we had to free up the driver side brake line as well as the two brake lines inside the frame on the passenger side. Also, and dont forget this step, disconnect the heater core hoses. Lengthening will not be required of any of these items; they just cant take the height need to install the body lift. Simply reconnect each once the body lift is on. There is one exception here, and thats the drivers side brake line. Relocation of this brake line is required. We drilled another pass-through hole as shown.
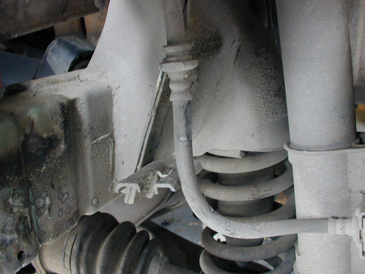
brake line

brake line relocation.


Buenos dias! Me pueden decir el numero de parte omodelo exacto d este kit completo para levantar mi geo Tracker?