Project TRICKER-KICKER
Calminis 6″ Combo Lift Kit, Theres More Then Just Clearance To Gain.
-Junior
Continued. Next, install the new tubular control arms. (TIP; make certain the steering arms are above the control arm on each side during install. If not, youll have to remove the arm and reinstall it as we did. Youll understand.)
Here you see the position of the steering arm, above the control arm.
Naturally the springs are next. The springs CAN be installed without a spring press. Considering I didnt have an extra body to take the photo while we did this, Ill have to describe it. We place the control arm on a floor jack and left it at a position where the spring would fit between its upper perch and the control arm spring rest. We then grabbed hold of the vehicle frame and used our feet to push the spring base into its resting spot, meanwhile jacking the floor jack to quickly get pressure on the spring to hold it in place. Make sense? Ok, maybe not, but it worked. The assistance of a short 2×4 piece of wood can be used as leverage for your feet.
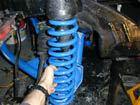
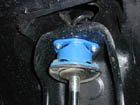
Leave the floor jack under the control arm to hold the spring in place and attach the new strut. Dont forget the upper blocks provided by Calmini. Attach the bottoms as seen here, and now the floor jack can be removed. Oh, did I mention you have to support the CV axles with the entire hub assembly with one hand while attempting to attach the lower strut bolts? Get some help from a friend on this one. Offer up lunch and a cold refreshment to compensate them. Youll be glad you did. The finished assembly should look like this. Note the brake line run and clamp system. If yours looks any different from this, please dont drive it. Get help
strut jack
cv axle installed
completed work
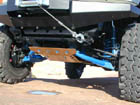
Repeat this on each side, attach your steering arms, and drive shafts and youre ready for a professional realignment. Additionally, but not shown here, Calmini offers a steering stabilizer/truss kit. We elected to install this system and it works great.
all done…
SK0035 stabilizer kit
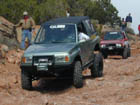
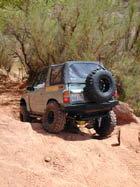
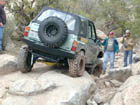
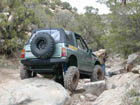
As for performance and durability, this kit is as tough as they get. We put this kit to the ultimate test in Moab this past 2001 Easter Jeep/Zuk Safari and it passed with flying colors. We literally drug the car on its tubular control arms in upper Helldorado after break a left front CV.
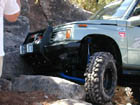 The rest you can see for your self. Sit back and enjoy these pics of the suspension in action.
 ZUKIWORLD Online – Everything Suzuki Your Complete Suzuki Automotive Resource for Editorial, Tech, Events, Adventure, Racing, and Forum

