Review Overview
Build Quality.
Ease of Setup.
Price.
Overall
the CVT Mt. Bailey tent is the perfect size for our compact camping adventures. It’s comfortable, durable, convenient, and easy to setup and take down. With an overall weight of only 96 lbs., it’s ideal for those looking for a light, small roof top tent option.
Review: Cascadia Vehicle Tents Mt. Bailey Roof Top Tent
Editor: Andy Lilienthal – subcompactculture.com
Portland, OR – What a better time to post up a tent review than right before Labor day. Needless to say, our days of camping on the ground are going to be brought to a minimum now that we have a Cascadia Vehicle Tents (CVT) roof top tent.
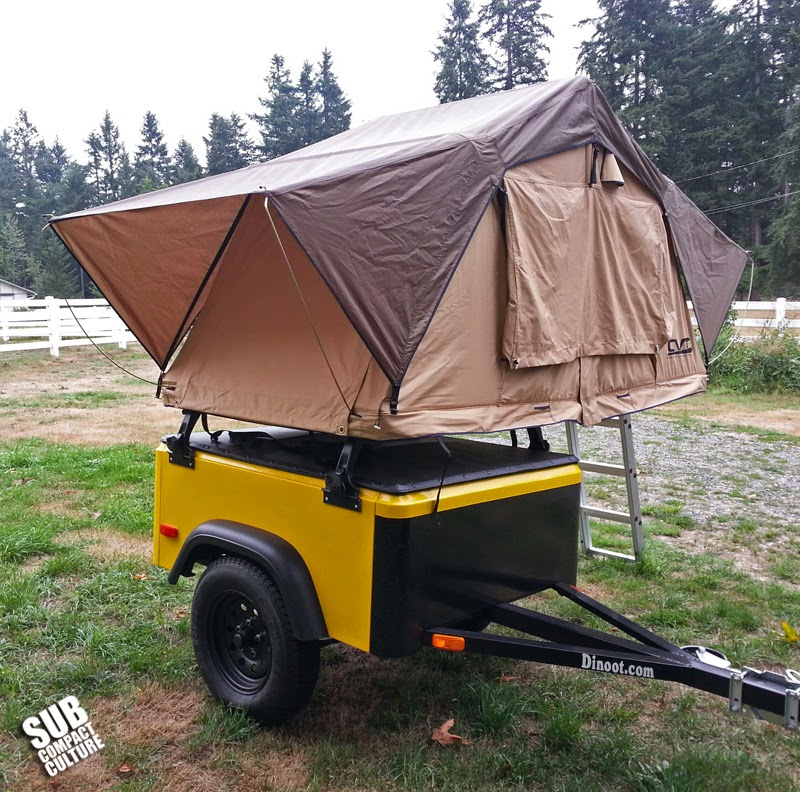
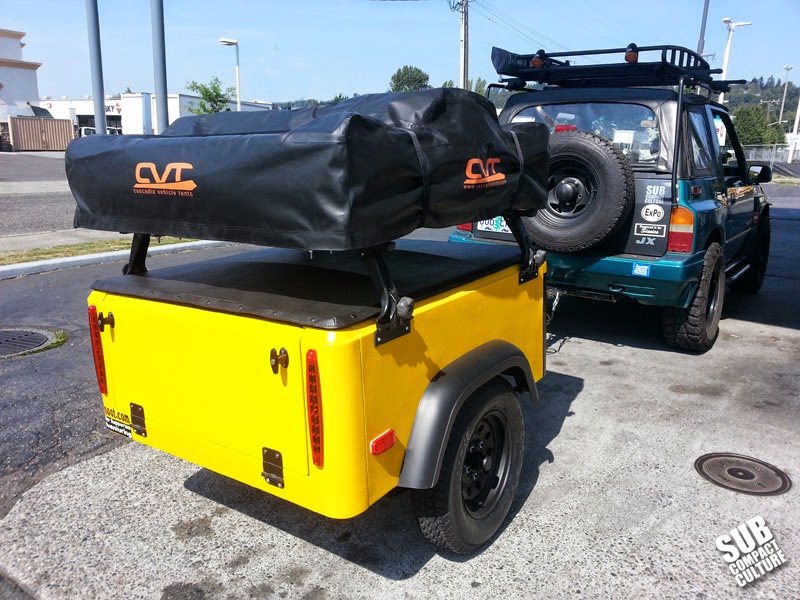
As you may know we recently purchased a micro Dinoot trailer to pull behind our Suzuki Sidekick, “the Teal Terror.” Part of the reason for the purchase was so we could mount a roof top tent (RTT for short) onto the unit. Roof top tents are great for traveling, since they’re mounted to the rack on a vehicle or a small trailer. They’re quick and easy to setup and take down, good in foul weather, and let you camp off of the ground where you don’t have to worry as much about water, mud, or bumpy, uncomfortable ground.
As with most of our camping gear, we did quite a bit of research before buying a RTT. Since the tent would be going on our little trailer, size and weight were our two first priorities. Of course durability, quality, and price were important, and we wanted to buy from a company that was a known entity, and not a fly-by-night tent importer (nearly all tents are made overseas). All of these traits led us to Bend, Oregon-based Cascadia Vehicle Tents, also known as CVT. And while the company may not be as well-known as other tent names on the market, it is developing a strong following among campers, adventurers, and overlanders. The company’s new Mt. Bailey tent, which weighs 96 lbs. and is 48”x48”x11” when closed for transport, was just the right size for our Dinoot trailer, and could even be mounted to our Subaru or Suzuki’s roof racks. And since CVT is based in Oregon, we were able to drive down and pickup our tent, which saved us shipping.
ASSEMBLY
Bobby Culpepper, the owner at CVT, was nice enough to let us install the tent at his facility so we could transport it back to Portland on the trailer—a three-hour drive. There is a bit of assembly required, and CVT actually includes 10mm and 13mm wrenches with the tent. You will need a drill with a Philips Head bit, however. Although the tents usually include instructions, ours was missing. No worries, though, Bobby provided us with a manual. We also found some on the Internet, too.
 Once unboxed, you bolt the aluminum mounting rails to the tent’s aluminum base using the included hardware. The rails can be mounted in different configurations depending on which way you want the tent’s ladder to come off of the car or trailer. Once that was done, we hoisted the tent onto our trailer’s square Thule crossbars, and began installing the simple, strong mounting brackets, which slide into the mounting rail’s chase, bolting to the Thule bars like a U-bolt. There were some compressed metal shavings in some of railings’ chases, but they were easily cleaned up using a flathead screwdriver.
Next we affixed the included extendable ladder to the tent base and bolted it to the frame. The ladder has two functions: One is to create leverage to help open the tent. The other is to, of course, get into the tent. From here, we installed the zippered black PVC cover onto the tent and headed back to Portland.
SETUP
Once we got home, we had to set the tent up and check it out. Setup is extremely simple. Remove the zippered cover, extend the aluminum ladder, then using the ladder as a lever, tilt the tent open. Think of it as a giant inhabitable pop-up book. You adjust the ladder to its correct height, make sure it’s at the correct angle to where it’ll support the tent base, and setup the window awnings.
The tent is made of 280g poly/cotton rip-stop fabric with a weatherproof polyurethane (PU) coating, which is breathable and mold-resistant. The rain fly, which covers the top of the tent, is 420D (denier) poly with an Oxford PU coating. The material feels durable and well made, although there were a few loose threads where some of the seams were finished; nothing a quick trim couldn’t fix.
The Mt. Bailey tent has four openings. The two side windows have zippered screens and zippered clear plastic windows, which allow the tent to do well in rainy or snowy conditions. However, you can also have the windows completely open, even without screens for a more open-air experience. The main entry by the ladder has a zippered screen and zippered canvas cover allowing for either good airflow or a nice bit of privacy. The opposite end has the same setup.
Each of these openings has an awning above it that are held open by two rods. These rods—a staple feature of many RTTs—simply slide in openings on the tent’s aluminum base, get bent to shape, and hook into grommets on the awning. All of these openings have grommets and ties that allow you to secure the screens and canvas flaps in both open and closed positions. There are also small triangular vents on the sides above the windows for circulation; these are protected by small covers to prevent rain from entering.
I climbed up into our mobile tent to survey the interior. It’s 48” wide and 96” long when open, and has adequate space for two people of our stature. We did notice there was a fair amount of metal shavings scattered throughout the tent from the manufacturing process, which we vacuumed up. Speaking of mattresses, the tent comes with a removable high-density 2.5” foam mattress held in place using Velcro. The mattress’s cover also can be removed for washing. One thing of note: I don’t recommend entering the tent without the mattress in place. I did and slightly dimpled the aluminum base with my knees as I crawled in to vacuum out the aforementioned metal shavings under the mattress. While it didn’t do any real damage, it is a point to note.
Most roof top tents end up on, well, roof tops. Since ours is so close to the ground on our small trailer, the ladder is actually a bit long—the opposite issue of most RTT users who have their tents on lifted SUVs. While the ladder still works, it needs to be adjusted and have new holes drilled at the most compressed position. We will likely upgrade to a telescoping ladder ($125 via CVT), which should remedy any issue.
We packed the tent away by taking the awning rods out, putting them into the included bag, and tossing said bag into the tent. We folded everything up and put the cover on, which was very easy and quick.
OUR FIRST NIGHT
We stayed on our friend’s property outside of Issaquah, Washington last weekend, where we were able to use the tent for the first time. Frankly, I can’t remember being this excited to sleep in a tent.
We crawled inside for the night and stashed things such as wallets, pocket knives, glasses, and mobile phones in the four hanging pockets affixed to the tent walls. There are hanging grommets all over the place designed to hold rolled-up windows. However, we found them convenient for hanging lightweight things like keys on carabineers, headlamps, small LED lanterns, or even watches. When open, the tent has a length of 96” or 8’ long, so were able to stash our backpacks and shoes at the end of the mattress.
We used our sleeping bags in the tent and found the combination of sleeping bag and foam mattress to be comfortable, even though there is only 48” of width. For comparison’s sake, this width is in between a twin bed (39”) and a full bed (54”). I’m a side sleeper and Mercedes is a back sleeper, and we both had enough of room. Let’s put it this way: You’d better like the person you’re with in the tent because it is cozy.
We left the trailer attached to the Suzuki this night, as we weren’t sure how secure we’d feel with the tent mounted on our small trailer, but it proved to be stable. That being said, when your tentmate turns over, there is a little movement—nothing spooky, but just enough that it takes a bit of getting used to. Of course, you always want to have the vehicle or trailer mounted on level ground.
We woke up the next morning to heavy dew. The rain fly was covered with moisture, but none of it made it through the tent. One thing we didn’t expect was condensation from under the mattress. Likely the heat from our bodies and the cold morning air (and the heavy dew) created moisture between the tent base and the foam pad—something we were told was common on RTTs. We removed the mattress and wiped the water away. We easily packed the tent up, and headed back to Portland.
After getting home we decided to set the tent up to ensure it had dried out from the dewy morning. We decided to time how long it took to completely set the tent up. From start to finish, we clocked 3.5 minutes. Not bad! I’d bet that we could knock another 45 seconds off of that pretty easily.
We found the CVT Mt. Bailey tent is the perfect size for our compact camping adventures. It’s comfortable, durable, convenient, and easy to setup and take down. With an overall weight of only 96 lbs., it’s ideal for those looking for a light, small roof top tent option. We can’t wait to use it again, and look forward to seeing how it does in a variety of other weather conditions.
SPECS
Cascadia Vehicle Tents Mt. Bailey
Price: $795.00
Dimensions:
Size: 48″W x 96″L x 45″Ht. (Open) Actual sleeping footprint
Size: 48″W x 48″L x 11″ Ht. (Closed)
Weight: 96lbs – Will hold up to 450 lbs
Base: Aluminum frame, joists, sheets and insulated foam
Internal frame: 3/4″ aluminum
Ladder: Sliding adjustable aluminum ladder
Fabric: 280g Poly/Cotton Rip Stop Fabric. W/P PU coating, Breathable and Mold Resistant with UV Protection
Rain Fly: 420D Poly/Oxford PU
Mattress: High density foam 2.5″ thick
Travel Cover: Heavy duty PVC
CONTACT INFO
Cascadia Vehicle Tents
545 SE Bridgeford Blvd #140
Bend, Oregon 97702
541-312-8368 (TENT)
CascadiaTents.com
About the Author: Andy Lilienthal, Editor In Chief of Subcompact Culture Blog and Suzuki 4×4 enthusiast. Subcompact Culture is all about small cars. This includes subcompacts, compacts, micro cars, and more. Heck, even some vehicles that are a bit bigger. From news and reviews to cars shows and project vehicles: Subcompact is the small car blog.
 ZUKIWORLD Online – Everything Suzuki Your Complete Suzuki Automotive Resource for Editorial, Tech, Events, Adventure, Racing, and Forum


